Popular Woodworking 2004-10 № 143, страница 37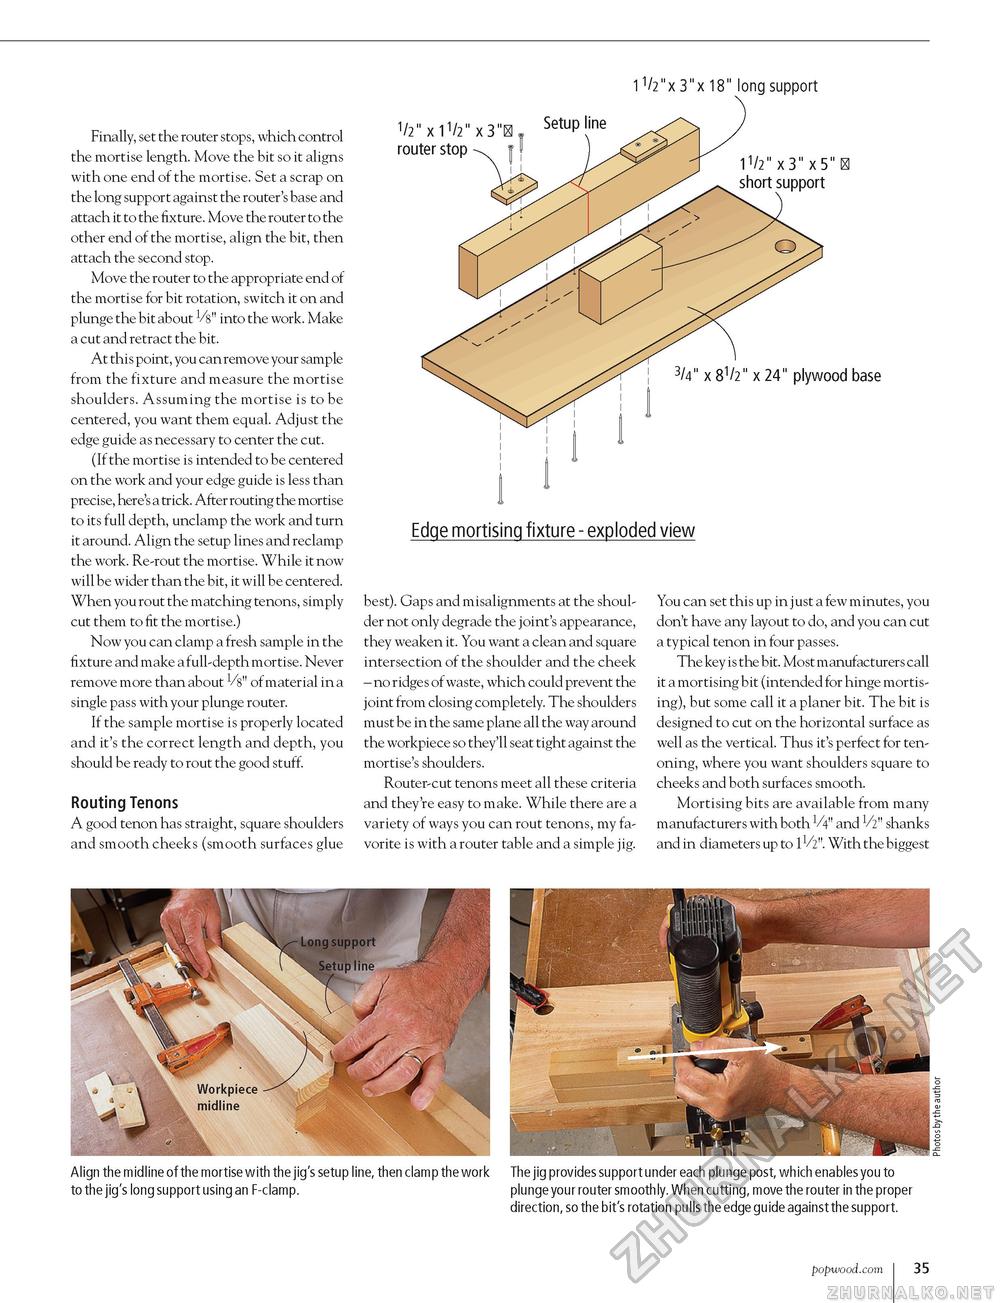
11/2"x 3"x 18" long support Finally, set the router stops, which control the mortise length. Move the bit so it aligns with one end of the mortise. Set a scrap on the long support against the router's base and attach it to the fixture. Move the router to the other end of the mortise, align the bit, then attach the second stop. Move the router to the appropriate end of the mortise for bit rotation, switch it on and plunge the bit about Vs" into the work. Make a cut and retract the bit. At this point, you can remove your sample from the fixture and measure the mortise shoulders. Assuming the mortise is to be centered, you want them equal. Adjust the edge guide as necessary to center the cut. (If the mortise is intended to be centered on the work and your edge guide is less than precise, here's a trick. After routing the mortise to its full depth, unclamp the work and turn it around. Align the setup lines and reclamp the work. Re-rout the mortise. While it now will be wider than the bit, it will be centered. When you rout the matching tenons, simply cut them to fit the mortise.) Now you can clamp a fresh sample in the fixture and make a full-depth mortise. Never remove more than about Vs" of material in a single pass with your plunge router. If the sample mortise is properly located and it's the correct length and depth, you should be ready to rout the good stuff. Routing Tenons A good tenon has straight, square shoulders and smooth cheeks (smooth surfaces glue best). Gaps and misalignments at the shoulder not only degrade the joint's appearance, they weaken it. You want a clean and square intersection of the shoulder and the cheek - no ridges of waste, which could prevent the joint from closing completely. The shoulders must be in the same plane all the way around the workpiece so they'll seat tight against the mortise's shoulders. Router-cut tenons meet all these criteria and they're easy to make. While there are a variety of ways you can rout tenons, my favorite is with a router table and a simple jig. You can set this up in just a few minutes, you don't have any layout to do, and you can cut a typical tenon in four passes. The key is the bit. Most manufacturers call it a mortising bit (intended for hinge mortising), but some call it a planer bit. The bit is designed to cut on the horizontal surface as well as the vertical. Thus it's perfect for tenoning, where you want shoulders square to cheeks and both surfaces smooth. Mortising bits are available from many manufacturers with both 1/4" and V2" shanks and in diameters up to 1V2". With the biggest Align the midline of the mortise with the jig's setup line, then clamp the work The jig provides support under each plunge post, which enables you to to the jig's long support using an F-clamp. plunge your router smoothly. When cutting, move the router in the proper direction, so the bit's rotation pulls the edge guide against the support. popwood.com 35 |


