Popular Woodworking 2004-10 № 143, страница 89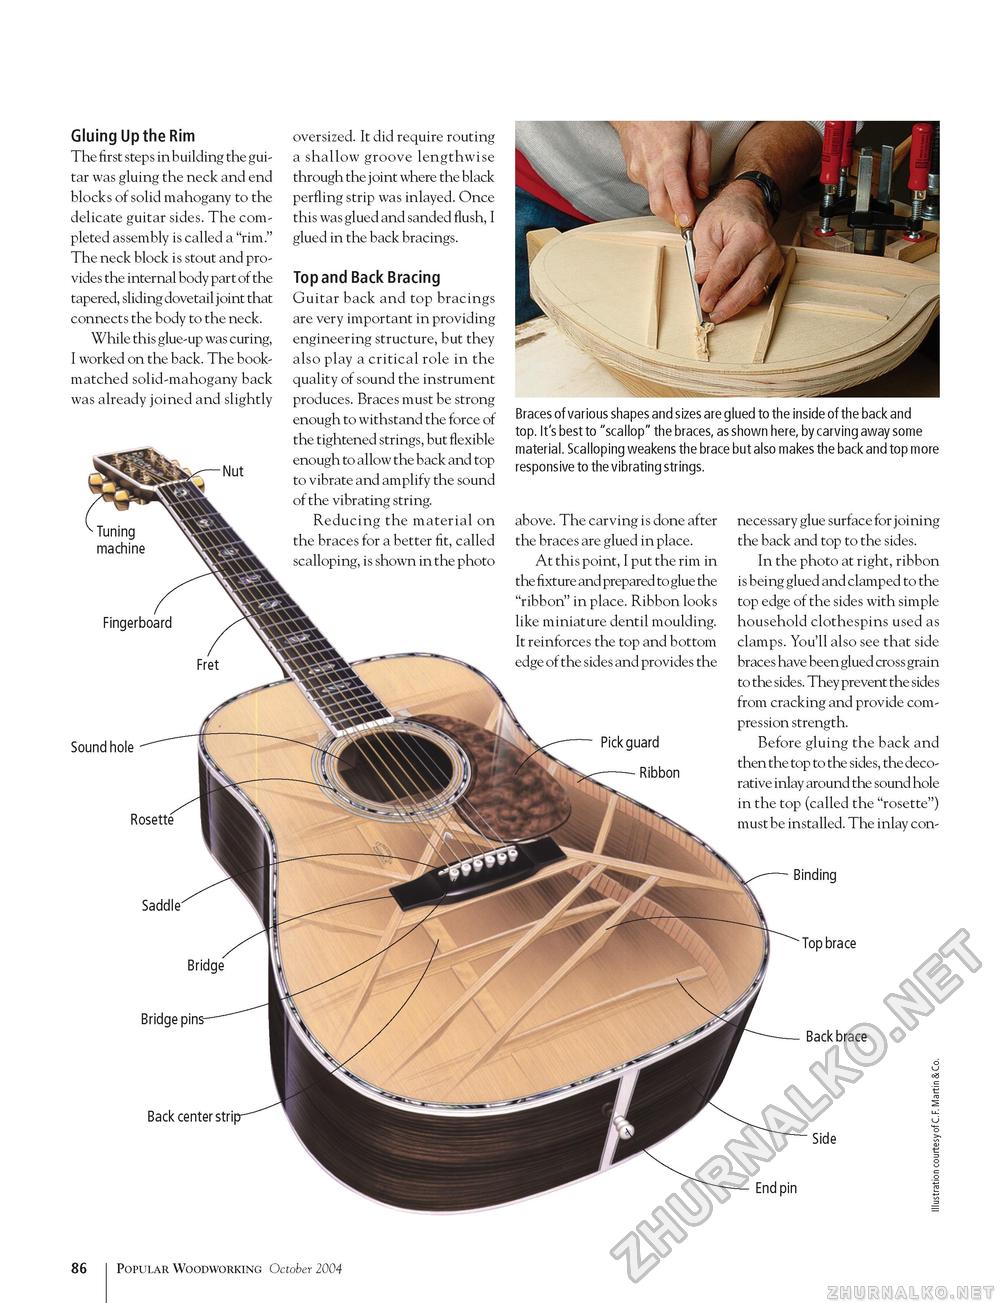
Gluing Up the Rim The first steps in building the guitar was gluing the neck and end blocks of solid mahogany to the delicate guitar sides. The completed assembly is called a "rim." The neck block is stout and provides the internal body part of the tapered, sliding dovetail j oint that connects the body to the neck. While this glue-up was curing, I worked on the back. The book-matched solid-mahogany back was already joined and slightly oversized. It did require routing a shallow groove lengthwise through the joint where the black perfling strip was inlayed. Once this was glued and sanded flush, I glued in the back bracings. Top and Back Bracing Guitar back and top bracings are very important in providing engineering structure, but they also play a critical role in the quality of sound the instrument produces. Braces must be strong enough to withstand the force of the tightened strings, but flexible enough to allow the back and top to vibrate and amplify the sound of the vibrating string. Reducing the material on the braces for a better fit, called scalloping, is shown in the photo Braces of various shapes and sizes are glued to the inside of the back and top. It's best to "scallop" the braces, as shown here, by carving away some material. Scalloping weakens the brace but also makes the back and top more responsive to the vibrating strings. Sound hole above. The carving is done after the braces are glued in place. At this point, I put the rim in the fixture and prepared to glue the "ribbon" in place. Ribbon looks like miniature dentil moulding. It reinforces the top and bottom edge of the sides and provides the Pick guard Ribbon Rosette necessary glue surface for joining the back and top to the sides. In the photo at right, ribbon is being glued and clamped to the top edge of the sides with simple household clothespins used as clamps. You'll also see that side braces have been glued cross grain to the sides. They prevent the sides from cracking and provide compression strength. Before gluing the back and then the top to the sides, the decorative inlay around the sound hole in the top (called the "rosette") must be installed. The inlay con- Saddle Bridge pins Back center stri Top brace Back brace 86 Popular Woodworking October 2004 |


