Popular Woodworking 2004-10 № 143, страница 90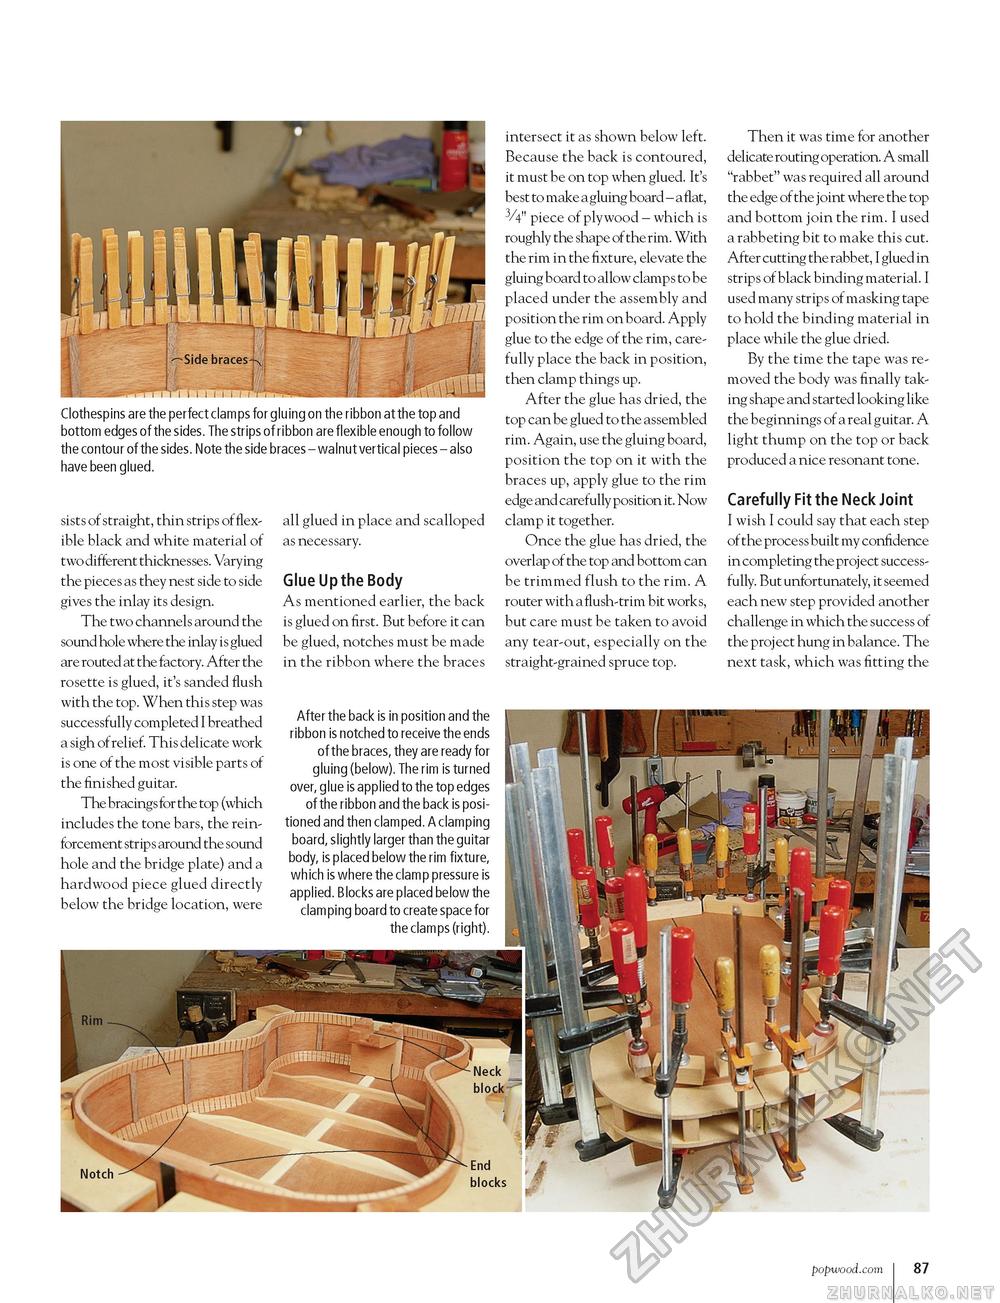
Clothespins are the perfect clamps for gluing on the ribbon at the top and bottom edges of the sides. The strips of ribbon are flexible enough to follow the contour of the sides. Note the side braces - walnut vertical pieces - also have been glued. sists of straight, thin strips of flexible black and white material of two different thicknesses. Varying the pieces as they nest side to side gives the inlay its design. The two channels around the sound hole where the inlay is glued are routed at the factory. After the rosette is glued, it's sanded flush with the top. When this step was successfully completed I breathed a sigh of relief. This delicate work is one of the most visible parts of the finished guitar. The bracings for the top (which includes the tone bars, the reinforcement strip s around the sound hole and the bridge plate) and a hardwood piece glued directly below the bridge location, were all glued in place and scalloped as necessary. Glue Up the Body As mentioned earlier, the back is glued on first. But before it can be glued, notches must be made in the ribbon where the braces After the back is in position and the ribbon is notched to receive the ends of the braces, they are ready for gluing (below). The rim is turned over, glue is applied to the top edges of the ribbon and the back is positioned and then clamped. A clamping board, slightly larger than the guitar body, is placed below the rim fixture, wh ich is where the clamp pressure is applied. Blocks are placed below the clamping board to create space for the clamps (right). intersect it as shown below left. Because the back is contoured, it must be on top when glued. It's best to make a gluing board - a flat, 3/4" piece of plywood - which is roughly the shape of the rim. With the rim in the fixture, elevate the gluing board to allow clamps to be placed under the assembly and position the rim on board. Apply glue to the edge of the rim, carefully place the back in position, then clamp things up. After the glue has dried, the top can be glued to the assembled rim. Again, use the gluing board, position the top on it with the braces up, apply glue to the rim edge and carefully position it. Now clamp it together. Once the glue has dried, the overlap of the top and bottom can be trimmed flush to the rim. A router with a flush-trim bit works, but care must be taken to avoid any tear-out, especially on the straight-grained spruce top. Then it was time for another delicate routing operation. A small "rabbet" was required all around the edge of the joint where the top and bottom join the rim. I used a rabbeting bit to make this cut. After cutting the rabbet, I glued in strips of black binding material. I used many strips of masking tape to hold the binding material in place while the glue dried. By the time the tape was removed the body was finally taking shape and started looking like the beginnings of a real guitar. A light thump on the top or back produced a nice resonant tone. Carefully Fit the Neck Joint I wish I could say that each step of the process built my confidence in completing the project successfully. But unfortunately, it seemed each new step provided another challenge in which the success of the proj ect hung in balance. The next task, which was fitting the popwood.com 87 |


