Popular Woodworking 2004-10 № 143, страница 92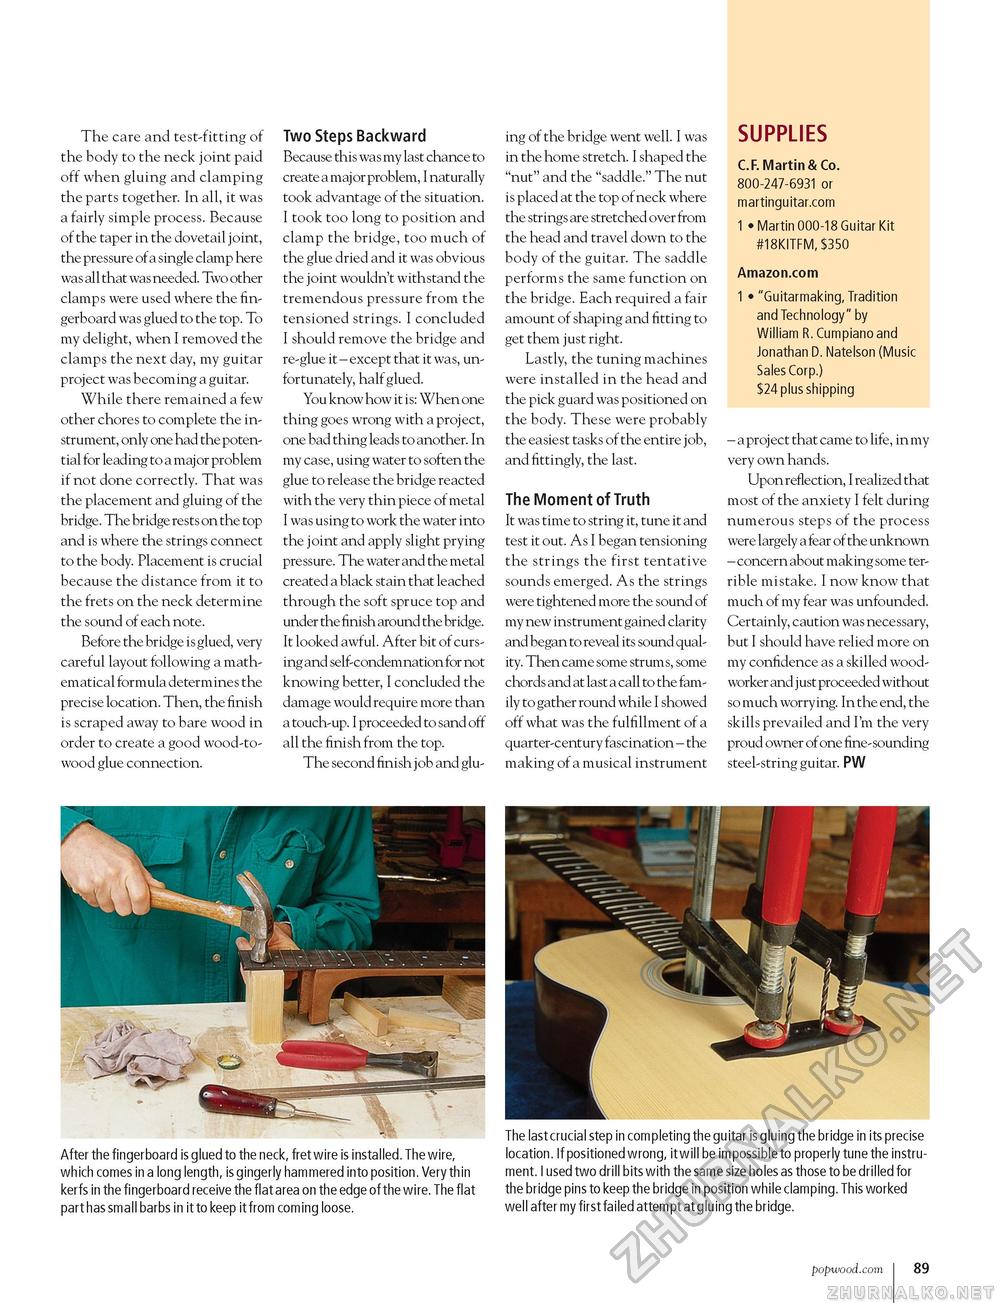
The care and test-fitting of the body to the neck joint paid off when gluing and clamping the parts together. In all, it was a fairly simple process. Because of the taper in the dovetail joint, the pressure of a single clamp here was all that was needed. Two other clamps were used where the fingerboard was glued to the top. To my delight, when I removed the clamps the next day, my guitar project was becoming a guitar. While there remained a few other chores to complete the instrument, only one had the potential for leading to a major problem if not done correctly. That was the placement and gluing of the bridge. The bridge rests on the top and is where the strings connect to the body. Placement is crucial because the distance from it to the frets on the neck determine the sound of each note. Before the bridge is glued, very careful layout following a mathematical formula determines the precise location. Then, the finish is scraped away to bare wood in order to create a good wood-to-wood glue connection. Two Steps Backward Because this was my last chance to create a maj or problem, I naturally took advantage of the situation. I took too long to position and clamp the bridge, too much of the glue dried and it was obvious the joint wouldn't withstand the tremendous pressure from the tensioned strings. I concluded I should remove the bridge and re-glue it - except that it was, unfortunately, half glued. You know how it is: When one thing goes wrong with a project, one bad thing leads to another. In my case, using water to soften the glue to release the bridge reacted with the very thin piece of metal I was using to work the water into the joint and apply slight prying pre ssure. The water and the metal created a black stain that leached through the soft spruce top and under the finish around the bridge. It looked awful. After bit of cursing and self-condemnation for not knowing better, I concluded the damage would require more than a touch-up. I proceeded to sand off all the finish from the top. The second finish job and glu ing of the bridge went well. I was in the home stretch. I shaped the "nut" and the "saddle." The nut is placed at the top of neck where the strings are stretched over from the head and travel down to the body of the guitar. The saddle performs the same function on the bridge. Each required a fair amount of shaping and fitting to get them just right. Lastly, the tuning machines were installed in the head and the pick guard was positioned on the body. These were probably the easiest tasks of the entire job, and fittingly, the last. The Moment of Truth It was time to string it, tune it and test it out. As I began tensioning the strings the first tentative sounds emerged. As the strings were tightened more the sound of my new instrument gained clarity and began to reveal its sound quality. Then came some strums, some chords and at last a call to the family to gather round while I showed off what was the fulfillment of a quarter-century fascination - the making of a musical instrument SUPPLIES C.F. Martin & Co. 800-247-6931 or martinguitar.com 1 • Martin 000-18 Guitar Kit #18KITFM, $350 Amazon.com 1 • "Guitarmaking, Tradition and Technology" by William R. Cumpiano and Jonathan D. Natelson (Music Sales Corp.) $24 plus shipping - a project that came to life, in my very own hands. Upon reflection, I realized that most of the anxiety I felt during numerous steps of the process were largely a fear of the unknown - concern about making some terrible mistake. I now know that much of my fear was unfounded. Certainly, caution was necessary, but I should have relied more on my confidence as a skilled woodworker and just proceeded without so much worrying. In the end, the skills prevailed and I'm the very proud owner of one fine-sounding steel-string guitar. PW After the fingerboard is glued to the neck, fret wire is installed. The wire, which comes in a long length, is gingerly hammered into position. Very thin kerfs in the fingerboard receive the flat area on the edge of the wire. The flat part has small barbs in it to keep it from coming loose. The last crucial step in completing the guitar is gluing the bridge in its precise location. If positioned wrong, it will be impossible to properly tune the instrument. I used two drill bits with the same size holes as those to be drilled for the bridge pins to keep the bridge in position while clamping. This worked well after my first failed attempt at gluing the bridge. popwood.com 89 |


