Popular Woodworking 2004-10 № 143, страница 91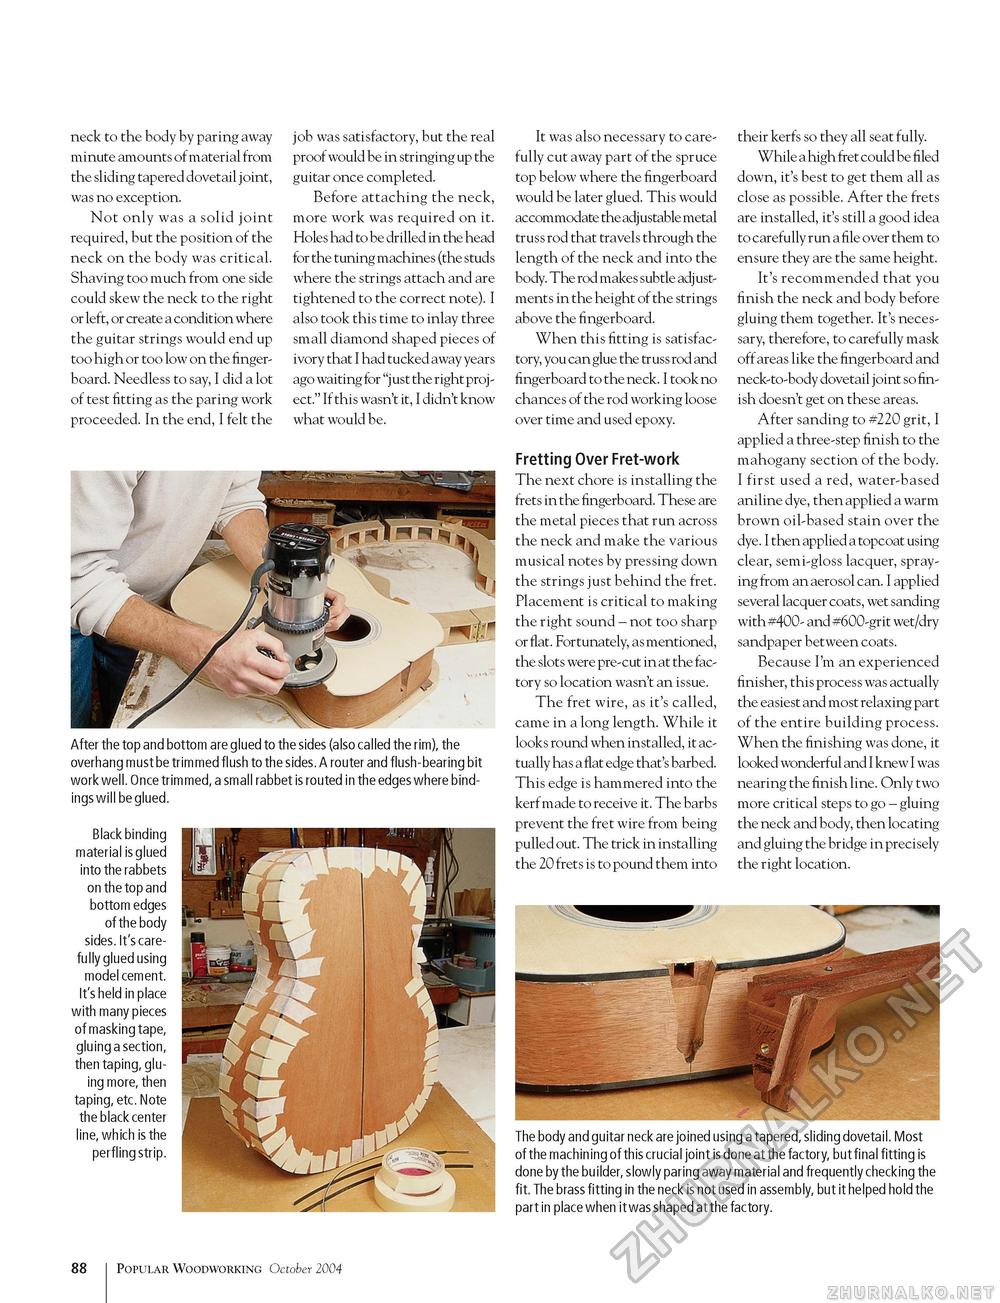
neck to the body by paring away minute amounts of material from the sliding tapered dovetail joint, was no exception. Not only was a solid joint required, but the position of the neck on the body was critical. Shaving too much from one side could skew the neck to the right or left, or create a condition where the guitar strings would end up too high or too low on the fingerboard. Needless to say, I did a lot of test fitting as the paring work proceeded. In the end, I felt the job was satisfactory, but the real proof would be in stringing up the guitar once completed. Before attaching the neck, more work was required on it. Holes had to be drilled in the head for the tuning machines (the studs where the strings attach and are tightened to the correct note). I also took this time to inlay three small diamond shaped pieces of ivory that I had tucked away years ago waiting for "just the right proj -ect." If this wasn't it, I didn't know what would be. After the top and bottom are glued to the sides (also called the rim), the overhang must be trimmed flush to the sides. A router and flush-bearing bit work well. Once trimmed, a small rabbet is routed in the edges where bindings will be glued. Black binding material is glued into the rabbets on the top and bottom edges of the body sides. It's carefully glued using model cement. It's held in place with many pieces of masking tape, gluing a section, then taping, gluing more, then taping, etc. Note the black center line, which is the perfling strip. It was also necessary to carefully cut away part of the spruce top below where the fingerboard would be later glued. This would accommodate the adjustable metal truss rod that travels through the length of the neck and into the body. The rod makes subtle adjustments in the height of the strings above the fingerboard. When this fitting is satisfactory, you can glue the truss rod and fingerboard to the neck. I took no chances of the rod working loose over time and used epoxy. Fretting Over Fret-work The next chore is installing the frets in the fingerboard. These are the metal pieces that run across the neck and make the various musical notes by pressing down the strings just behind the fret. Placement is critical to making the right sound - not too sharp or flat. Fortunately, as mentioned, the slots were pre-cut in at the factory so location wasn't an issue. The fret wire, as it's called, came in a long length. While it looks round when installed, it actually has a flat edge that's barbed. This edge is hammered into the kerf made to receive it. The barbs prevent the fret wire from being pulled out. The trick in installing the 20 frets is to pound them into their kerfs so they all seat fully. While a high fret could be filed down, it's best to get them all as close as possible. After the frets are installed, it's still a good idea to carefully run a file over them to ensure they are the same height. It's recommended that you finish the neck and body before gluing them together. It's necessary, therefore, to carefully mask off areas like the fingerboard and neck-to-body dovetail joint so finish doesn't get on these areas. After sanding to #220 grit, I applied a three-step finish to the mahogany section of the body. I first used a red, water-based aniline dye, then applied a warm brown oil-based stain over the dye. I then applied a topcoat using clear, semi-gloss lacquer, spraying from an aerosol can. I applied several lacquer coats, wet sanding with #400- and #600-grit wet/dry sandpaper between coats. Because I'm an experienced finisher, this process was actually the easiest and most relaxing part of the entire building process. When the finishing was done, it looked wonderful and I knew I was nearing the finish line. Only two more critical steps to go - gluing the neck and body, then locating and gluing the bridge in precisely the right location. The body and guitar neck are joined using a tapered, sliding dovetail. Most of the machining of this crucial joint is done at the factory, but final fitting is done by the builder, slowly paring away material and frequently checking the fit. The brass fitting in the neck is not used in assembly, but it helped hold the part in place when it was shaped at the factory. 88 Popular Woodworking October 2004 |


