Popular Woodworking 2004-11 № 144, страница 72
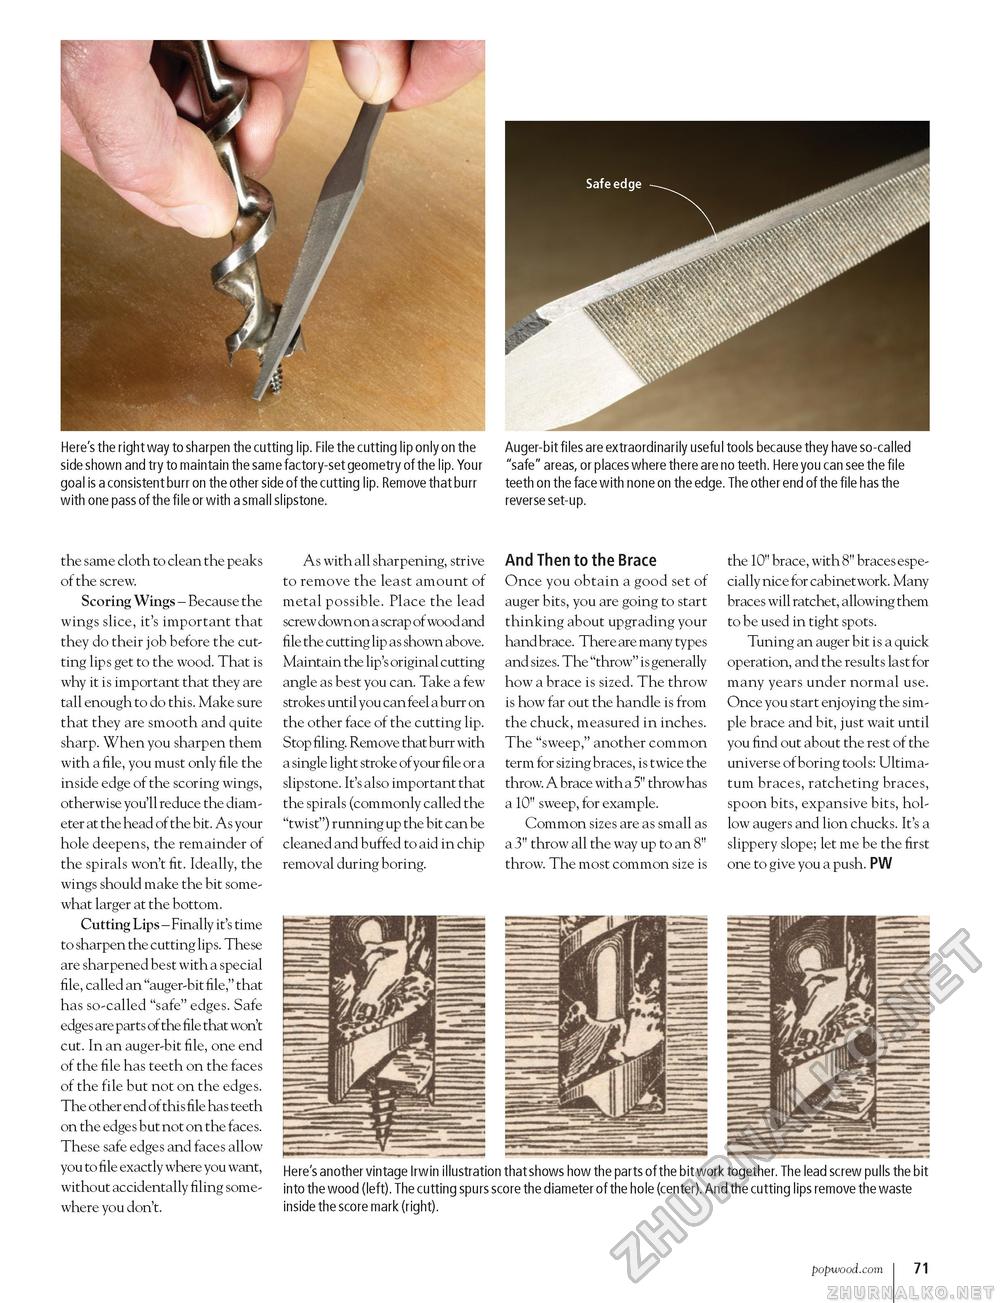
Here's the right way to sharpen the cutting lip. File the cutting lip only on the side shown and try to maintain the same factory-set geometry of the lip. Your goal is a consistent burr on the other side of the cutting lip. Remove that burr with one pass of the file or with a small slipstone. Auger-bit files are extraordinarily useful tools because they have so-called "safe" areas, or places where there are no teeth. Here you can see the file teeth on the face with none on the edge. The other end of the file has the reverse set-up. the same cloth to clean the peaks of the screw. Scoring Wings - Because the wings slice, it's important that they do their job before the cutting lips get to the wood. That is why it is important that they are tall enough to do this. Make sure that they are smooth and quite sharp. When you sharpen them with a file, you must only file the inside edge of the scoring wings, otherwise you'll reduce the diameter at the head of the bit. As your hole deepens, the remainder of the spirals won't fit. Ideally, the wings should make the bit somewhat larger at the bottom. Cutting Lips - Finally it's time to sharpen the cutting lips. These are sharpened best with a special file, called an "auger-bit file," that has so-called "safe" edges. Safe edges are parts of the file that won't cut. In an auger-bit file, one end of the file has teeth on the faces of the file but not on the edges. The other end of this file has teeth on the edges but not on the faces. These safe edges and faces allow you to file exactly where you want, without accidentally filing somewhere you don't. As with all sharpening, strive to remove the least amount of metal possible. Place the lead screw down on a scrap of wood and file the cutting lip as shown above. Maintain the lip's original cutting angle as best you can. Take a few strokes until you can feel a burr on the other face of the cutting lip. Stop filing. Remove that burr with a single light stroke of your file or a slipstone. It's also important that the spirals (commonly called the "twist") running up the bit can be cleaned and buffed to aid in chip removal during boring. And Then to the Brace Once you obtain a good set of auger bits, you are going to start thinking about upgrading your hand brace. There are many types and sizes. The "throw" is generally how a brace is sized. The throw is how far out the handle is from the chuck, measured in inches. The "sweep," another common term for sizing braces, is twice the throw. A brace with a 5" throw has a 10" sweep, for example. Common sizes are as small as a 3" throw all the way up to an 8" throw. The most common size is the 10" brace, with 8" braces especially nice for cabinetwork. Many braces will ratchet, allowing them to be used in tight spots. Tuning an auger bit is a quick operation, and the results last for many years under normal use. Once you start enjoying the simple brace and bit, just wait until you find out about the rest of the universe of boring tools: Ultimatum braces, ratcheting braces, spoon bits, expansive bits, hollow augers and lion chucks. It's a slippery slope; let me be the first one to give you a push. PW Here's another vintage Irwin illustration that shows how the parts of the bit work together. The lead screw pulls the bit into the wood (left). The cutting spurs score the diameter of the hole (center). And the cutting lips remove the waste inside the score mark (right). popwood.com 71 |


