Popular Woodworking 2004-12 № 145, страница 80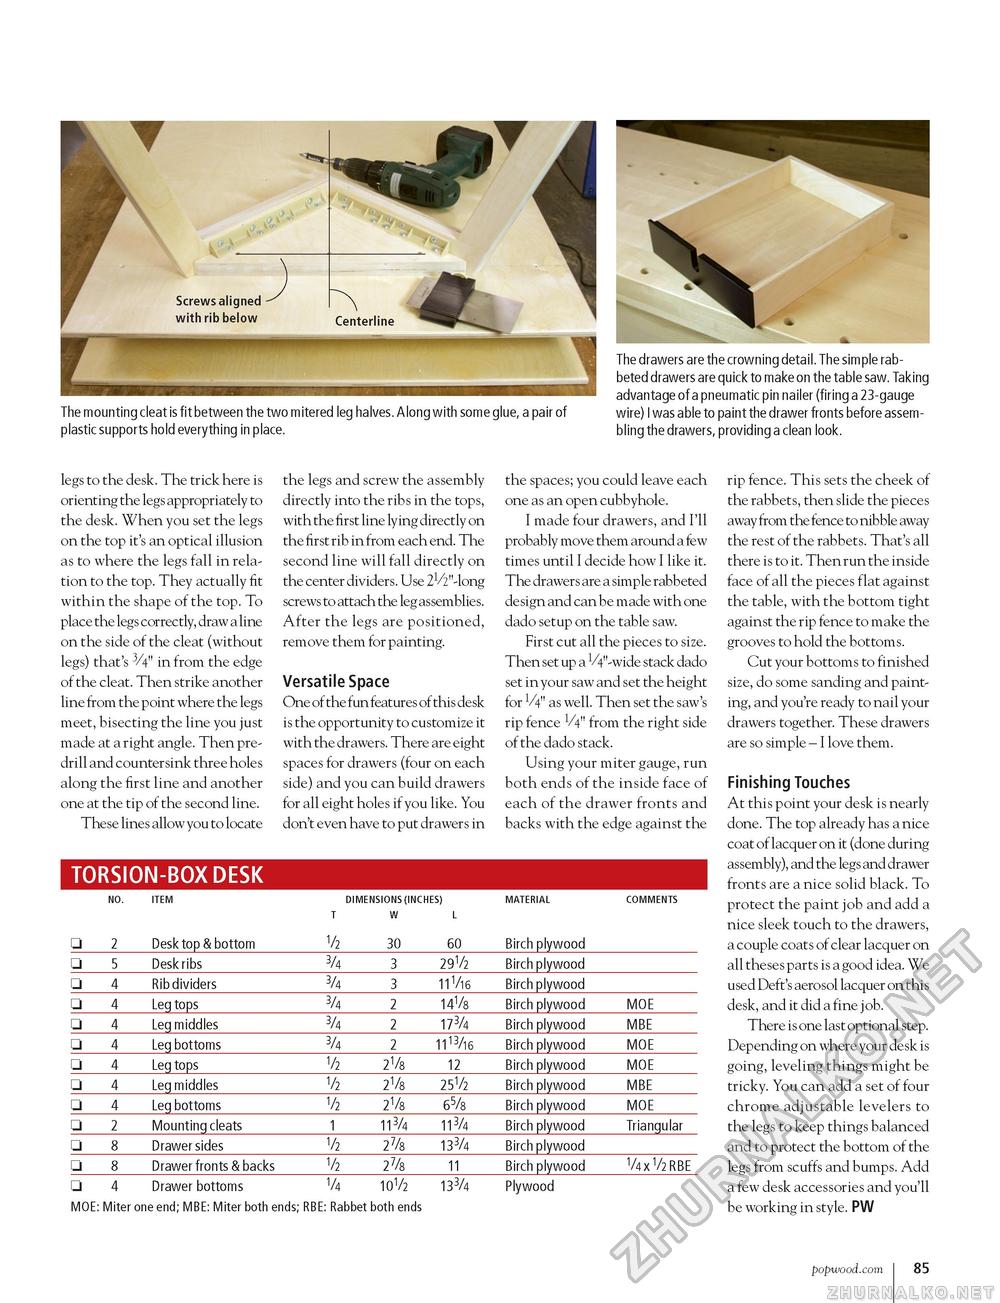
The mounting cleat is fit between the two mitered leg halves. Along with some glue, a pair of plastic supports hold everything in place. The drawers are the crowning detail. The simple rabbeted drawers are quick to make on the table saw. Taking advantage of a pneumatic pin nailer (firing a 23-gauge wire) I was able to paint the drawer fronts before assembling the drawers, providing a clean look. legs to the desk. The trick here is orienting the legs appropriately to the desk. When you set the legs on the top it's an optical illusion as to where the legs fall in relation to the top. They actually fit within the shape of the top. To place the legs correctly, draw a line on the side of the cleat (without legs) that's 3/4" in from the edge of the cleat. Then strike another line from the point where the legs meet, bisecting the line you just made at a right angle. Then pre-drill and countersink three holes along the first line and another one at the tip of the second line. These lines allow you to locate TORSION-BOX DESK the legs and screw the assembly directly into the ribs in the tops, with the first line lying directly on the first rib in from each end. The second line will fall directly on the center dividers. Use 2V2"-long screws to attach the leg assemblies. After the legs are positioned, remove them for painting. Versatile Space One of the fun features of this desk is the opportunity to customize it with the drawers. There are eight spaces for drawers (four on each side) and you can build drawers for all eight holes if you like. You don't even have to put drawers in the spaces; you could leave each one as an open cubbyhole. I made four drawers, and I'll probably move them around a few times until I decide how I like it. The drawers are a simple rabbeted design and can be made with one dado setup on the table saw. First cut all the pieces to size. Then set up a 4"-wide stack dado set in your saw and set the height for V4" as well. Then set the saw's rip fence V4" from the right side of the dado stack. Using your miter gauge, run both ends of the inside face of each of the drawer fronts and backs with the edge against the
MOE: Miter one end; MBE: Miter both ends; RBE: Rabbet both ends MOE: Miter one end; MBE: Miter both ends; RBE: Rabbet both ends rip fence. This sets the cheek of the rabbets, then slide the pieces away from the fence to nibble away the rest of the rabbets. That's all there is to it. Then run the inside face of all the pieces flat against the table, with the bottom tight against the rip fence to make the grooves to hold the bottoms. Cut your bottoms to finished size, do some sanding and painting, and you're ready to nail your drawers together. These drawers are so simple - I love them. Finishing Touches At this point your desk is nearly done. The top already has a nice coat of lacquer on it (done during assembly), and the legs and drawer fronts are a nice solid black. To protect the paint job and add a nice sleek touch to the drawers, a couple coats of clear lacquer on all theses parts is a good idea. We used Deft's aerosol lacquer on this desk, and it did a fine job. There is one last optional step. Depending on where your desk is going, leveling things might be tricky. You can add a set of four chrome adjustable levelers to the legs to keep things balanced and to protect the bottom of the legs from scuffs and bumps. Add a few desk accessories and you'll be working in style. PW popwood.com 101 |
||||||||||||||||||||||||||||||||||||||||||||||||||||||||||||||||||||||||||||||||||||||||||||||||||||||||||||||||||||||||||||||


