Popular Woodworking 2004-12 № 145, страница 79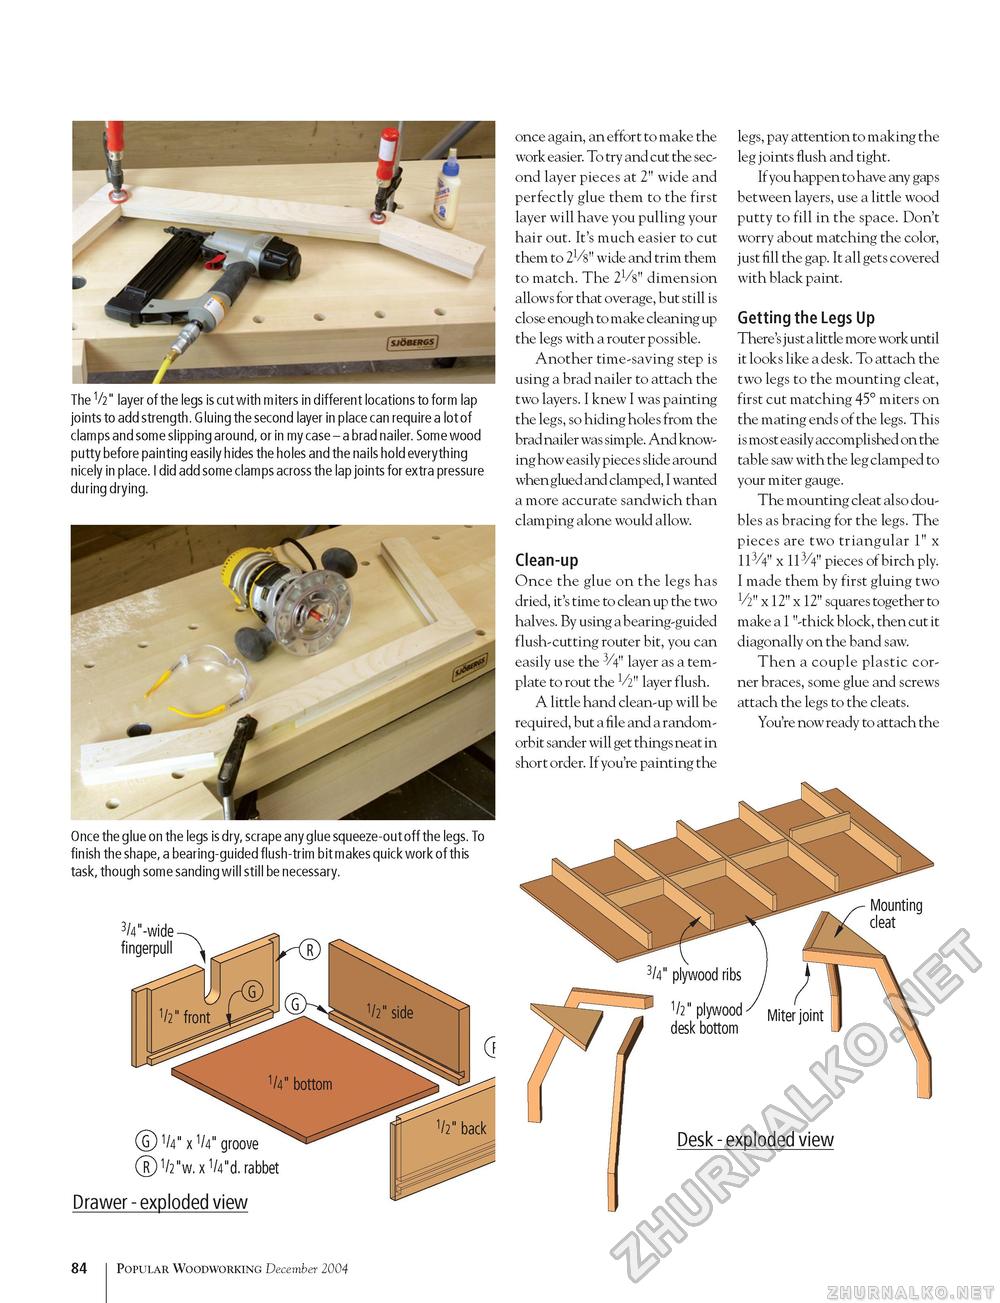
The V2" layer of the legs is cut with miters in different locations to form lap joints to add strength. Gluing the second layer in place can require a lot of clamps and some slipping around, or in my case - a brad nailer. Some wood putty before painting easily hides the holes and the nails hold everything nicely in place. I did add some clamps across the lap joints for extra pressure during drying. Once the glue on the legs is dry, scrape any glue squeeze-out off the legs. To finish the shape, a bearing-guided flush-trim bit makes quick work of this task, though some sanding will still be necessary. 3/4"-wide fingerpull ©1/4" x 1/4" groove ®V2"w. x 1/4"d. rabbet Drawer - exploded view once again, an effort to make the work easier. To try and cut the second layer pieces at 2" wide and perfectly glue them to the first layer will have you pulling your hair out. It's much easier to cut them to 21/8" wide and trim them to match. The 21/8" dimension allows for that overage, but still is close enough to make cleaning up the legs with a router possible. Another time-saving step is using a brad nailer to attach the two layers. I knew I was painting the legs, so hiding holes from the brad nailer was simple. And knowing how easily piece s slide around when glued and clamped, I wanted a more accurate sandwich than clamping alone would allow. Clean-up Once the glue on the legs has dried, it's time to clean up the two halves. By using a bearing-guided flush-cutting router bit, you can easily use the 3/4" layer as a template to rout the 1/2" layer flush. A little hand clean-up will be required, but a file and a random-orbit sander will get things neat in short order. If you're painting the legs, pay attention to making the leg joints flush and tight. If you happen to have any gap s between layers, use a little wood putty to fill in the space. Don't worry about matching the color, just fill the gap. It all gets covered with black paint. Getting the Legs Up There's just a little more work until it looks like a desk. To attach the two legs to the mounting cleat, first cut matching 45° miters on the mating ends of the legs. This is most easily accomplished on the table saw with the leg clamped to your miter gauge. The mounting cleat also doubles as bracing for the legs. The pieces are two triangular 1" x 113/4" x 113/4" pieces of birch ply. I made them by first gluing two Vz" x 12" x 12" squares together to make a 1 "-thick block, then cut it diagonally on the band saw. Then a couple plastic corner braces, some glue and screws attach the legs to the cleats. You're now ready to attach the 1/2'plywood^ Miterjoint desk bottom Desk - exploded view 84 100 Popular Woodworking December 2004 |


