Popular Woodworking 2005-02 № 146, страница 57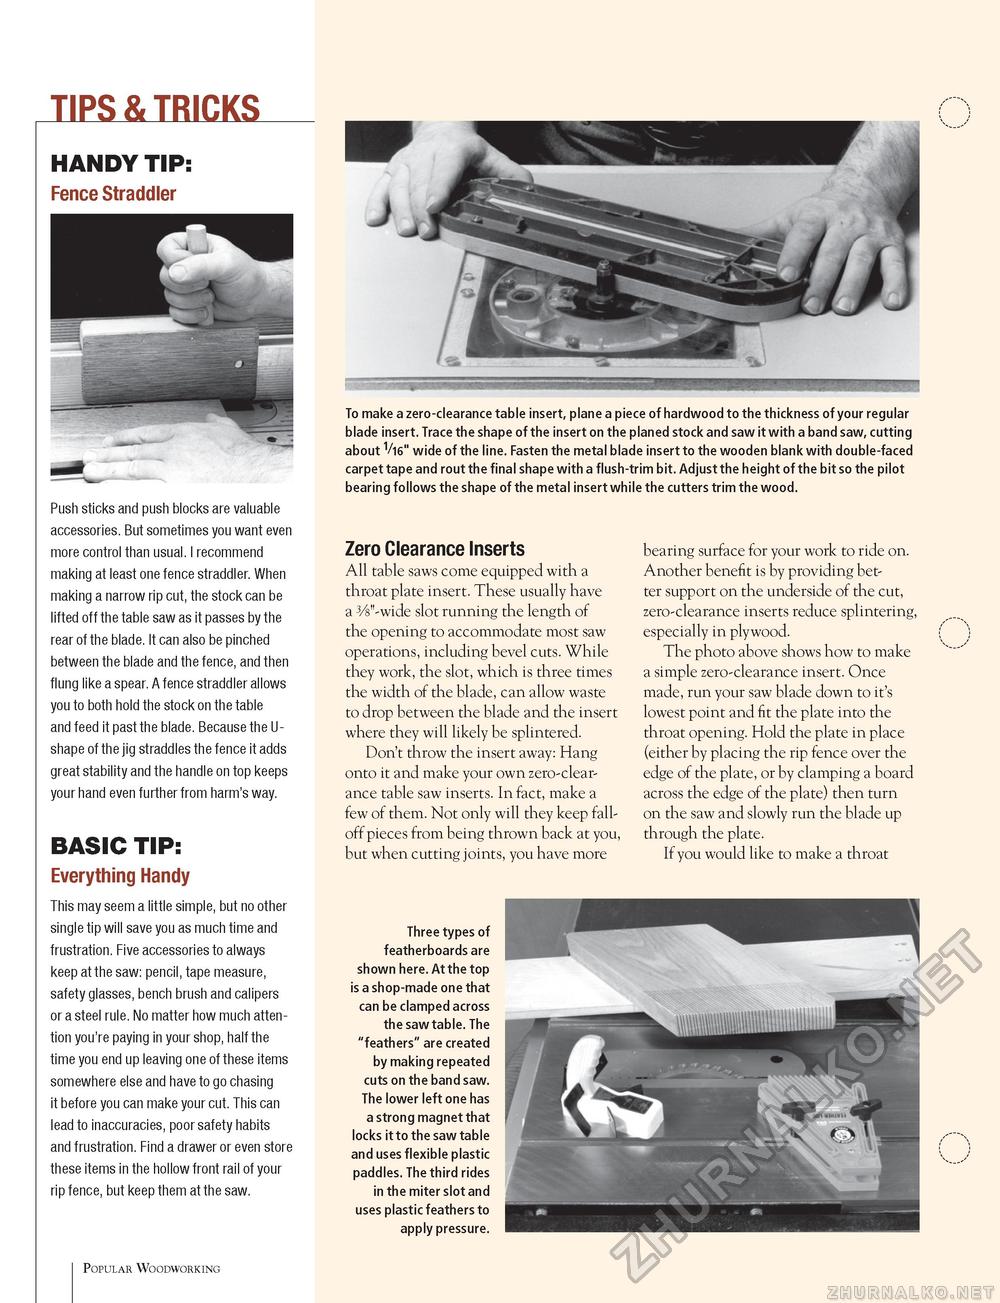
Push sticks and push blocks are valuable accessories. But sometimes you want even more control than usual. I recommend making at least one fence straddler. When making a narrow rip cut, the stock can be lifted off the table saw as it passes by the rear of the blade. It can also be pinched between the blade and the fence, and then flung like a spear. A fence straddler allows you to both hold the stock on the table and feed it past the blade. Because the U-shape of the jig straddles the fence it adds great stability and the handle on top keeps your hand even further from harm's way. BASIC TIP: Everything Handy This may seem a little simple, but no other single tip will save you as much time and frustration. Five accessories to always keep at the saw: pencil, tape measure, safety glasses, bench brush and calipers or a steel rule. No matter how much attention you're paying in your shop, half the time you end up leaving one of these items somewhere else and have to go chasing it before you can make your cut. This can lead to inaccuracies, poor safety habits and frustration. Find a drawer or even store these items in the hollow front rail of your rip fence, but keep them at the saw. To make a zero-clearance table insert, plane a piece of hardwood to the thickness of your regular blade insert. Trace the shape of the insert on the planed stock and saw it with a band saw, cutting about 1/i6" wide of the line. Fasten the metal blade insert to the wooden blank with double-faced carpet tape and rout the final shape with a flush-trim bit. Adjust the height of the bit so the pilot bearing follows the shape of the metal insert while the cutters trim the wood. Zero Clearance Inserts All table saws come equipped with a throat plate insert. These usually have a -W'-wide slot running the length of the opening to accommodate most saw operations, including bevel cuts. While they work, the slot, which is three times the width of the blade, can allow waste to drop between the blade and the insert where they will likely be splintered. Don't throw the insert away: Hang onto it and make your own zero-clearance table saw inserts. In fact, make a few of them. Not only will they keep fall-off pieces from being thrown back at you, but when cutting joints, you have more Three types of featherboards are shown here. At the top is a shop-made one that can be clamped across the saw table. The "feathers" are created by making repeated cuts on the band saw. The lower left one has a strong magnet that locks it to the saw table and uses flexible plastic paddles. The third rides in the miter slot and uses plastic feathers to apply pressure. bearing surface for your work to ride on. Another benefit is by providing better support on the underside of the cut, zero-clearance inserts reduce splintering, especially in plywood. The photo above shows how to make a simple zero-clearance insert. Once made, run your saw blade down to it's lowest point and fit the plate into the throat opening. Hold the plate in place (either by placing the rip fence over the edge of the plate, or by clamping a board across the edge of the plate) then turn on the saw and slowly run the blade up through the plate. If you would like to make a throat Popular Woodworking |


