Popular Woodworking 2005-02 № 146, страница 82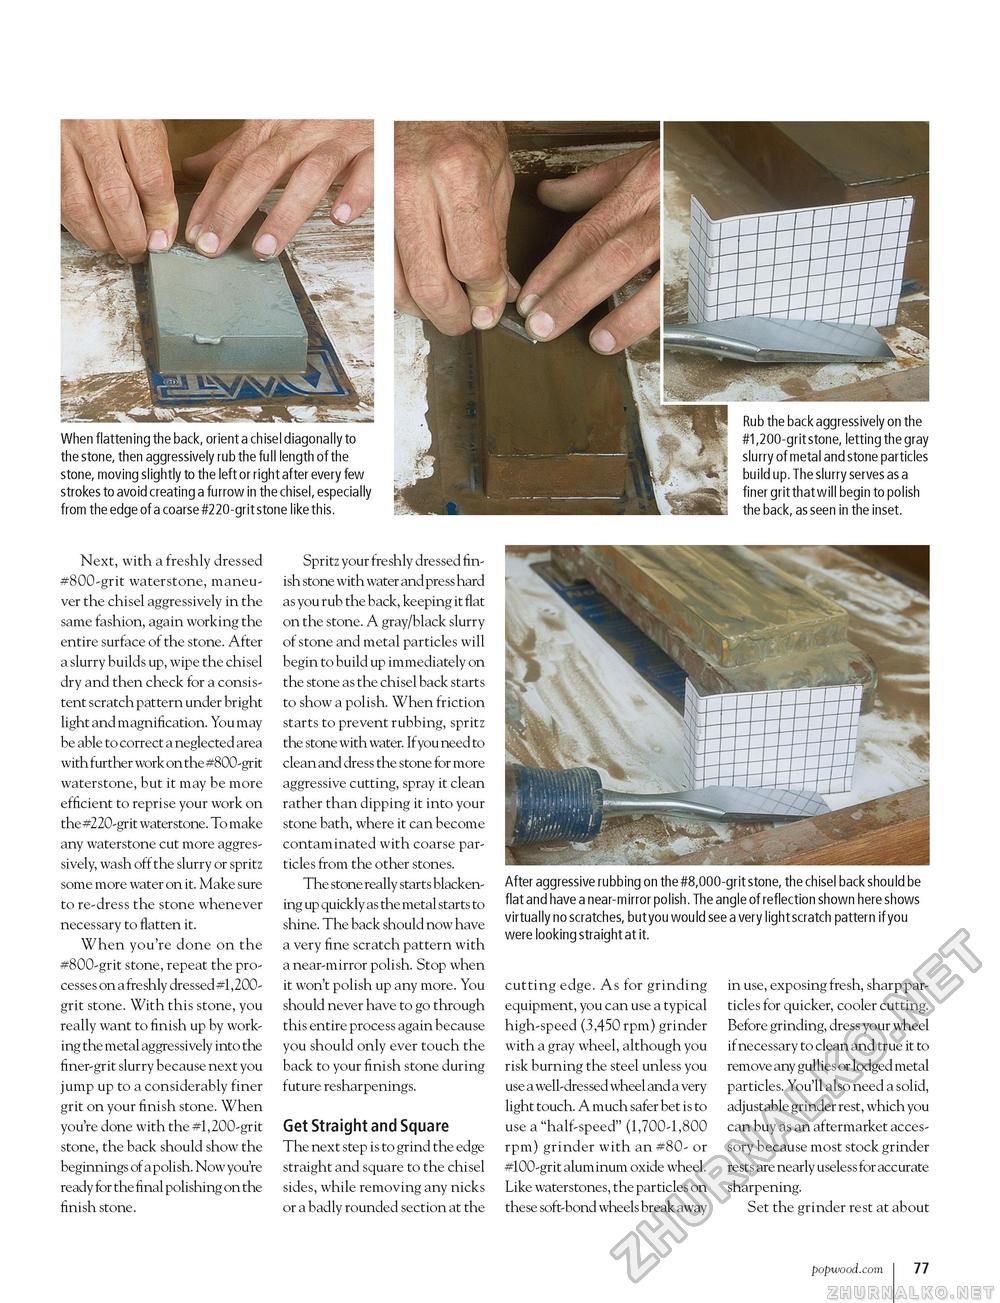
When flattening the back, orient a chisel diagonally to the stone, then aggressively rub the full length of the stone, moving slightly to the left or right after every few strokes to avoid creating a furrow in the chisel, especially from the edge of a coarse #220-grit stone like this. Rub the back aggressively on the #1,200-grit stone, letting the gray slurry of metal and stone particles build up. The slurry serves as a finer grit that will begin to polish the back, as seen in the inset. After aggressive rubbing on the #8,000-grit stone, the chisel back should be flat and have a near-mirror polish. The angle of reflection shown here shows virtually no scratches, but you would see a very light scratch pattern if you were looking straight at it. Next, with a freshly dressed #800-grit waterstone, maneuver the chisel aggressively in the same fashion, again working the entire surface of the stone. After a slurry builds up, wipe the chisel dry and then check for a consistent scratch pattern under bright light and magnification. You may be able to correct a neglected area with further work on the #800-grit waterstone, but it may be more efficient to reprise your work on the #220-grit waterstone. To make any waterstone cut more aggressively, wash off the slurry or spritz some more water on it. Make sure to re-dress the stone whenever necessary to flatten it. When you're done on the #800-grit stone, repeat the processes on a freshly dressed #1,200-grit stone. With this stone, you really want to finish up by working the metal aggressively into the finer-grit slurry because next you jump up to a considerably finer grit on your finish stone. When you're done with the #1,200-grit stone, the back should show the beginnings of a polish. Now you're ready for the final polishing on the finish stone. Spritz your freshly dressed finish stone with water and press hard as you rub the back, keeping it flat on the stone. A gray/black slurry of stone and metal particles will begin to build up immediately on the stone as the chisel back starts to show a polish. When friction starts to prevent rubbing, spritz the stone with water. If you need to clean and dress the stone for more aggressive cutting, spray it clean rather than dipping it into your stone bath, where it can become contaminated with coarse particles from the other stones. The stone really starts blackening up quickly as the metal starts to shine. The back should now have a very fine scratch pattern with a near-mirror polish. Stop when it won't polish up any more. You should never have to go through this entire process again because you should only ever touch the back to your finish stone during future resharpenings. Get Straight and Square The next step is to grind the edge straight and square to the chisel sides, while removing any nicks or a badly rounded section at the cutting edge. As for grinding equipment, you can use a typical high-speed (3,450 rpm) grinder with a gray wheel, although you risk burning the steel unless you use a well-dressed wheel and a very light touch. A much safer bet is to use a "half-speed" (1,700-1,800 rpm) grinder with an #80- or #100-grit aluminum oxide wheel. Like waterstones, the particles on these soft-bond wheels break away in use, exposing fresh, sharp particles for quicker, cooler cutting. Before grinding, dress your wheel if necessary to clean and true it to remove any gullies or lodged metal particles. You'll also need a solid, adjustable grinder rest, which you can buy as an aftermarket accessory because most stock grinder rests are nearly useless for accurate sharpening. Set the grinder rest at about popwood.com 77 |


