Popular Woodworking 2005-02 № 146, страница 84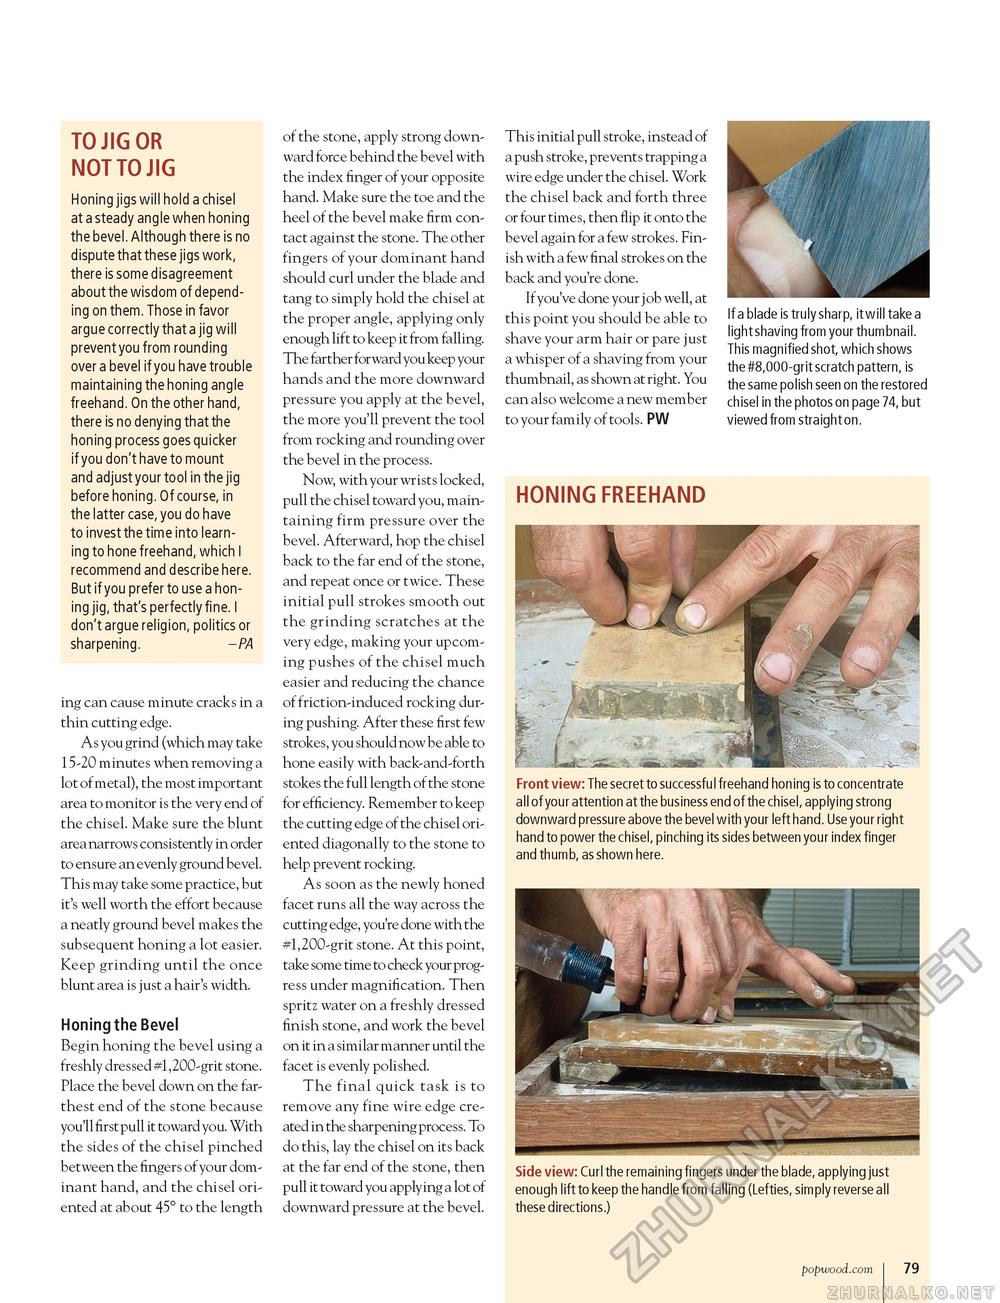
TO JIG OR NOT TO JIG Honing jigs will hold a chisel at a steady angle when honing the bevel. Although there is no dispute that these jigs work, there is some disagreement about the wisdom of depending on them. Those in favor argue correctly that a jig will prevent you from rounding over a bevel if you have trouble maintaining the honing angle freehand. On the other hand, there is no denying that the honing process goes quicker if you don't have to mount and adjust your tool in the jig before honing. Of course, in the latter case, you do have to invest the time into learning to hone freehand, which I recommend and describe here. But if you prefer to use a honing jig, that's perfectly fine. I don't argue religion, politics or sharpening. - PA ing can cause minute cracks in a thin cutting edge. As you grind (which may take 15-20 minutes when removing a lot of metal), the most important area to monitor is the very end of the chisel. Make sure the blunt area narrows consistently in order to ensure an evenly ground bevel. This may take some practice, but it's well worth the effort because a neatly ground bevel makes the subsequent honing a lot easier. Keep grinding until the once blunt area is just a hair's width. Honing the Bevel Begin honing the bevel using a freshly dressed #1,200-grit stone. Place the bevel down on the farthest end of the stone because you'll first pull it toward you. With the sides of the chisel pinched between the fingers of your dominant hand, and the chisel oriented at about 45° to the length of the stone, apply strong downward force behind the bevel with the index finger of your opposite hand. Make sure the toe and the heel of the bevel make firm contact against the stone. The other fingers of your dominant hand should curl under the blade and tang to simply hold the chisel at the proper angle, applying only enough lift to keep it from falling. The farther forward you keep your hands and the more downward pressure you apply at the bevel, the more you'll prevent the tool from rocking and rounding over the bevel in the process. Now, with your wrists locked, pull the chisel toward you, maintaining firm pressure over the bevel. Afterward, hop the chisel back to the far end of the stone, and repeat once or twice. These initial pull strokes smooth out the grinding scratches at the very edge, making your upcoming pushes of the chisel much easier and reducing the chance of friction-induced rocking during pushing. After these first few strokes, you should now be able to hone easily with back-and-forth stokes the full length of the stone for efficiency. Remember to keep the cutting edge of the chisel oriented diagonally to the stone to help prevent rocking. As soon as the newly honed facet runs all the way across the cutting edge, you're done with the #1,200-grit stone. At this point, take some time to check your progress under magnification. Then spritz water on a freshly dressed finish stone, and work the bevel on it in a similar manner until the facet is evenly polished. The final quick task is to remove any fine wire edge created in the sharpening process. To do this, lay the chisel on its back at the far end of the stone, then pull it toward you applying a lot of downward pressure at the bevel. This initial pull stroke, instead of a push stroke, prevents trapping a wire edge under the chisel. Work the chisel back and forth three or four times, then flip it onto the bevel again for a few strokes. Finish with a few final strokes on the back and you're done. If you've done your j ob well, at this point you should be able to shave your arm hair or pare just a whisper of a shaving from your thumbnail, as shown at right. You can also welcome a new member to your family of tools. PW If a blade is truly sharp, it will take a light shaving from your thumbnail. This magnified shot, which shows the #8,000-grit scratch pattern, is the same polish seen on the restored chisel in the photos on page 74, but viewed from straight on. Front view: The secret to successfu l freehand honing is to concentrate all of your attention at the business end of the chisel, applying strong downward pressure above the bevel with your left hand. Use your right hand to power the chisel, pinching its sides between your index finger and thumb, as shown here. Side view: Curl the remaining fingers under the blade, applying just enough lift to keep the handle from falling (Lefties, simply reverse all these directions.) popwood.com 79 |


