Popular Woodworking 2005-04 № 147, страница 78
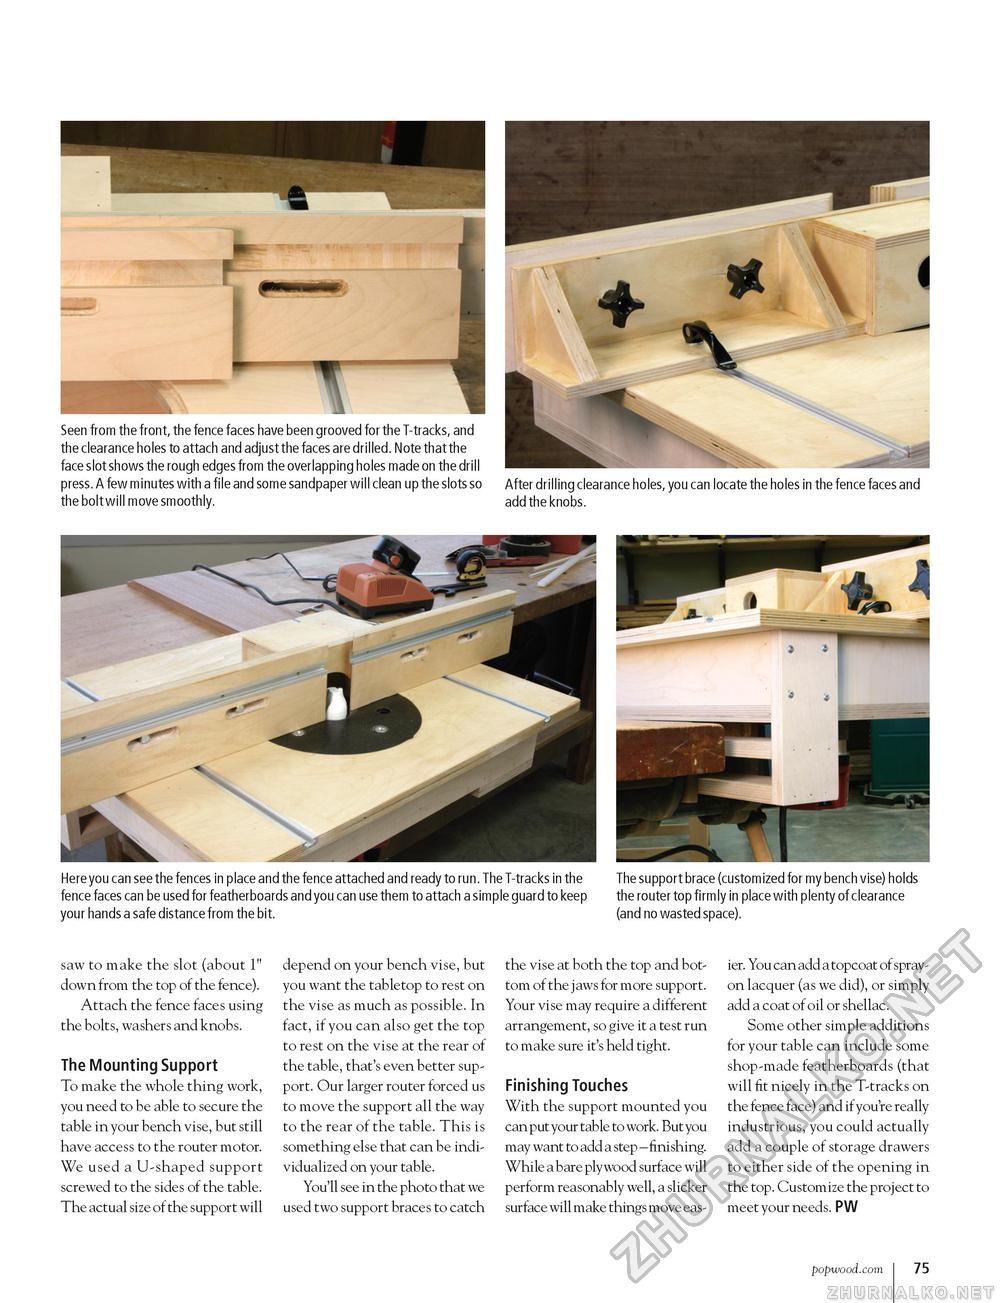
Seen from the front, the fence faces have been grooved for the T-tracks, and the clearance holes to attach and adjust the faces are drilled. Note that the face slot shows the rough edges from the overlapping holes made on the drill press. A few minutes with a file and some sandpaper will clean up the slots so the bolt will move smoothly. After drilling clearance holes, you can locate the holes in the fence faces and add the knobs. Here you can see the fences in place and the fence attached and ready to run. The T-tracks in the fence faces can be used for featherboards and you can use them to attach a simple guard to keep your hands a safe distance from the bit. The support brace (customized for my bench vise) holds the router top firmly in place with plenty of clearance (and no wasted space). saw to make the slot (about 1" down from the top of the fence). Attach the fence faces using the bolts, washers and knobs. The Mounting Support To make the whole thing work, you need to be able to secure the table in your bench vise, but still have access to the router motor. We used a U-shaped support screwed to the sides of the table. The actual size of the support will depend on your bench vise, but you want the tabletop to rest on the vise as much as possible. In fact, if you can also get the top to rest on the vise at the rear of the table, that's even better support. Our larger router forced us to move the support all the way to the rear of the table. This is something else that can be individualized on your table. You'll see in the photo that we used two support braces to catch the vise at both the top and bottom of the jaws for more support. Your vise may require a different arrangement, so give it a test run to make sure it's held tight. Finishing Touches With the support mounted you can put your table to work. But you may want to add a step - finishing. While a bare plywood surface will perform reasonably well, a slicker surface will make things move eas ier. You can add a topcoat of spray-on lacquer (as we did), or simply add a coat of oil or shellac. Some other simple additions for your table can include some shop-made featherboards (that will fit nicely in the T-tracks on the fence face) and if you're really industrious, you could actually add a couple of storage drawers to either side of the opening in the top. Customize the project to meet your needs. PW popwood.com 75 |


