Popular Woodworking 2005-04 № 147, страница 75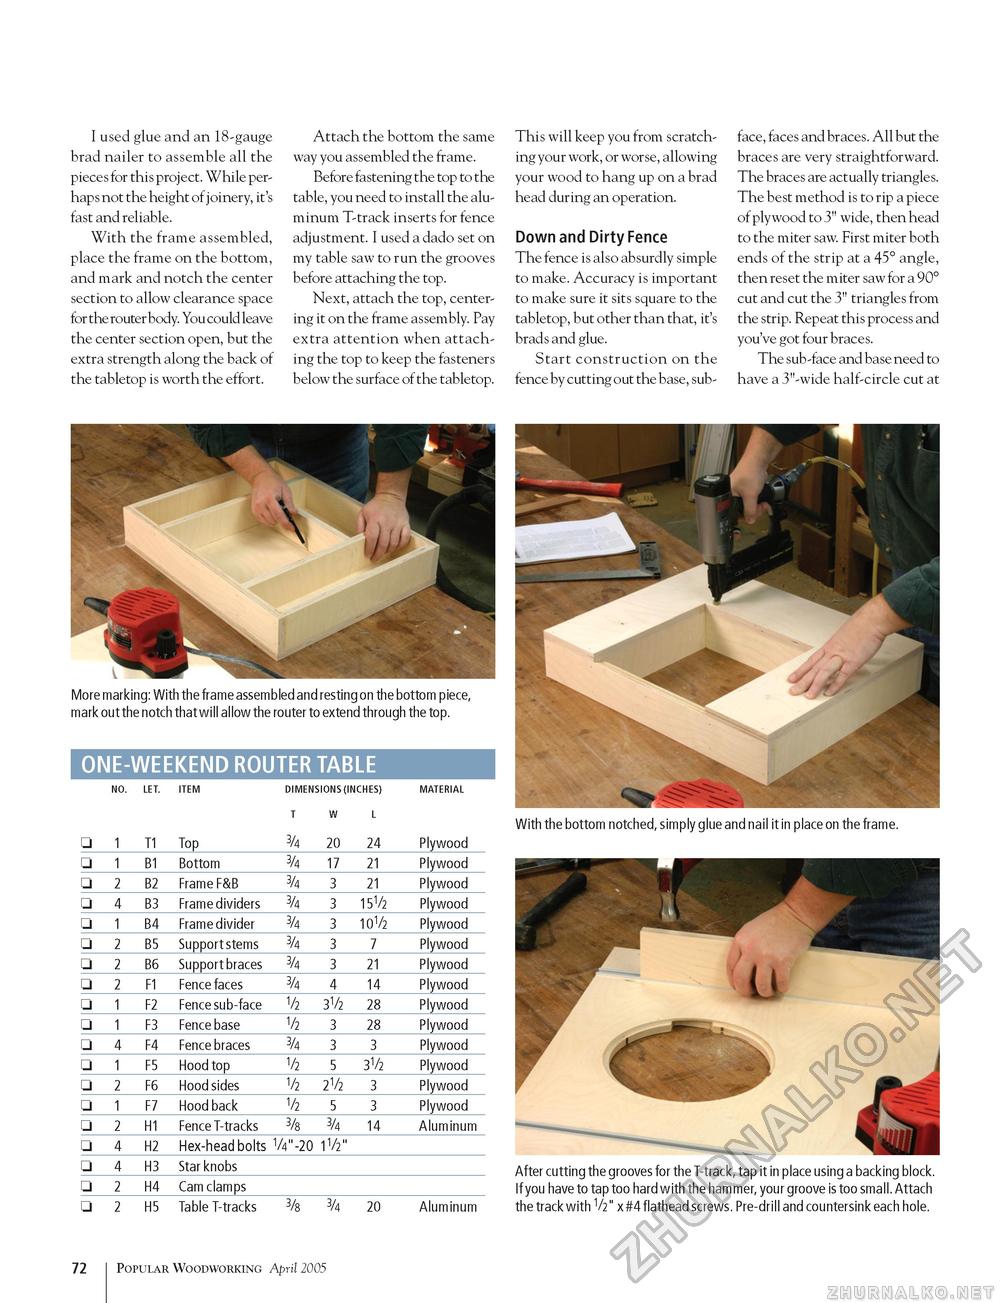
I used glue and an 18-gauge brad nailer to assemble all the pieces for this project. While perhaps not the height of joinery, it's fast and reliable. With the frame assembled, place the frame on the bottom, and mark and notch the center section to allow clearance space for the router body. You could leave the center section open, but the extra strength along the back of the tabletop is worth the effort. Attach the bottom the same way you assembled the frame. Before fastening the top to the table, you need to install the aluminum T-track inserts for fence adjustment. I used a dado set on my table saw to run the grooves before attaching the top. Next, attach the top, centering it on the frame assembly. Pay extra attention when attaching the top to keep the fasteners below the surface of the tabletop. This will keep you from scratching your work, or worse, allowing your wood to hang up on a brad head during an operation. Down and Dirty Fence The fence is also absurdly simple to make. Accuracy is important to make sure it sits square to the tabletop, but other than that, it's brads and glue. Start construction on the fence by cutting out the base, sub- face, faces and braces. All but the braces are very straightforward. The braces are actually triangles. The best method is to rip a piece of plywood to 3" wide, then head to the miter saw. First miter both ends of the strip at a 45° angle, then reset the miter saw for a 90° cut and cut the 3" triangles from the strip. Repeat this process and you've got four braces. The sub-face and base need to have a 3"-wide half-circle cut at More marking: With the frame assembled and resting on the bottom piece, mark out the notch that will allow the router to extend through the top. ONE-WEEKEND ROUTER TABLE DIMENSIONS (INCHES) DIMENSIONS (INCHES) NO. LET ITEM
With the bottom notched, simply glue and nail it in place on the frame. After cutting the grooves for the T-track, tap it in place using a backing block. If you have to tap too hard with the hammer, your groove is too small. Attach the track with V2" x #4 flathead screws. Pre-drill and countersink each hole. NO. LET ITEM |
||||||||||||||||||||||||||||||||||||||||||||||||||||||||||||||||||||||||||||||||||||||||||||||||||||||||||||||||||||||||||||||||||||||||||||||||||||||||||||||||||||||||


