Popular Woodworking 2005-04 № 147, страница 74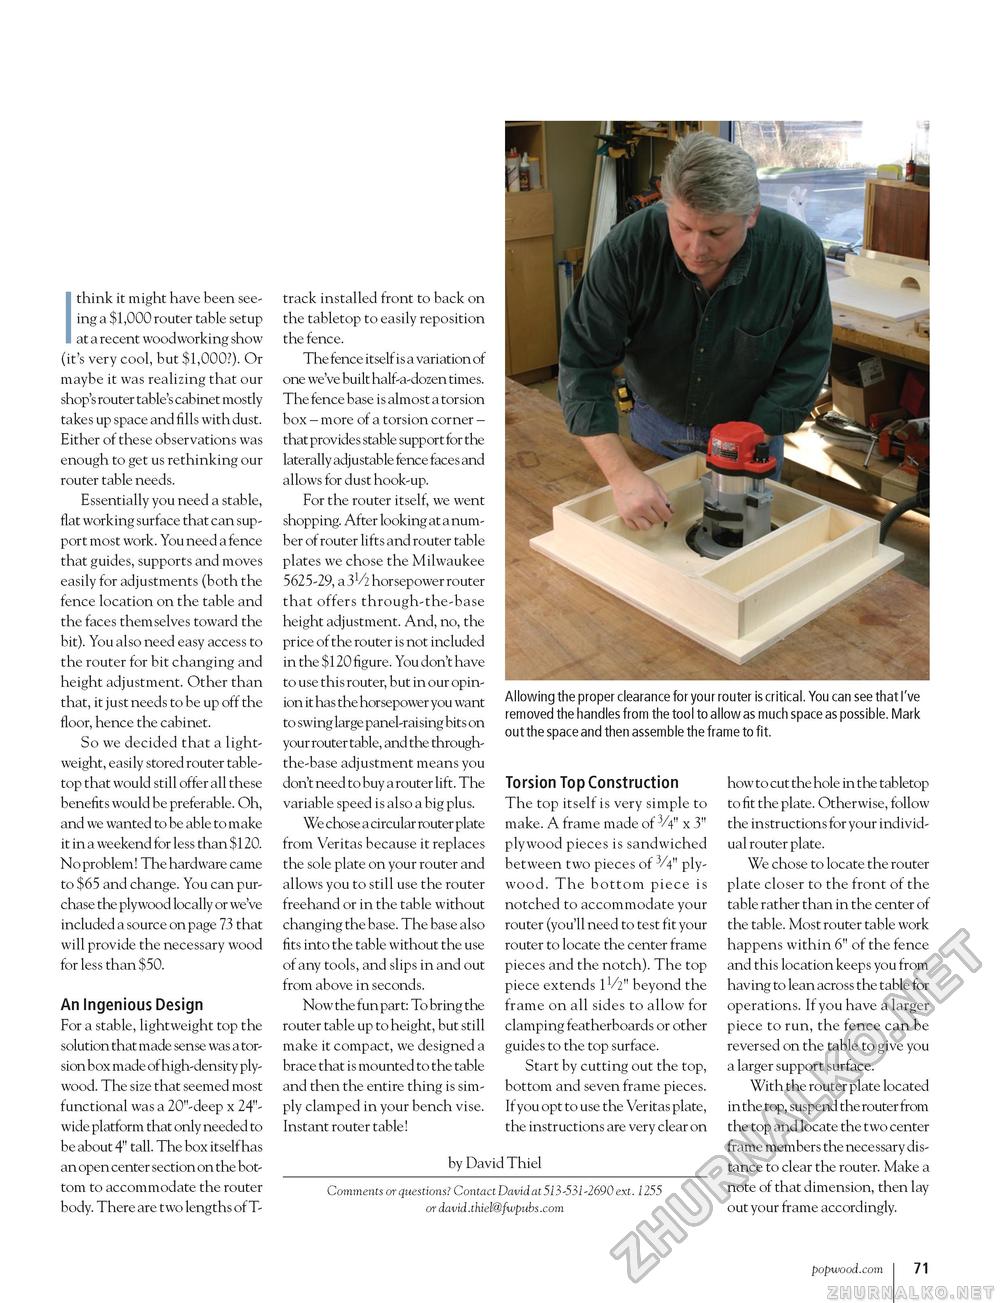
Allowing the proper clearance for your router is critical. You can see that I've removed the handles from the tool to allow as much space as possible. Mark out the space and then assemble the frame to fit. think it might have been seeing a $1,000 router table setup at a recent woodworking show (it's very cool, but $1,000?). Or maybe it was realizing that our shop's router table's cabinet mostly takes up space and fills with dust. Either of these observations was enough to get us rethinking our router table needs. Essentially you need a stable, flat working surface that can support most work. You need a fence that guides, supports and moves easily for adjustments (both the fence location on the table and the faces themselves toward the bit). You also need easy access to the router for bit changing and height adjustment. Other than that, it just needs to be up off the floor, hence the cabinet. So we decided that a lightweight, easily stored router table-top that would still offer all these benefits would be preferable. Oh, and we wanted to be able to make it in a weekend for less than $120. No problem! The hardware came to $65 and change. You can purchase the plywood locally or we've included a source on page 73 that will provide the necessary wood for less than $50. An Ingenious Design For a stable, lightweight top the solution that made sense was a torsion box made of high-density plywood. The size that seemed most functional was a 20"-deep x 24"-wide platform that only needed to be about 4" tall. The box itself has an open center section on the bottom to accommodate the router body. There are two lengths of T- track installed front to back on the tabletop to easily reposition the fence. The fence itself is a variation of one we've built half-a-dozen times. The fence base is almost a torsion box - more of a torsion corner -that provides stable support for the laterally adjustable fence faces and allows for dust hook-up. For the router itself, we went shopping. After looking at a number of router lifts and router table plates we chose the Milwaukee 5625-29, a 3V2 horsepower router that offers through-the-base height adjustment. And, no, the price of the router is not included in the $ 120 figure. You don't have to use this router, but in our opinion it has the horsepower you want to swing large panel-raising bits on your router table, and the through-the-base adjustment means you don't need to buy a router lift. The variable speed is also a big plus. We chose a circular router plate from Veritas because it replaces the sole plate on your router and allows you to still use the router freehand or in the table without changing the base. The base also fits into the table without the use of any tools, and slips in and out from above in seconds. Now the fun part: To bring the router table up to height, but still make it compact, we designed a brace that is mounted to the table and then the entire thing is simply clamped in your bench vise. Instant router table! Torsion Top Construction The top itself is very simple to make. A frame made of 3/4" x 3" plywood pieces is sandwiched between two pieces of 3/4" plywood. The bottom piece is notched to accommodate your router (you'll need to test fit your router to locate the center frame pieces and the notch). The top piece extends 11/2" beyond the frame on all sides to allow for clamping featherboards or other guides to the top surface. Start by cutting out the top, bottom and seven frame pieces. If you opt to use the Veritas plate, the instructions are very clear on how to cut the hole in the tabletop to fit the plate. Otherwise, follow the instructions for your individual router plate. We chose to locate the router plate closer to the front of the table rather than in the center of the table. Most router table work happens within 6" of the fence and this location keeps you from having to lean across the table for operations. If you have a larger piece to run, the fence can be reversed on the table to give you a larger support surface. With the router plate located in the top, suspend the router from the top and locate the two center frame members the necessary distance to clear the router. Make a note of that dimension, then lay out your frame accordingly. by David Thiel Comments or questions? Contact David at 513'531'2690 ext. 1255 or david.thiel@fwpubs.com popwood.com 71 |


