Popular Woodworking 2005-04 № 147, страница 76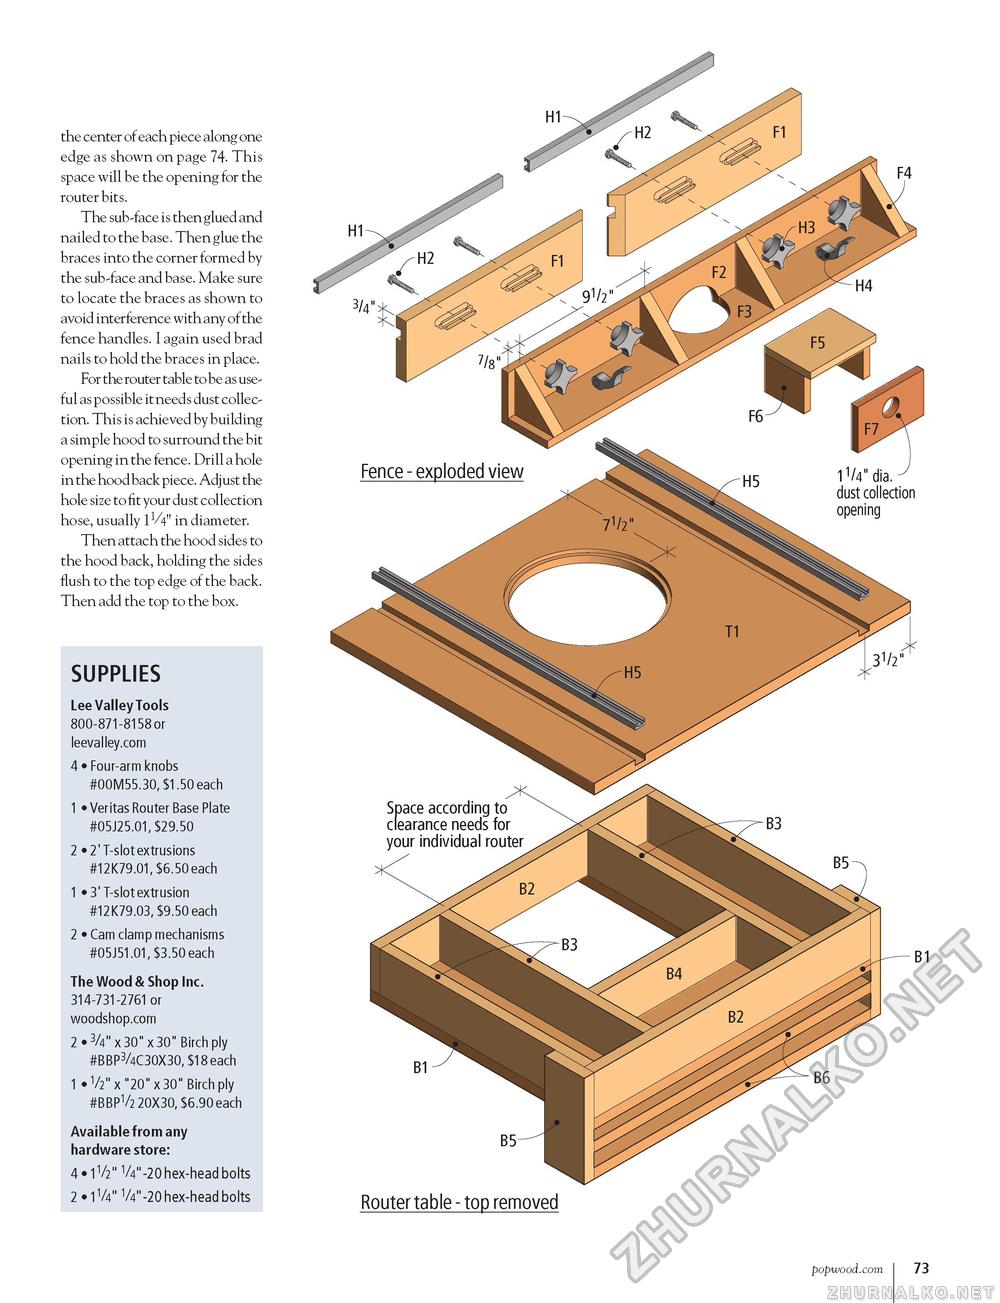
the center of each piece along one edge as shown on page 74. This space will be the opening for the router bits. The sub-face is then glued and nailed to the base. Then glue the braces into the corner formed by the sub-face and base. Make sure to locate the braces as shown to avoid interference with any of the fence handles. I again used brad nails to hold the braces in place. For the router table to be as useful as possible it needs dust collection. This is achieved by building a simple hood to surround the bit opening in the fence. Drill a hole in the hood back piece. Adj ust the hole size to fit your dust collection hose, usually 11/4" in diameter. Then attach the hood sides to the hood back, holding the sides flush to the top edge of the back. Then add the top to the box. SUPPLIES Lee Valley Tools 800-871-8158 or leevalley.com 4 • Four-arm knobs #00M55.30, $1.50 each 1 • Veritas Router Base Plate #05J25.01, $29.50 2 • 2' T-slot extrusions #12K79.01, $6.50 each 1 • 3' T-slot extrusion #12K79.03, $9.50 each 2 • Cam clamp mechanisms #05J51.01, $3.50 each The Wood & Shop Inc. 314-731-2761 or woodshop.com 2 • 3/4" x 30" x 30" Birch ply #BBP3/4C30X30, $18 each 1 • V2" x "20" x 30" Birch ply #BBPV2 20X30, $6.90 each Available from any hardware store: 4 • 1V2" V4"-20 hex-head bolts 2 • 1V4" V4"-20 hex-head bolts Router table - top removed popwood.com 73 |


