Popular Woodworking 2005-04 № 147, страница 77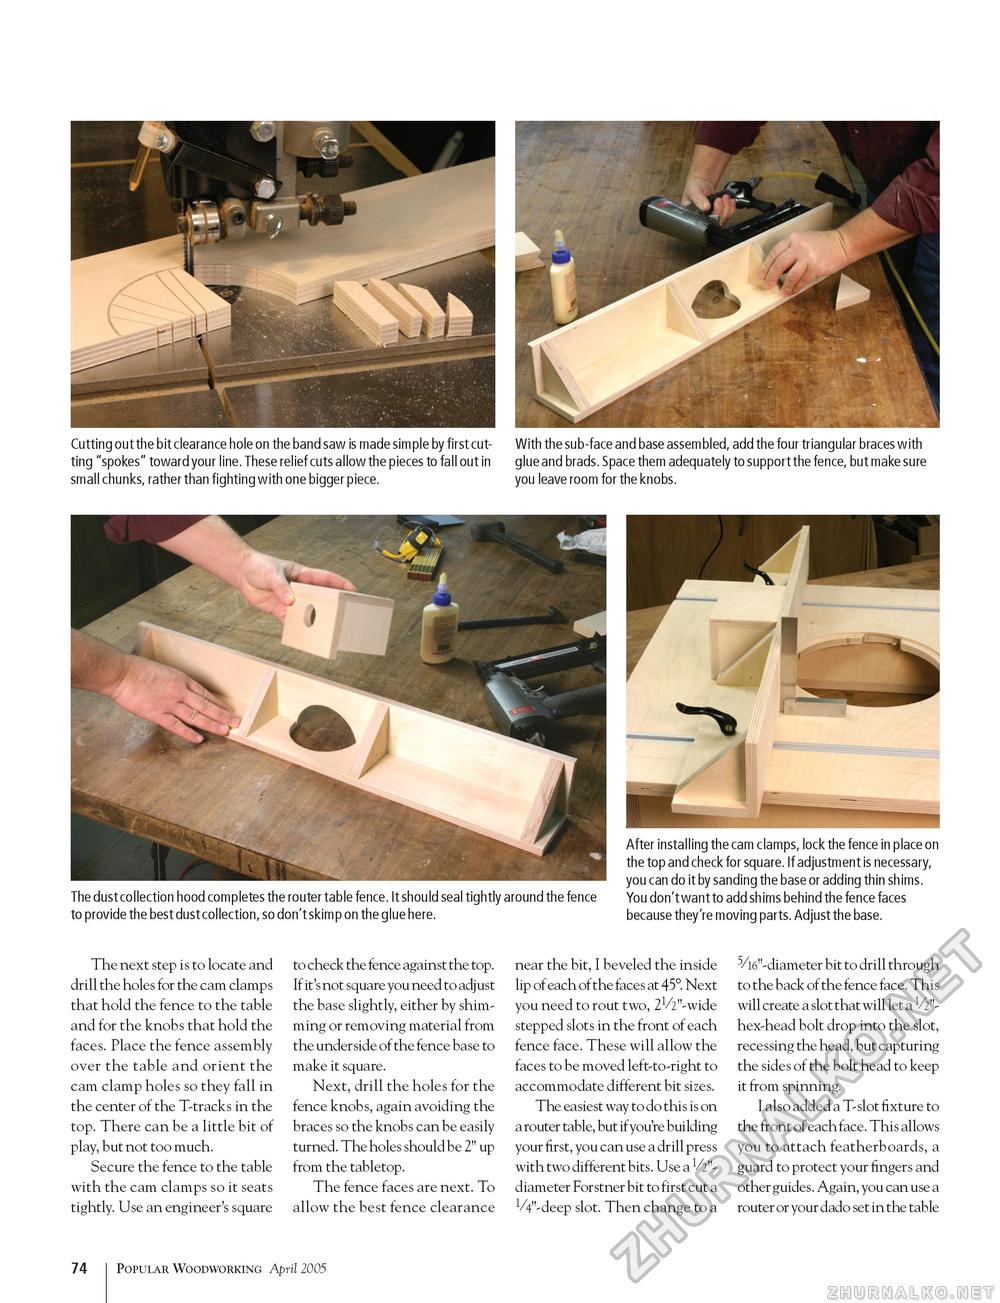
Cutting out the bit clearance hole on the band saw is made simple by first cut- With the sub-face and base assembled, add the four triangular braces with ting "spokes" toward your line. These relief cuts allow the pieces to fall out in glue and brads. Space them adequately to support the fence, but make sure small chunks, rather than fighting with one bigger piece. you leave room for the knobs. The dust collection hood completes the router table fence. It should seal tightly around the fence to provide the best dust collection, so don't skimp on the glue here. After installing the cam clamps, lock the fence in place on the top and check for square. If adjustment is necessary, you can do it by sanding the base or adding thin shims. You don't want to add shims behind the fence faces because they're moving parts. Adjust the base. The next step is to locate and drill the holes for the cam clamps that hold the fence to the table and for the knobs that hold the faces. Place the fence assembly over the table and orient the cam clamp holes so they fall in the center of the T-tracks in the top. There can be a little bit of play, but not too much. Secure the fence to the table with the cam clamps so it seats tightly. Use an engineer's square to check the fence against the top. If it's not square you need to adj ust the base slightly, either by shimming or removing material from the underside of the fence base to make it square. Next, drill the holes for the fence knobs, again avoiding the braces so the knobs can be easily turned. The holes should be 2" up from the tabletop. The fence faces are next. To allow the best fence clearance near the bit, I beveled the inside lip of each of the faces at 45°. Next you need to rout two, 21/2"-wide stepped slots in the front of each fence face. These will allow the faces to be moved left-to-right to accommodate different bit sizes. The easiest way to do this is on a router table, but if you're building your first, you can use a drill press with two different bits. Use a V2"-diameter Forstner bit to first cut a ^"-deep slot. Then change to a -diameter bit to drill through to the back of the fence face. This will create a slot that will let a hex-head bolt drop into the slot, recessing the head, but capturing the sides of the bolt head to keep it from spinning. I also added a T-slot fixture to the front of each face. This allows you to attach featherboards, a guard to protect your fingers and other guides. Again, you can use a router or your dado set in the table 74 1 Popular Woodworking April 2005 |


