Popular Woodworking 2005-04 № 147, страница 91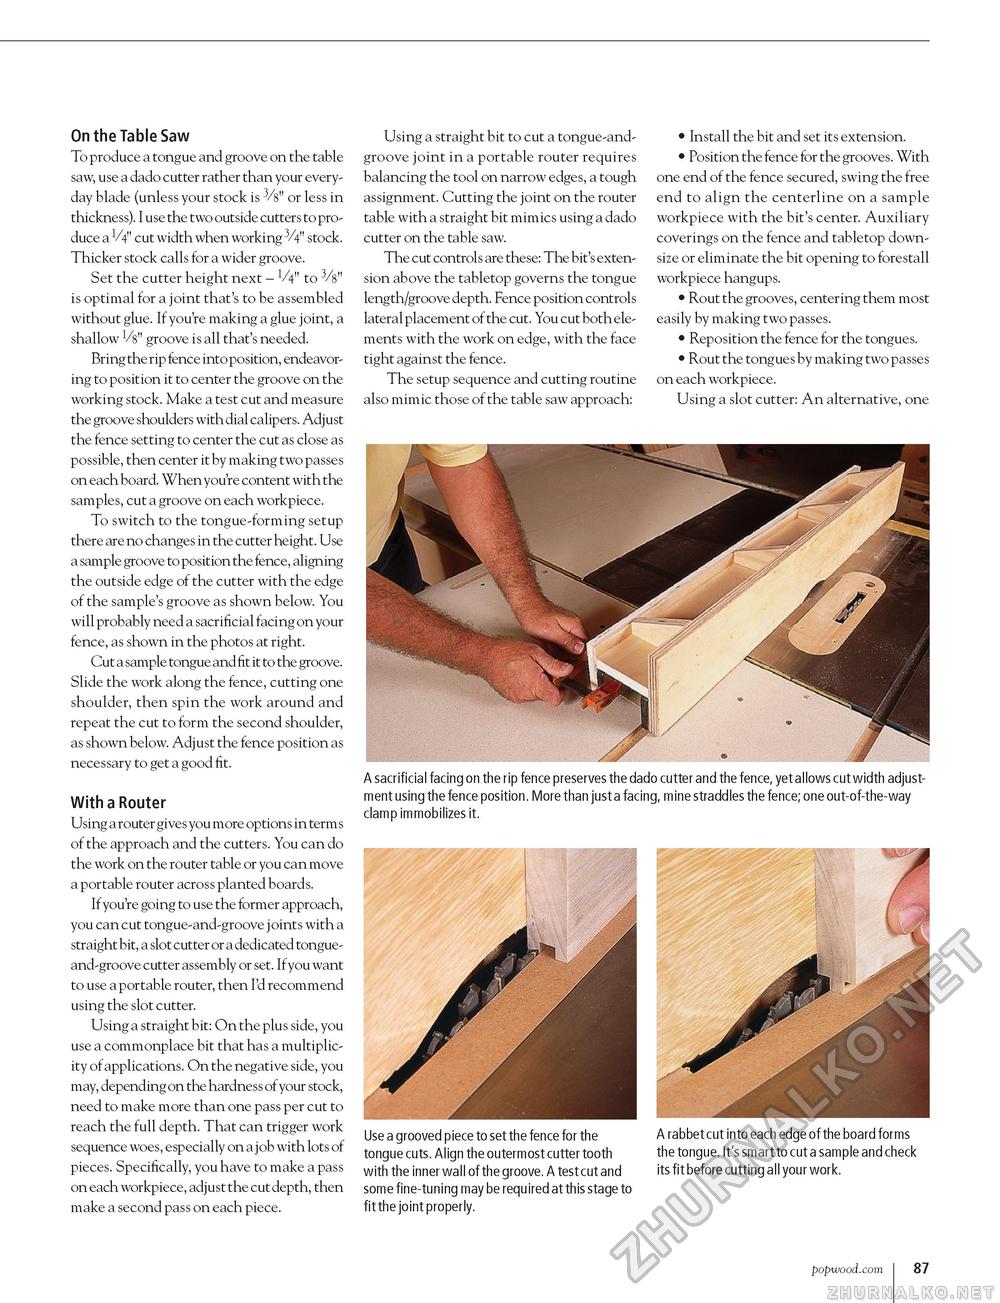
On the Table Saw To produce a tongue and groove on the table saw, use a dado cutter rather than your everyday blade (unless your stock is 3/8" or less in thickness). I use the two outside cutters to produce a V4" cut width when working 3/4" stock. Thicker stock calls for a wider groove. Set the cutter height next - V4" to 3/8" is optimal for a joint that's to be assembled without glue. If you're making a glue joint, a shallow V8" groove is all that's needed. Bring the rip fence into position, endeavoring to position it to center the groove on the working stock. Make a test cut and measure the groove shoulders with dial calipers. Adjust the fence setting to center the cut as close as possible, then center it by making two passes on each board. When you're content with the samples, cut a groove on each workpiece. To switch to the tongue-forming setup there are no changes in the cutter height. Use a sample groove to position the fence, aligning the outside edge of the cutter with the edge of the sample's groove as shown below. You will probably need a sacrificial facing on your fence, as shown in the photos at right. Cut a sample tongue and fit it to the groove. Slide the work along the fence, cutting one shoulder, then spin the work around and repeat the cut to form the second shoulder, as shown below. Adjust the fence position as necessary to get a good fit. With a Router Using a router gives you more options in term s of the approach and the cutters. You can do the work on the router table or you can move a portable router across planted boards. If you're going to use the former approach, you can cut tongue-and-groove j oints with a straight bit, a slot cutter or a dedicated tongue-and-groove cutter assembly or set. Ifyou want to use a portable router, then I'd recommend using the slot cutter. Using a straight bit: On the plus side, you use a commonplace bit that has a multiplicity of applications. On the negative side, you may, depending on the hardness of your stock, need to make more than one pass per cut to reach the full depth. That can trigger work sequence woes, especially on a job with lots of pieces. Specifically, you have to make a pass on each workpiece, adjust the cut depth, then make a second pass on each piece. Using a straight bit to cut a tongue-and-groove joint in a portable router requires balancing the tool on narrow edges, a tough assignment. Cutting the joint on the router table with a straight bit mimics using a dado cutter on the table saw. The cut controls are these: The bit's extension above the tabletop governs the tongue length/groove depth. Fence position controls lateral placement of the cut. You cut both elements with the work on edge, with the face tight against the fence. The setup sequence and cutting routine also mimic those of the table saw approach: • Install the bit and set its extension. • Position the fence for the grooves. With one end of the fence secured, swing the free end to align the centerline on a sample workpiece with the bit's center. Auxiliary coverings on the fence and tabletop downsize or eliminate the bit opening to forestall workpiece hangups. • Rout the grooves, centering them most easily by making two passes. • Reposition the fence for the tongues. • Rout the tongues by making two passes on each workpiece. Using a slot cutter: An alternative, one A sacrificial facing on the rip fence preserves the dado cutter and the fence, yet allows cut width adjustment using the fence position. More than just a facing, mine straddles the fence; one out-of-the-way clamp immobilizes it. Use a grooved piece to set the fence for the tongue cuts. Align the outermost cutter tooth with the inner wall of the groove. A test cut and some fine-tuning may be required at this stage to fit the joint properly. A rabbet cut into each edge of the board forms the tongue. It's smart to cut a sample and check its fit before cutting all your work. popwood.com 87 |


