Popular Woodworking 2005-04 № 147, страница 89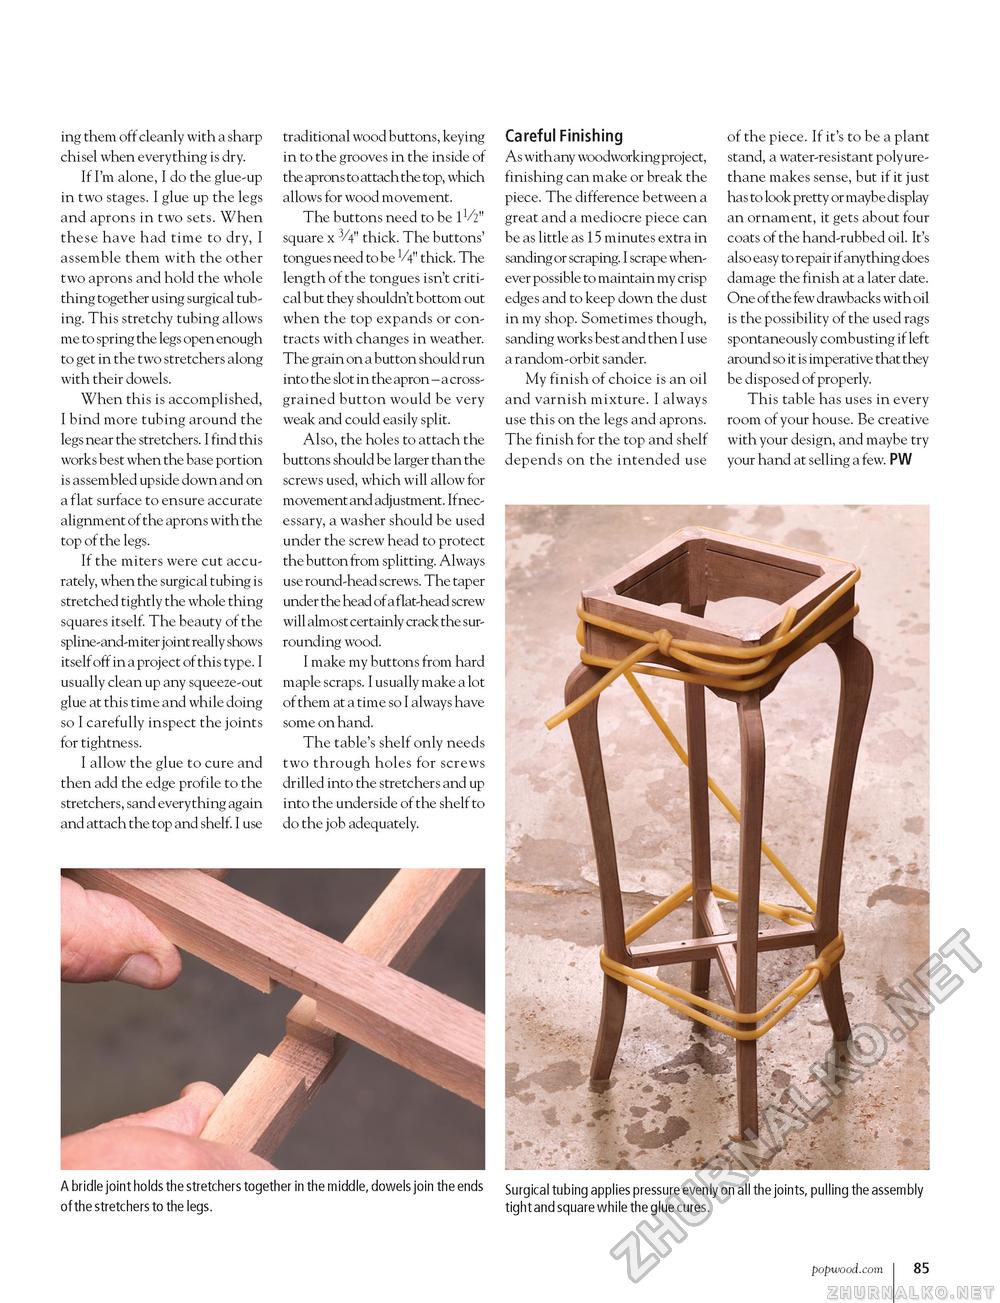
ing them off cleanly with a sharp chisel when everything is dry. If I'm alone, I do the glue-up in two stages. I glue up the legs and aprons in two sets. When these have had time to dry, I assemble them with the other two aprons and hold the whole thing together using surgical tubing. This stretchy tubing allows me to spring the legs open enough to get in the two stretchers along with their dowels. When this is accomplished, I bind more tubing around the legs near the stretchers. I find this works best when the base portion is assembled upside down and on a flat surface to ensure accurate alignment of the aprons with the top of the legs. If the miters were cut accurately, when the surgical tubing is stretched tightly the whole thing squares itself. The beauty of the spline-and-miter joint really shows itself off in a project of this type. I usually clean up any squeeze-out glue at this time and while doing so I carefully inspect the joints for tightness. I allow the glue to cure and then add the edge profile to the stretchers, sand everything again and attach the top and shelf. I use traditional wood buttons, keying in to the grooves in the inside of the aprons to attach the top, which allows for wood movement. The buttons need to be lV2" square x 3/4" thick. The buttons' tongues need to be V4" thick. The length of the tongues isn't critical but they shouldn't bottom out when the top expands or contracts with changes in weather. The grain on a button should run into the slot in the apron - a cross-grained button would be very weak and could easily split. Also, the holes to attach the buttons should be larger than the screws used, which will allow for movement and adjustment. Ifnec-essary, a washer should be used under the screw head to protect the button from splitting. Always use round-head screws. The taper under the head of a flat-head screw will almost certainly crack the surrounding wood. I make my buttons from hard maple scraps. I usually make a lot of them at a time so I always have some on hand. The table's shelf only needs two through holes for screws drilled into the stretchers and up into the underside of the shelf to do the job adequately. Careful Finishing As with any woodworking project, finishing can make or break the piece. The difference between a great and a mediocre piece can be as little as 15 minutes extra in sanding or scraping. I scrape whenever possible to maintain my crisp edges and to keep down the dust in my shop. Sometimes though, sanding works best and then I use a random-orbit sander. My finish of choice is an oil and varnish mixture. I always use this on the legs and aprons. The finish for the top and shelf depends on the intended use of the piece. If it's to be a plant stand, a water-resistant polyure-thane makes sense, but if it just has to look pretty or maybe display an ornament, it gets about four coats of the hand-rubbed oil. It's also easy to repair if anything does damage the finish at a later date. One of the few drawbacks with oil is the possibility of the used rags spontaneously combusting if left around so it is imperative that they be disposed of properly. This table has uses in every room of your house. Be creative with your design, and maybe try your hand at selling a few. PW A bridle joint holds the stretchers together in the middle, dowels join the ends of the stretchers to the legs. Surgical tubing applies pressure evenly on all the joints, pulling the assembly tight and square while the glue cures. popwood.com 85 |


