Popular Woodworking 2005-06 № 148, страница 30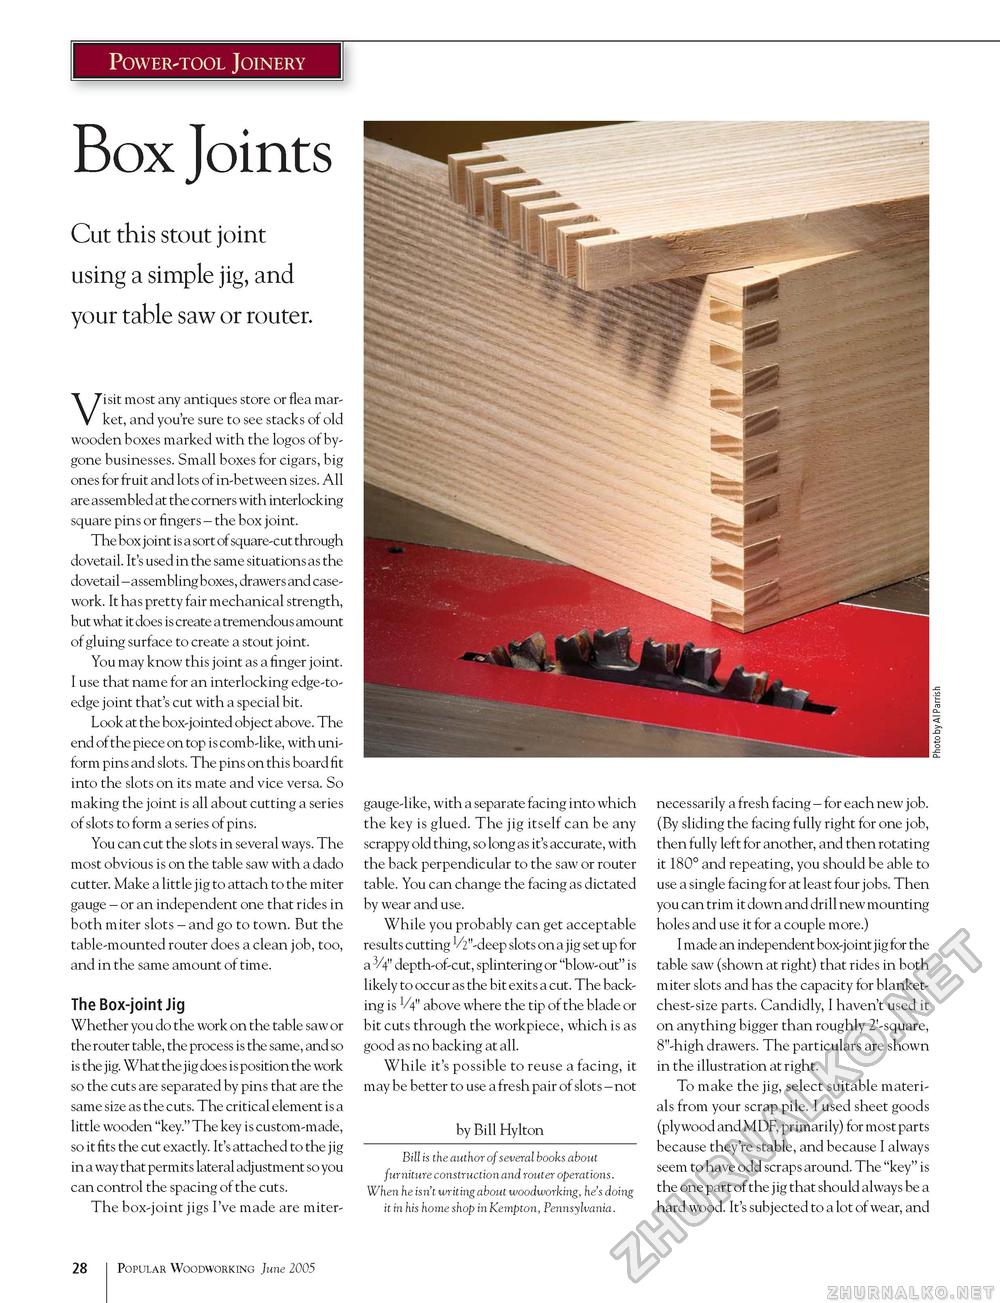
Power-tool Joinery Box Joints Cut this stout joint using a simple jig, and your table saw or router. Visit most any antiques store or flea market, and you're sure to see stacks of old wooden boxes marked with the logos of bygone businesses. Small boxes for cigars, big ones for fruit and lots of in-between sizes. All are assembled at the corners with interlocking square pins or fingers - the box joint. The box joint is a sort of square-cut through dovetail. It's used in the same situations as the dovetail - assembling boxes, drawers and casework. It has pretty fair mechanical strength, but what it does is create a tremendous amount of gluing surface to create a stout joint. You may know this joint as a finger joint. I use that name for an interlocking edge-to-edge joint that's cut with a special bit. Look at the box-jointed object above. The end of the piece on top is comb-like, with uniform pins and slots. The pins on this board fit into the slots on its mate and vice versa. So making the joint is all about cutting a series of slots to form a series of pins. You can cut the slots in several ways. The most obvious is on the table saw with a dado cutter. Make a little j ig to attach to the miter gauge - or an independent one that rides in both miter slots - and go to town. But the table-mounted router does a clean job, too, and in the same amount of time. The Box-joint Jig Whether you do the work on the table saw or the router table, the process is the same, and so is the jig. What the jig does is position the work so the cuts are separated by pins that are the same size as the cuts. The critical element is a little wooden "key." The key is custom-made, so it fits the cut exactly. It's attached to the j ig in a way that permits lateral adj ustment so you can control the spacing of the cuts. The box-joint jigs I've made are miter- gauge-like, with a separate facing into which the key is glued. The jig itself can be any scrappy old thing, so long as it's accurate, with the back perpendicular to the saw or router table. You can change the facing as dictated by wear and use. While you probably can get acceptable results cutting V2"-deep slots on a jig set up for a 3/4" depth-of-cut, splintering or "blow-out" is likely to occur as the bit exits a cut. The backing is V4" above where the tip of the blade or bit cuts through the workpiece, which is as good as no backing at all. While it's possible to reuse a facing, it may be better to use a fresh pair of slots - not by Bill Hylton Bill is the author of several books about furniture construction and router operations. When he isn't writing about woodworking, he's doing it in his home shop in Kempton, Pennsylvania. necessarily a fresh facing - for each new job. (By sliding the facing fully right for one job, then fully left for another, and then rotating it 180° and repeating, you should be able to use a single facing for at least four jobs. Then you can trim it down and drill new mounting holes and use it for a couple more.) I made an independent box-joint jig for the table saw (shown at right) that rides in both miter slots and has the capacity for blanket-chest-size parts. Candidly, I haven't used it on anything bigger than roughly 2'-square, 8"-high drawers. The particulars are shown in the illustration at right. To make the jig, select suitable materials from your scrap pile. I used sheet goods (plywood and MDF, primarily) for most parts because they're stable, and because I always seem to have odd scraps around. The "key" is the one part of the j ig that should always be a hard wood. It's subjected to a lot of wear, and 28 Popular Woodworking June 2005 |


