Popular Woodworking 2005-06 № 148, страница 32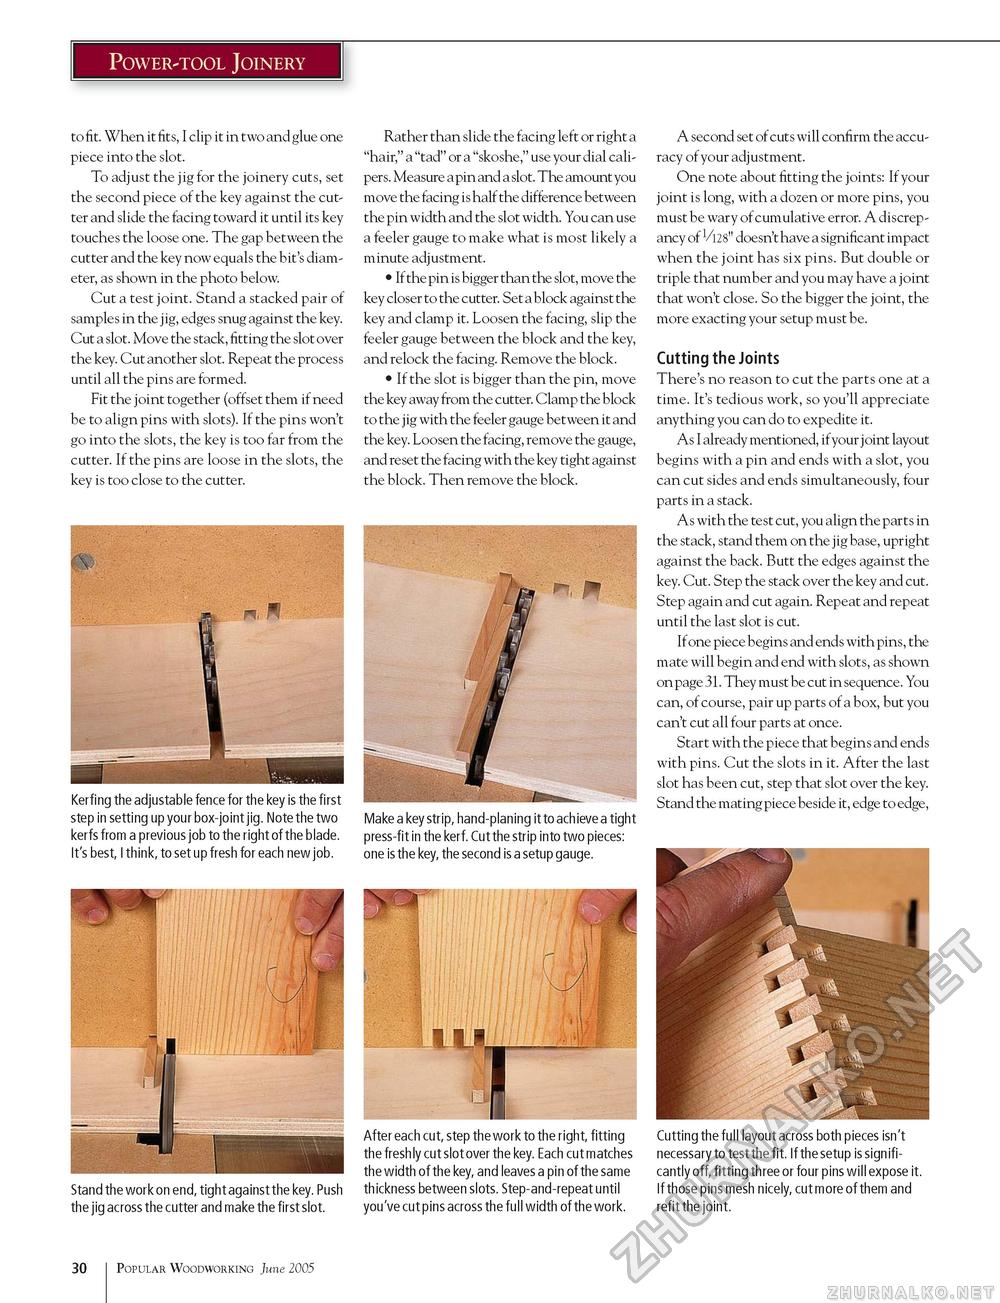
Power-tool Joinery to fit. When it fits, I clip it in two and glue one piece into the slot. To adjust the jig for the joinery cuts, set the second piece of the key against the cutter and slide the facing toward it until its key touches the loose one. The gap between the cutter and the key now equals the bit's diameter, as shown in the photo below. Cut a test joint. Stand a stacked pair of samples in the jig, edges snug against the key. Cut a slot. Move the stack, fitting the slot over the key. Cut another slot. Repeat the process until all the pins are formed. Fit the joint together (offset them if need be to align pins with slots). If the pins won't go into the slots, the key is too far from the cutter. If the pins are loose in the slots, the key is too close to the cutter. Kerfing the adjustable fence for the key is the first step in setting up your box-joint jig. Note the two kerfs from a previous job to the right of the blade. It's best, I think, to set up fresh for each new job. Stand the work on end, tight against the key. Push the jig across the cutter and make the first slot. Rather than slide the facing left or right a "hair," a "tad" or a "skoshe," use your dial calipers. Measure a pin and a slot. The amount you move the facing is half the difference between the pin width and the slot width. You can use a feeler gauge to make what is most likely a minute adjustment. • If the pin is bigger than the slot, move the key closer to the cutter. Set a block against the key and clamp it. Loosen the facing, slip the feeler gauge between the block and the key, and relock the facing. Remove the block. • If the slot is bigger than the pin, move the key away from the cutter. Clamp the block to the jig with the feeler gauge between it and the key. Loosen the facing, remove the gauge, and re set the facing with the key tight against the block. Then remove the block. Make a key strip, hand-planing it to ach ieve a tight press-fit in the kerf. Cut the strip into two pieces: one is the key, the second is a setup gauge. After each cut, step the work to the right, fitting the freshly cut slot over the key. Each cut matches the width of the key, and leaves a pin of the same thickness between slots. Step-and-repeat until you've cut pins across the full width of the work. A second set of cuts will confirm the accuracy of your adjustment. One note about fitting the joints: If your joint is long, with a dozen or more pins, you must be wary of cumulative error. A discrepancy of Vl28" doesn't have a significant impact when the joint has six pins. But double or triple that number and you may have a joint that won't close. So the bigger the joint, the more exacting your setup must be. Cutting the Joints There's no reason to cut the parts one at a time. It's tedious work, so you'll appreciate anything you can do to expedite it. As I already mentioned, if your joint layout begins with a pin and ends with a slot, you can cut sides and ends simultaneously, four parts in a stack. As with the test cut, you align the parts in the stack, stand them on the jig base, upright against the back. Butt the edges against the key. Cut. Step the stack over the key and cut. Step again and cut again. Repeat and repeat until the last slot is cut. If one piece begins and ends with pins, the mate will begin and end with slots, as shown on page 31. They must be cut in sequence. You can, of course, pair up parts of a box, but you can't cut all four parts at once. Start with the piece that begins and ends with pins. Cut the slots in it. After the last slot has been cut, step that slot over the key. Stand the mating piece beside it, edge to edge, Cutting the full layout across both pieces isn't necessary to test the fit. If the setup is sign ifi-cantly off, fitting three or four pins will expose it. If those pins mesh nicely, cut more of them and refit the joint. 30 Popular Woodworking June 2005 |


