Popular Woodworking 2005-06 № 148, страница 74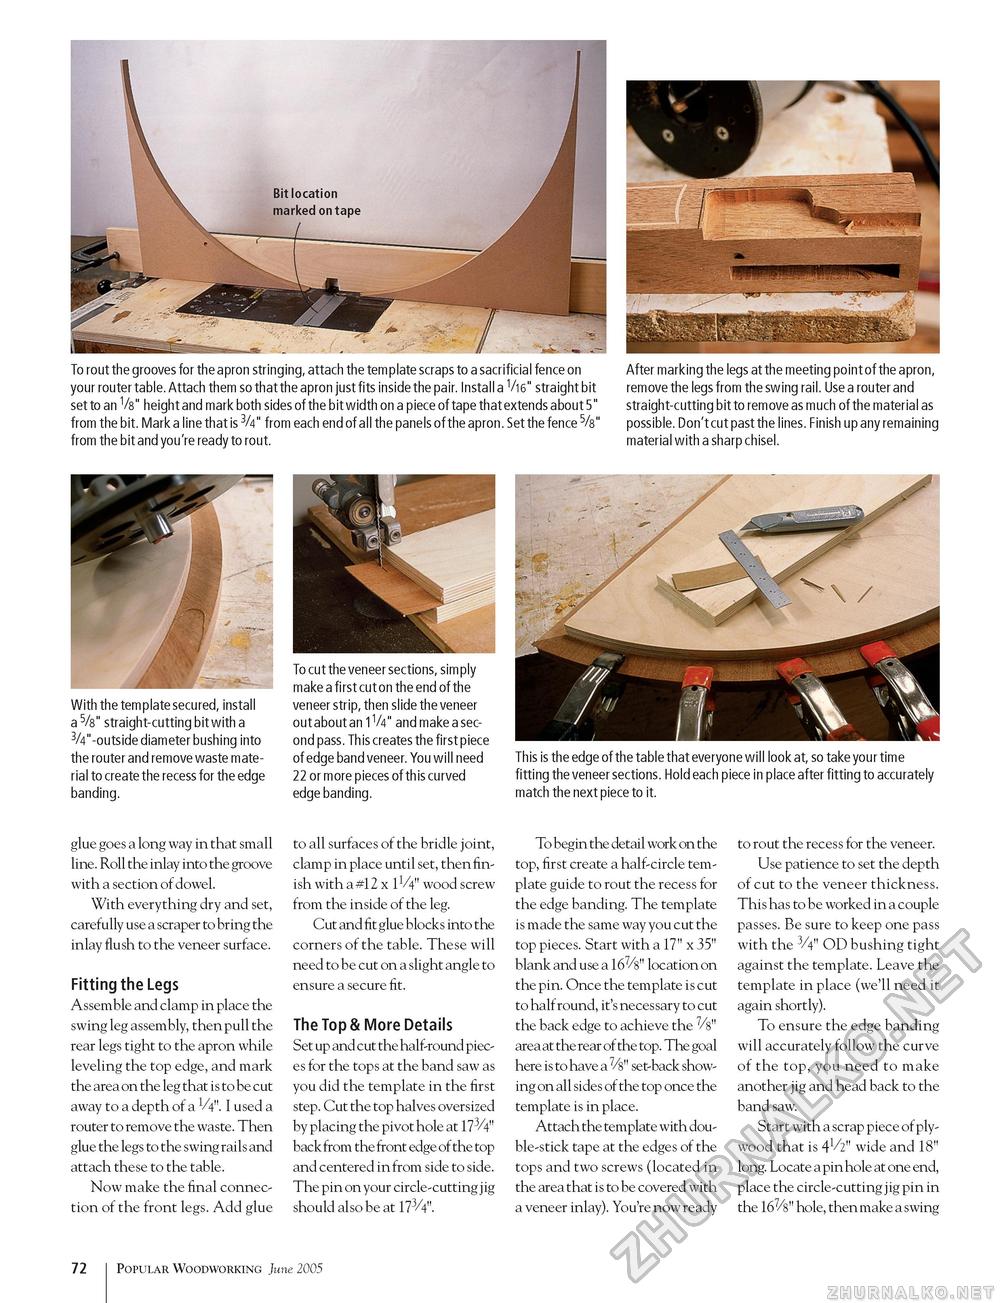
To rout the grooves for the apron stringing, attach the template scraps to a sacrificial fence on your router table. Attach them so that the apron just fits inside the pair. Install a V16" straight bit set to an V8" height and mark both sides of the bit width on a piece of tape that extends about 5" from the bit. Mark a line that is 3/4" from each end of all the panels of the apron. Set the fence 5/8" from the bit and you're ready to rout. After marking the legs at the meeting point of the apron, remove the legs from the swing rail. Use a router and straight-cutting bit to remove as much of the material as possible. Don't cut past the lines. Finish up any remaining material with a sharp chisel. With the template secured, install a 5/8" straight-cutting bit with a 3/4"-outside diameter bushing into the router and remove waste material to create the recess for the edge banding. To cut the veneer sections, simply make a first cut on the end of the veneer strip, then slide the veneer out about an 1V4" and make a second pass. This creates the first piece of edge band veneer. You will need 22 or more pieces of this cu rved edge banding. This is the edge of the table that everyone will look at, so take your time fitting the veneer sections. Hold each piece in place after fitting to accurately match the next piece to it. glue goes a long way in that small line. Roll the inlay into the groove with a section of dowel. With everything dry and set, carefully use a scraper to bring the inlay flush to the veneer surface. Fitting the Legs Assemble and clamp in place the swing leg assembly, then pull the rear legs tight to the apron while leveling the top edge, and mark the area on the leg that is to be cut away to a depth of a V4". I used a router to remove the waste. Then glue the legs to the swing rails and attach these to the table. Now make the final connection of the front legs. Add glue to all surfaces of the bridle joint, clamp in place until set, then finish with a #12 x 11/4" wood screw from the inside of the leg. Cut and fit glue blocks into the corners of the table. These will need to be cut on a slight angle to ensure a secure fit. The Top & More Details Set up and cut the half-round pieces for the tops at the band saw as you did the template in the first step. Cut the top halves oversized by placing the pivot hole at 173/4" back from the front edge of the top and centered in from side to side. The pin on your circle-cutting j ig should also be at 173/4". To begin the detail work on the top, first create a half-circle template guide to rout the recess for the edge banding. The template is made the same way you cut the top pieces. Start with a 17" x 35" blank and use a 167/8" location on the pin. Once the template is cut to half round, it's necessary to cut the back edge to achieve the 7/8" area at the rear of the top. The goal here is to have a 7/8" set-back showing on all sides of the top once the template is in place. Attach the template with double-stick tape at the edges of the tops and two screws (located in the area that is to be covered with a veneer inlay). You're now ready to rout the recess for the veneer. Use patience to set the depth of cut to the veneer thickness. This has to be worked in a couple passes. Be sure to keep one pass with the 3/4" OD bushing tight against the template. Leave the template in place (we'll need it again shortly). To ensure the edge banding will accurately follow the curve of the top, you need to make another jig and head back to the band saw. Start with a scrap piece of plywood that is 41/2" wide and 18" long. Locate a pin hole at one end, place the circle-cutting jig pin in the 167/8" hole, then make a swing 72 Popular Woodworking June 2005 |


