Popular Woodworking 2005-08 № 149, страница 44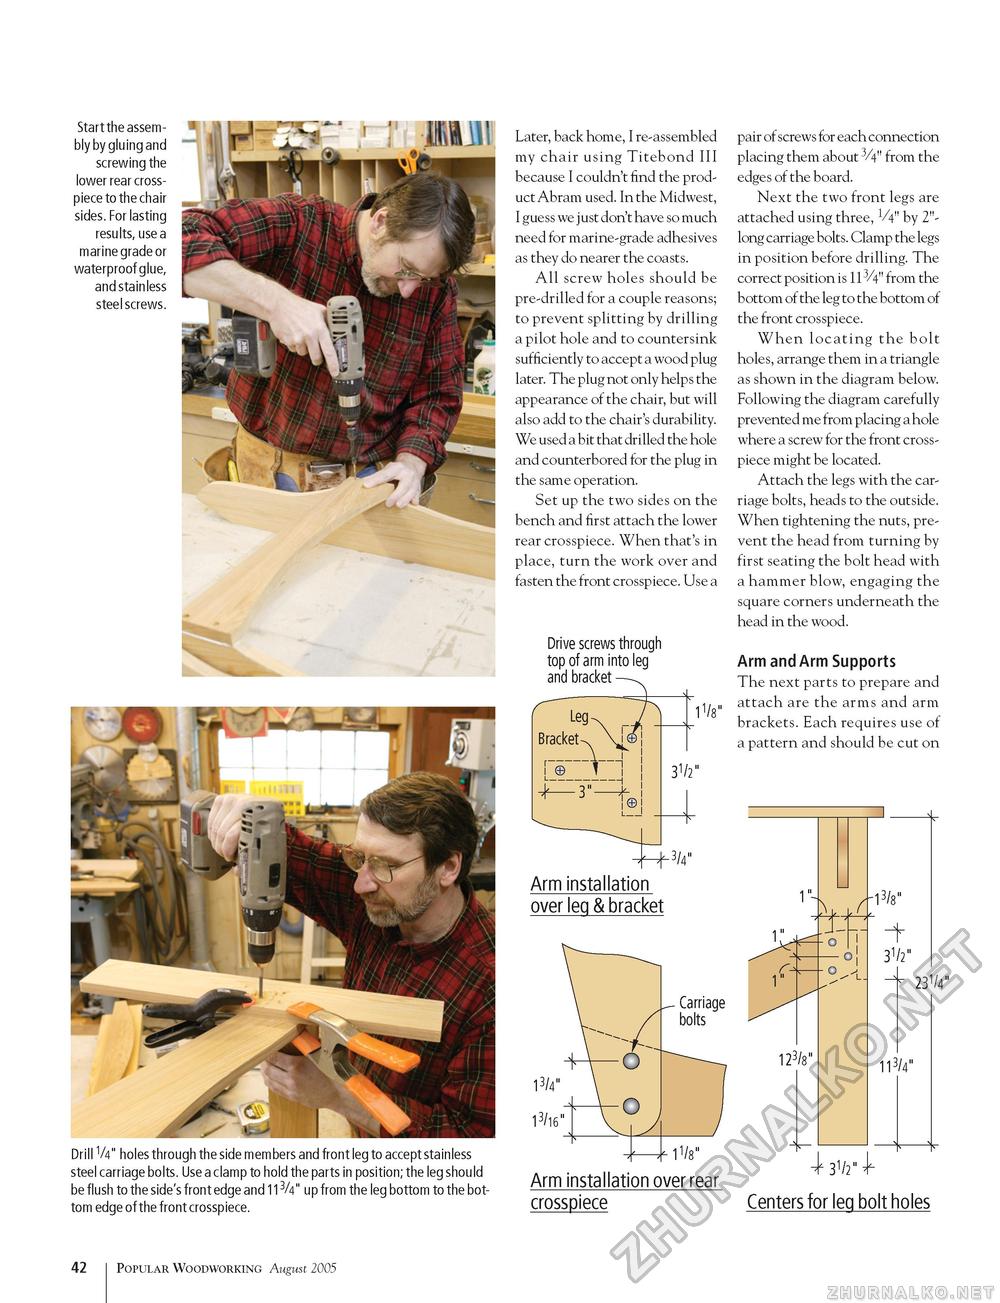
Start the assembly by gluing and screwing the lower rear cross-piece to the chair sides. For lasting results, use a marine grade or waterproof glue, and stainless steel screws. Later, back home, I re-assembled my chair using Titebond III because I couldn't find the product Abram used. In the Midwest, I guess we just don't have so much need for marine-grade adhesives as they do nearer the coasts. All screw holes should be pre-drilled for a couple reasons; to prevent splitting by drilling a pilot hole and to countersink sufficiently to accept a wood plug later. The plug not only helps the appearance of the chair, but will also add to the chair's durability. We used a bit that drilled the hole and counterbored for the plug in the same operation. Set up the two sides on the bench and first attach the lower rear crosspiece. When that's in place, turn the work over and fasten the front crosspiece. Use a Drive screws through topofarm into leg and bracket pair of screws for each connection placing them about 3/4" from the edges of the board. Next the two front legs are attached using three, 1A" by 2"-long carriage bolts. Clamp the legs in position before drilling. The correct position is 113/4" from the bottom of the leg to the bottom of the front crosspiece. When locating the bolt holes, arrange them in a triangle as shown in the diagram below. Following the diagram carefully prevented me from placing a hole where a screw for the front cross-piece might be located. Attach the legs with the carriage bolts, heads to the outside. When tightening the nuts, prevent the head from turning by first seating the bolt head with a hammer blow, engaging the square corners underneath the head in the wood. Arm and Arm Supports The next parts to prepare and attach are the arms and arm brackets. Each requires use of a pattern and should be cut on Drill V4" holes through the side members and front leg to accept stainless steel carriage bolts. Use a clamp to hold the parts in position; the leg should be flush to the side's front edge and 113/4" up from the leg bottom to the bottom edge of the front crosspiece. 23V4" Arm installation over rear crosspiece Centers for leg bolt holes 42 Popular Woodworking August 2005 |


