Popular Woodworking 2005-08 № 149, страница 58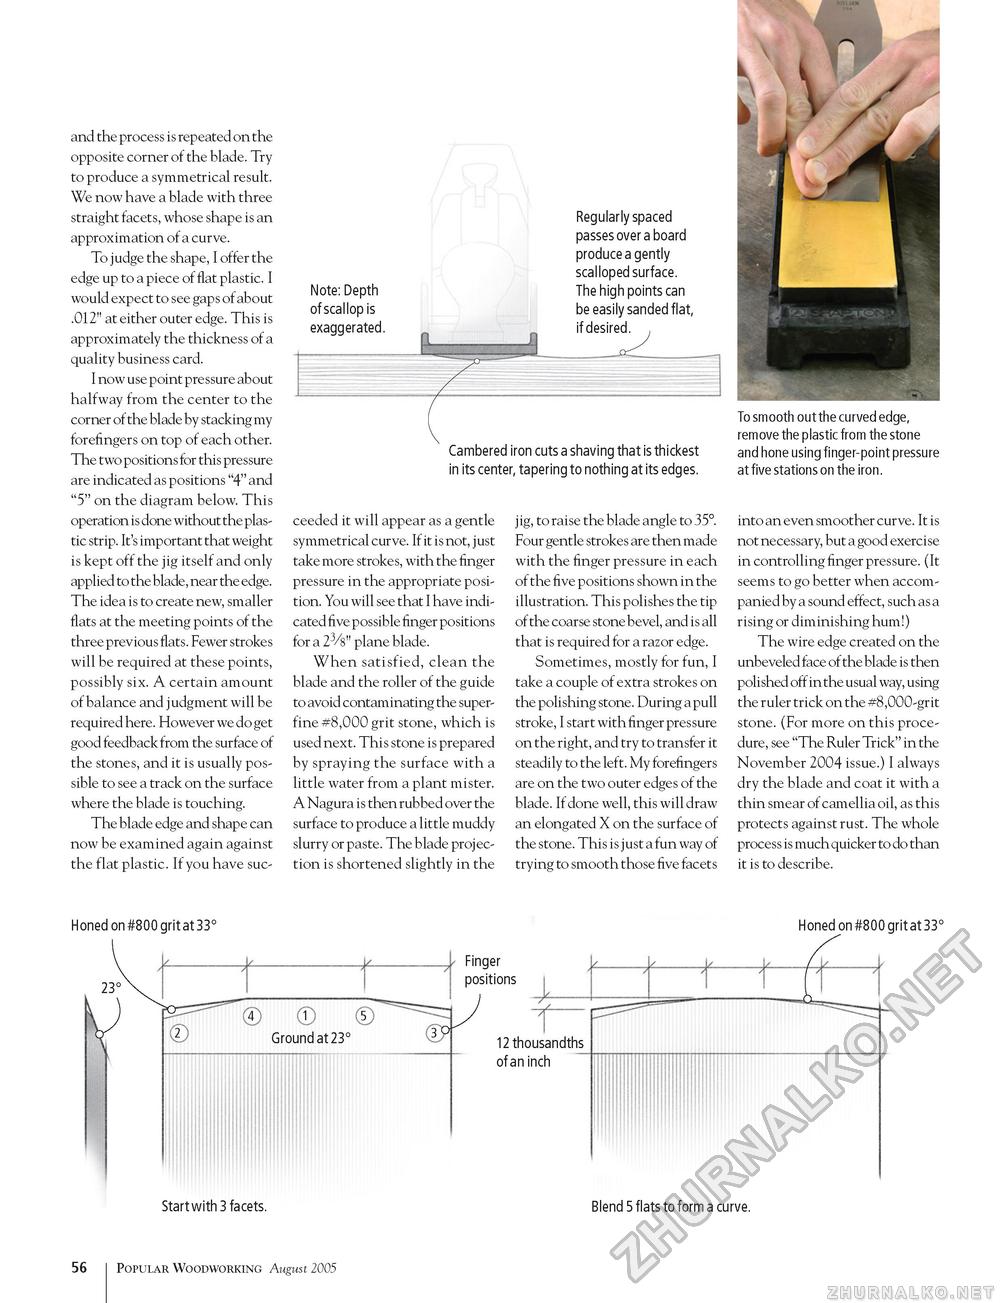
Note: Depth of scallop is exaggerated Regularly spaced passes over a board produce a gently scalloped surface. The high points can be easily sanded flat, if desired. Cambered iron cuts a shaving that is thickest in its center, tapering to nothing at its edges. and the process is repeated on the opposite corner of the blade. Try to produce a symmetrical result. We now have a blade with three straight facets, whose shape is an approximation of a curve. To judge the shape, I offer the edge up to a piece of flat plastic. I would expect to see gaps of about .012" at either outer edge. This is approximately the thickness of a quality business card. I now use point pressure about halfway from the center to the corner of the blade by stacking my forefingers on top of each other. The two positions for this pressure are indicated as positions "4" and "5" on the diagram below. This operation is done without the plastic strip. It's important that weight is kept off the jig itself and only applied to the blade, near the edge. The idea is to create new, smaller flats at the meeting points of the three previous flats. Fewer strokes will be required at these points, possibly six. A certain amount of balance and judgment will be required here. However we do get good feedback from the surface of the stones, and it is usually possible to see a track on the surface where the blade is touching. The blade edge and shape can now be examined again against the flat plastic. If you have suc- ceeded it will appear as a gentle symmetrical curve. If it is not, just take more strokes, with the finger pressure in the appropriate position. You will see that I have indicated five possible finger positions for a 23/8" plane blade. When satisfied, clean the blade and the roller of the guide to avoid contaminating the superfine #8,000 grit stone, which is used next. This stone is prepared by spraying the surface with a little water from a plant mister. A Nagura is then rubbed over the surface to produce a little muddy slurry or paste. The blade proj ec-tion is shortened slightly in the j ig, to raise the blade angle to 35°. Four gentle strokes are then made with the finger pressure in each of the five positions shown in the illustration. This polishes the tip of the coarse stone bevel, and is all that is required for a razor edge. Sometimes, mostly for fun, I take a couple of extra strokes on the polishing stone. During a pull stroke, I start with finger pressure on the right, and try to transfer it steadily to the left. My forefingers are on the two outer edges of the blade. If done well, this will draw an elongated X on the surface of the stone. This is just a fun way of trying to smooth those five facets To smooth out the curved edge, remove the plastic from the stone and hone using finger-point pressure at five stations on the iron. into an even smoother curve. It is not necessary, but a good exercise in controlling finger pressure. (It seems to go better when accompanied by a sound effect, such as a rising or diminishing hum!) The wire edge created on the unbeveled face of the blade is then polished off in the usual way, using the ruler trick on the #8,000-grit stone. (For more on this procedure, see "The Ruler Trick" in the November 2004 issue.) I always dry the blade and coat it with a thin smear of camellia oil, as this protects against rust. The whole process is much quicker to do than it is to describe. Honed on #800 grit at 33° Honed on #800 grit at 33°
4 1 5 Ground at 23° Finger positions 3o 12 thousandths of an inch IIII Start with 3 facets. Blend 5 flats to form a curve. 56 Popular Woodworking August 2005 |


