Popular Woodworking 2005-08 № 149, страница 60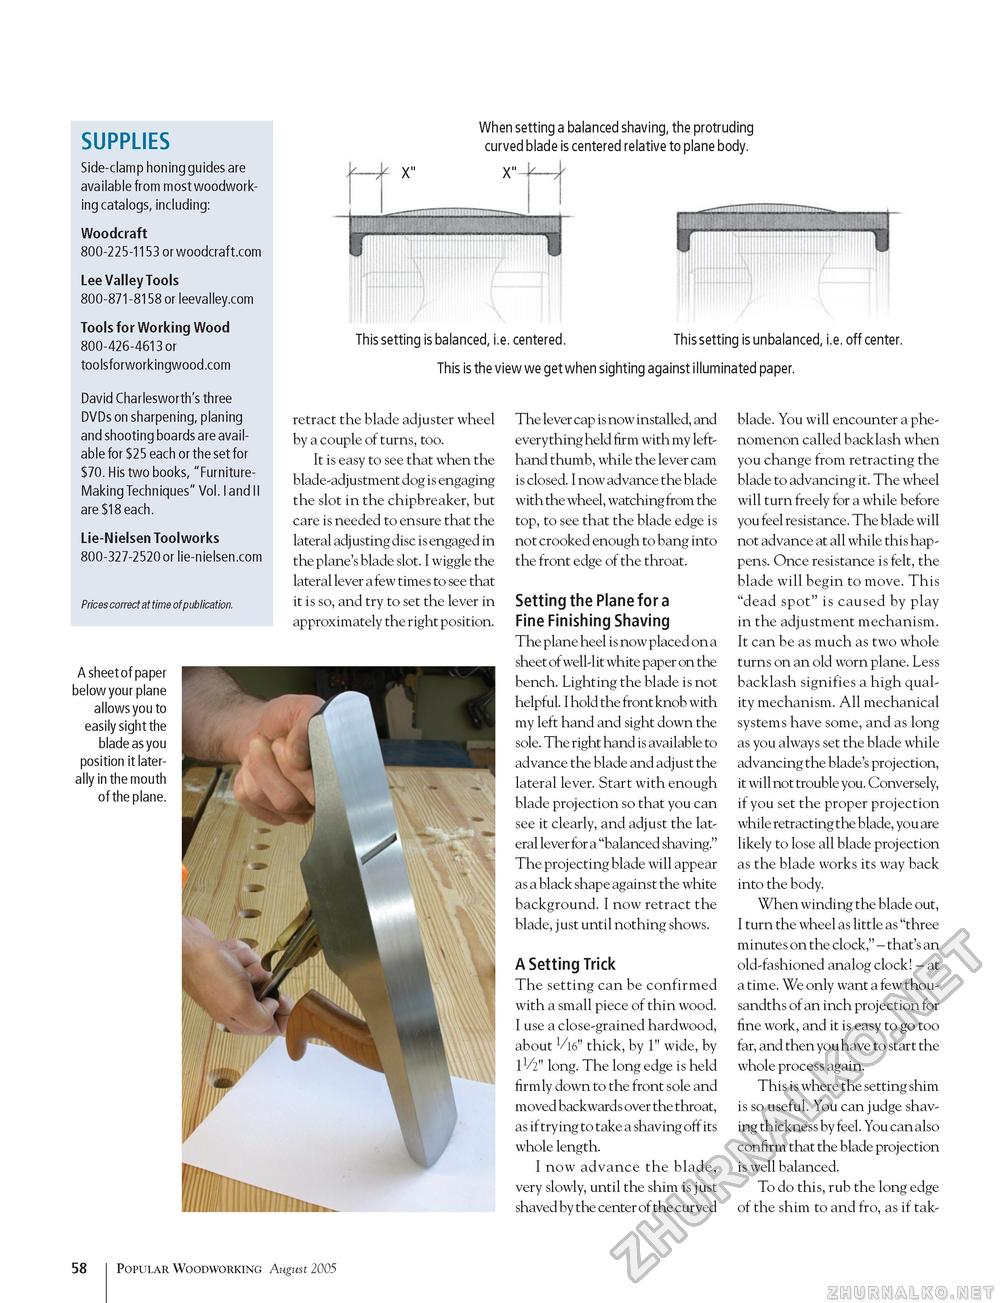
SUPPLIES Side-clamp honing guides are available from most woodworking catalogs, including: Woodcraft 800-225-1153 or woodcraft.com Lee Valley Tools 800-871-8158 or leevalley.com Tools for Working Wood 800-426-4613 or toolsforworkingwood.com David Charlesworth's three DVDs on sharpening, planing and shooting boards are available for $25 each or the set for $70. His two books, "Furniture-Making Techniques" Vol. I and II are $18 each. Lie-Nielsen Toolworks 800-327-2520 or lie-nielsen.com Prices correct at time of publication. When setting a balanced shaving, the protruding curved blade is centered relative to plane body. This setting is balanced, i.e. centered. This setting is unbalanced, i.e. off center. This is the view we get when sighting against illuminated paper. retract the blade adjuster wheel by a couple of turns, too. It is easy to see that when the blade-adjustment dog is engaging the slot in the chipbreaker, but care is needed to ensure that the lateral adjusting disc is engaged in the plane's blade slot. I wiggle the lateral lever a few times to see that it is so, and try to set the lever in approximately the right position. A sheetof paper below your plane allows you to easily sight the blade as you position it laterally in the mouth of the plane. The lever cap is now installed, and everything held firm with my left-hand thumb, while the lever cam is closed. I now advance the blade with the wheel, watching from the top, to see that the blade edge is not crooked enough to bang into the front edge of the throat. Setting the Plane for a Fine Finishing Shaving The plane heel is now placed on a sheet of well-lit white paper on the bench. Lighting the blade is not helpful. I hold the front knob with my left hand and sight down the sole. The right hand is available to advance the blade and adjust the lateral lever. Start with enough blade projection so that you can see it clearly, and adjust the lateral lever for a "balanced shaving." The projecting blade will appear as a black shape against the white background. I now retract the blade, just until nothing shows. A Setting Trick The setting can be confirmed with a small piece of thin wood. I use a close-grained hardwood, about n16" thick, by 1" wide, by 1V2" long. The long edge is held firmly down to the front sole and moved backwards over the throat, as if trying to take a shaving off its whole length. I now advance the blade, very slowly, until the shim is just shaved by the center of the curved blade. You will encounter a phenomenon called backlash when you change from retracting the blade to advancing it. The wheel will turn freely for a while before you feel resistance. The blade will not advance at all while this happens. Once resistance is felt, the blade will begin to move. This "dead spot" is caused by play in the adjustment mechanism. It can be as much as two whole turns on an old worn plane. Less backlash signifies a high quality mechanism. All mechanical systems have some, and as long as you always set the blade while advancing the blade's projection, it will not trouble you. Conversely, if you set the proper projection while retracting the blade, you are likely to lose all blade projection as the blade works its way back into the body. When winding the blade out, I turn the wheel as little as "three minutes on the clock," - that's an old-fashioned analog clock! - at a time. We only want a few thousandths of an inch projection for fine work, and it is easy to go too far, and then you have to start the whole process again. This is where the setting shim is so useful. You can judge shaving thickness by feel. You can also confirm that the blade projection is well balanced. To do this, rub the long edge of the shim to and fro, as if tak- 58 Popular Woodworking August 2005 |


