Popular Woodworking 2005-08 № 149, страница 80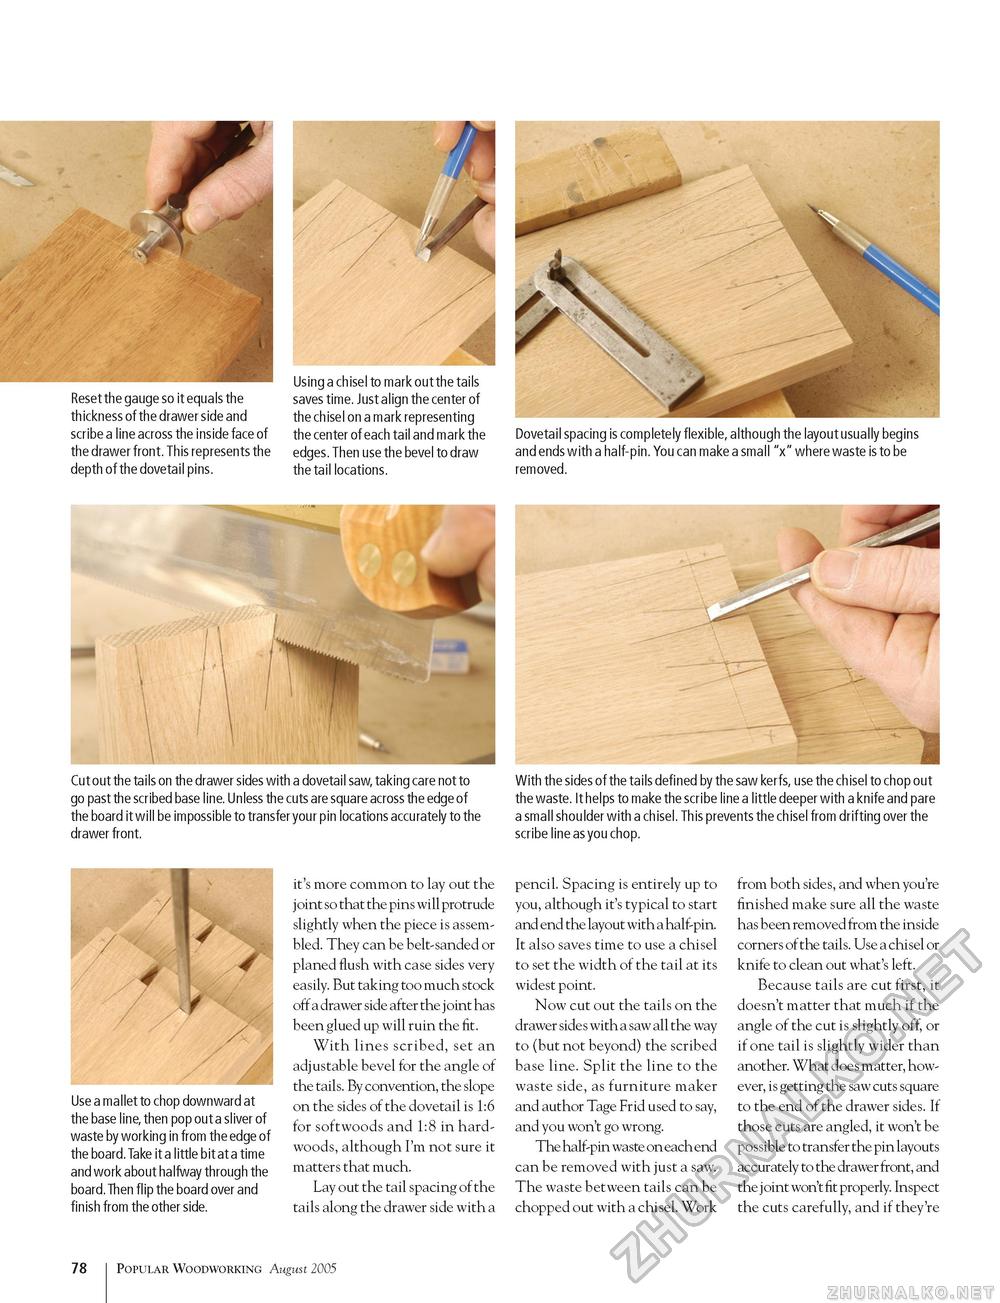
Reset the gauge so it equals the th ickness of the drawer side and scribe a line across the inside face of the drawer front. This represents the depth of the dovetail pins. Using a chisel to mark out the tails saves time. Just align the center of the chisel on a mark representing the center of each tail and mark the edges. Then use the bevel to draw the tail locations. Dovetail spacing is completely flexible, although the layout usually begins and ends with a half-pin. You can make a small "x" where waste is to be removed. Cut out the tails on the drawer sides with a dovetail saw, taking care not to With the sides of the tails defined by the saw kerfs, use the chisel to chop out go past the scribed base line. Unless the cuts are square across the edge of the waste. It helps to make the scribe line a little deeper with a knife and pare the board it will be impossible to transfer your pin locations accurately to the a small shoulder with a chisel. This prevents the chisel from drifting over the drawer front. scribe line as you chop. Use a mallet to chop downward at the base line, then pop out a sliver of waste by working in from the edge of the board. Take it a little bit at a time and work about halfway through the board. Then flip the board over and finish from the other side. it's more common to lay out the j oint so that the pins will protrude slightly when the piece is assembled. They can be belt-sanded or planed flush with case sides very easily. But taking too much stock off a drawer side after the j oint has been glued up will ruin the fit. With lines scribed, set an adjustable bevel for the angle of the tails. By convention, the slope on the sides of the dovetail is 1:6 for softwoods and 1:8 in hardwoods, although I'm not sure it matters that much. Lay out the tail spacing of the tails along the drawer side with a pencil. Spacing is entirely up to you, although it's typical to start and end the layout with a half-pin. It also saves time to use a chisel to set the width of the tail at its widest point. Now cut out the tails on the drawer side s with a saw all the way to (but not beyond) the scribed base line. Split the line to the waste side, as furniture maker and author Tage Frid used to say, and you won't go wrong. The half-pin waste on each end can be removed with just a saw. The waste between tails can be chopped out with a chisel. Work from both sides, and when you're finished make sure all the waste has been removed from the inside corners of the tails. Use a chisel or knife to clean out what's left. Because tails are cut first, it doesn't matter that much if the angle of the cut is slightly off, or if one tail is slightly wider than another. What does matter, however, is getting the saw cuts square to the end of the drawer sides. If those cuts are angled, it won't be possible to transfer the pin layouts accurately to the drawer front, and the joint won't fit properly. Inspect the cuts carefully, and if they're 78 Popular Woodworking August 2005 |


