Popular Woodworking 2005-08 № 149, страница 81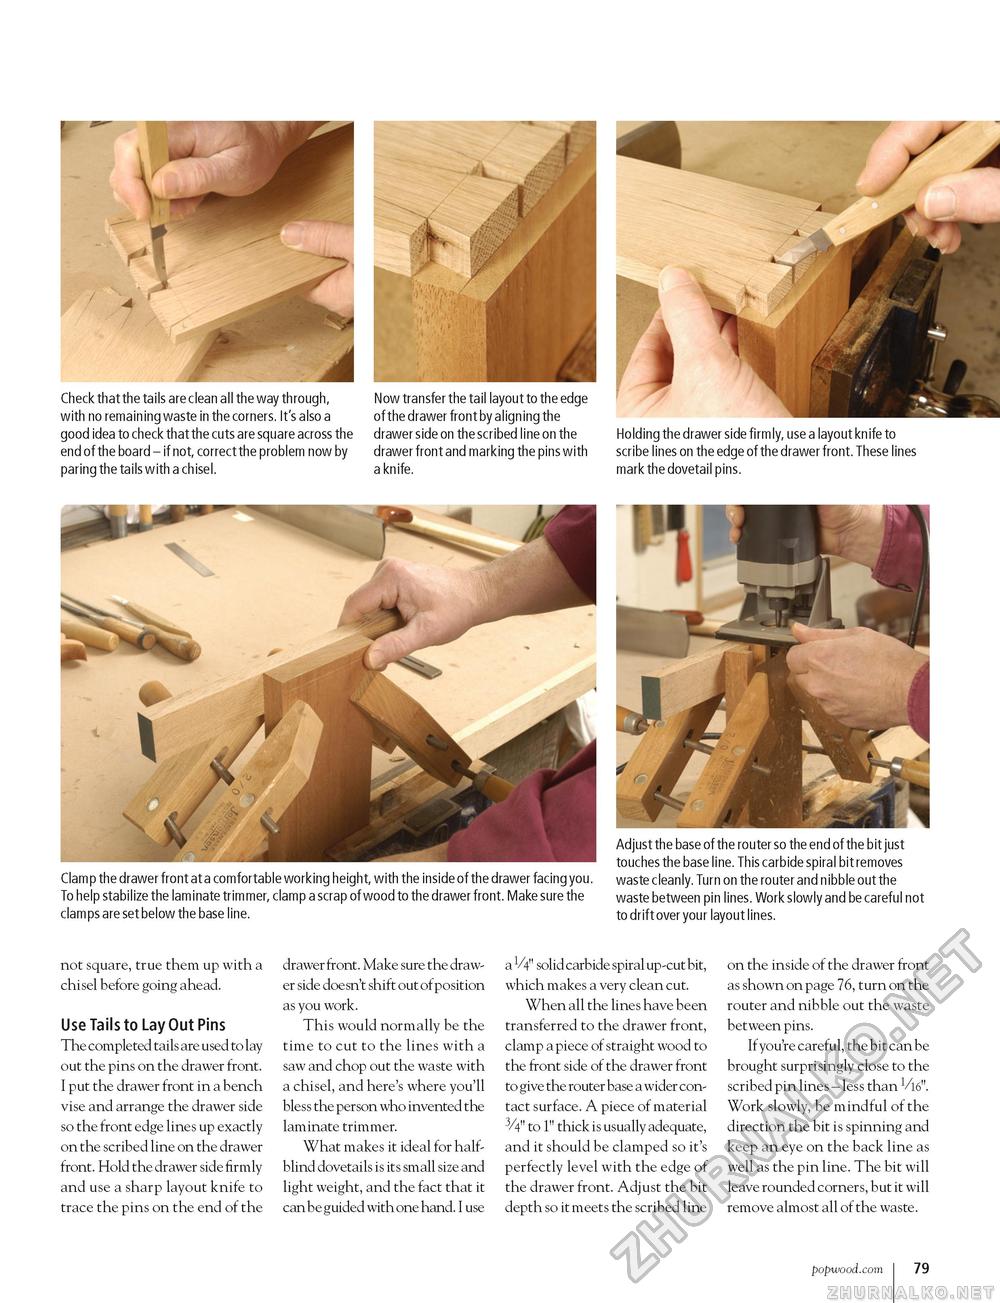
Check that the tails are clean all the way through, with no remaining waste in the corners. It's also a good idea to check that the cuts are square across the end of the board - if not, correct the problem now by paring the tails with a chisel. Now transfer the tail layout to the edge of the drawer front by aligning the drawer side on the scribed line on the drawer front and marking the pins with a knife. Holding the drawer side firmly, use a layout knife to scribe lines on the edge of the drawer front. These lines mark the dovetail pins. Clamp the drawer front at a comfortable working height, with the inside of the drawer facing you. To help stabilize the laminate trimmer, clamp a scrap of wood to the drawer front. Make sure the clamps are set below the base line. Adjust the base of the router so the end of the bit just touches the base line. This carbide spiral bit removes waste cleanly. Turn on the router and nibble out the waste between pin lines. Work slowly and be careful not to drift over your layout lines. not square, true them up with a chisel before going ahead. Use Tails to Lay Out Pins The completed tails are used to lay out the pins on the drawer front. I put the drawer front in a bench vise and arrange the drawer side so the front edge lines up exactly on the scribed line on the drawer front. Hold the drawer side firmly and use a sharp layout knife to trace the pins on the end of the drawer front. Make sure the drawer side doesn't shift out of position as you work. This would normally be the time to cut to the lines with a saw and chop out the waste with a chisel, and here's where you'll bless the person who invented the laminate trimmer. What makes it ideal for half-blind dovetails is its small size and light weight, and the fact that it can be guided with one hand. I use a V4" solid carbide spiral up-cut bit, which makes a very clean cut. When all the lines have been transferred to the drawer front, clamp a piece of straight wood to the front side of the drawer front to give the router base a wider contact surface. A piece of material 3/4" to 1" thick is usually adequate, and it should be clamped so it's perfectly level with the edge of the drawer front. Adjust the bit depth so it meets the scribed line on the inside of the drawer front as shown on page 76, turn on the router and nibble out the waste between pins. If you're careful, the bit can be brought surprisingly close to the scribed pin lines - less than Vl6". Work slowly, be mindful of the direction the bit is spinning and keep an eye on the back line as well as the pin line. The bit will leave rounded corners, but it will remove almost all of the waste. popwood.com I 79 |


