Popular Woodworking 2005-10 № 150, страница 67
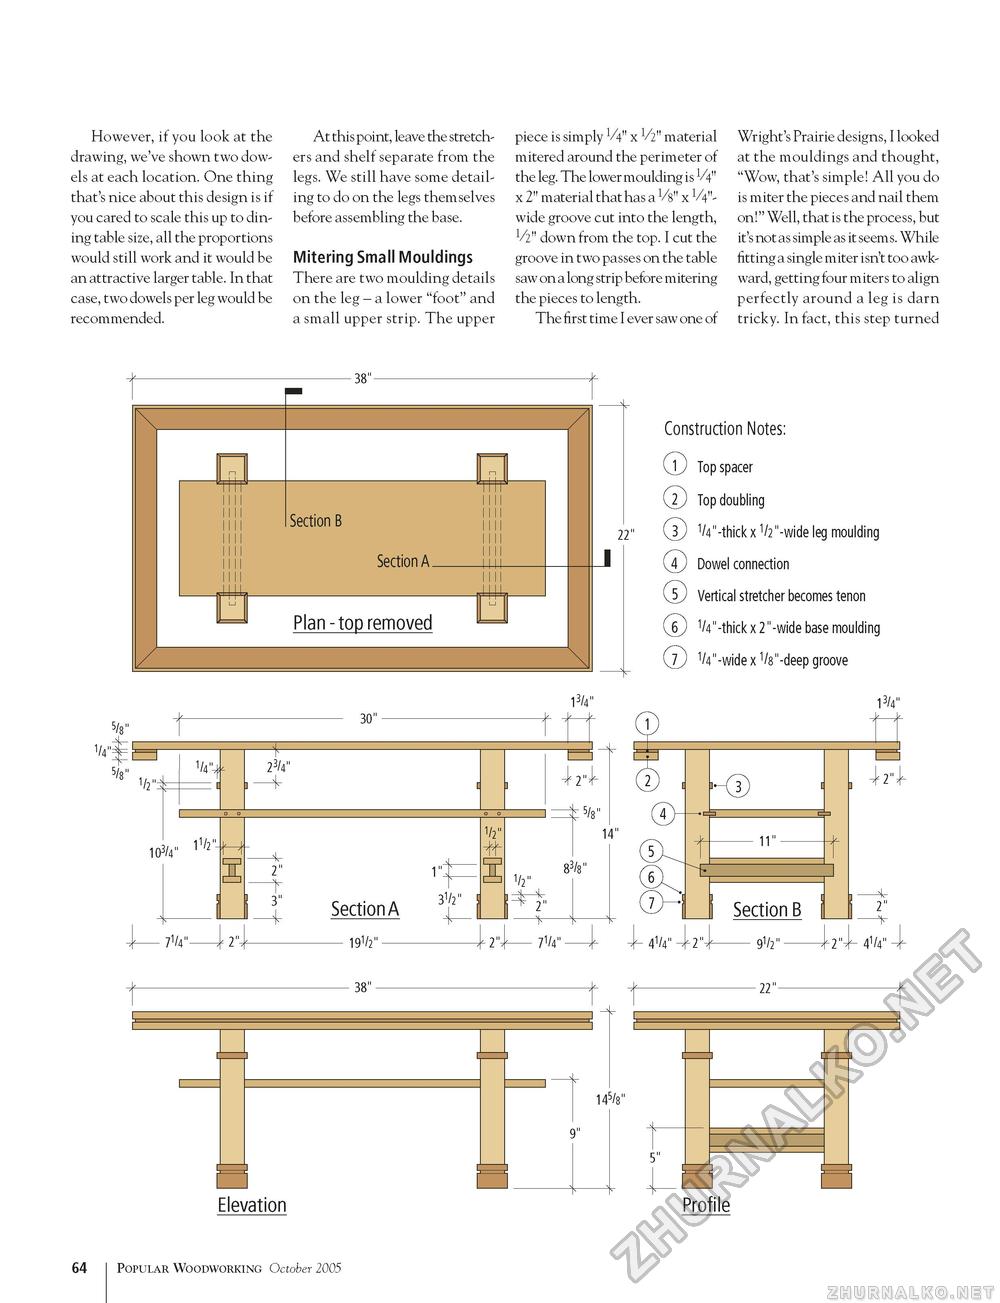
However, if you look at the drawing, we've shown two dowels at each location. One thing that's nice about this design is if you cared to scale this up to dining table size, all the proportions would still work and it would be an attractive larger table. In that case, two dowels per leg would be recommended. At this point, leave the stretchers and shelf separate from the legs. We still have some detailing to do on the legs themselves before assembling the base. Mitering Small Mouldings There are two moulding details on the leg - a lower "foot" and a small upper strip. The upper piece is simply VV' x V2" material mitered around the perimeter of the leg. The lower moulding is V4" x 2" material that has a Vs" x 1/4"-wide groove cut into the length, V2" down from the top. I cut the groove in two passes on the table saw on a long strip before mitering the pieces to length. The first time I ever saw one of Wright's Prairie designs, I looked at the mouldings and thought, "Wow, that's simple! All you do is miter the pieces and nail them on!" Well, that is the process, but it's not as simple as it seem s. While fitting a single miter isn't too awkward, getting four miters to align perfectly around a leg is darn tricky. In fact, this step turned 5/8" 38" 5/8" 23/4" 103/4" 1V21 M 7V4"
Section A — 19V2" — 3V2" 1/2" 22" Construction Notes: © Top spacer © Top doubling © 1/4"-thickx1/2"-wideleg moulding © Dowel connection © Vertical stretcher becomes tenon ® 1/4"-thickx2"-wide base moulding W 1/4"-widex1/8"-deepgroove 13/4" =± 5/8" 14" 14"
7V4" 4V4"42 M3 Section B — 9V211 — 2N 4V4" 38" 22" Elevation 64 Popular Woodworking October 2005 145/8" ■ Profile |
||||||||||||||||||||||||||||||||||||||||||||||


