Popular Woodworking 2005-11 № 151, страница 57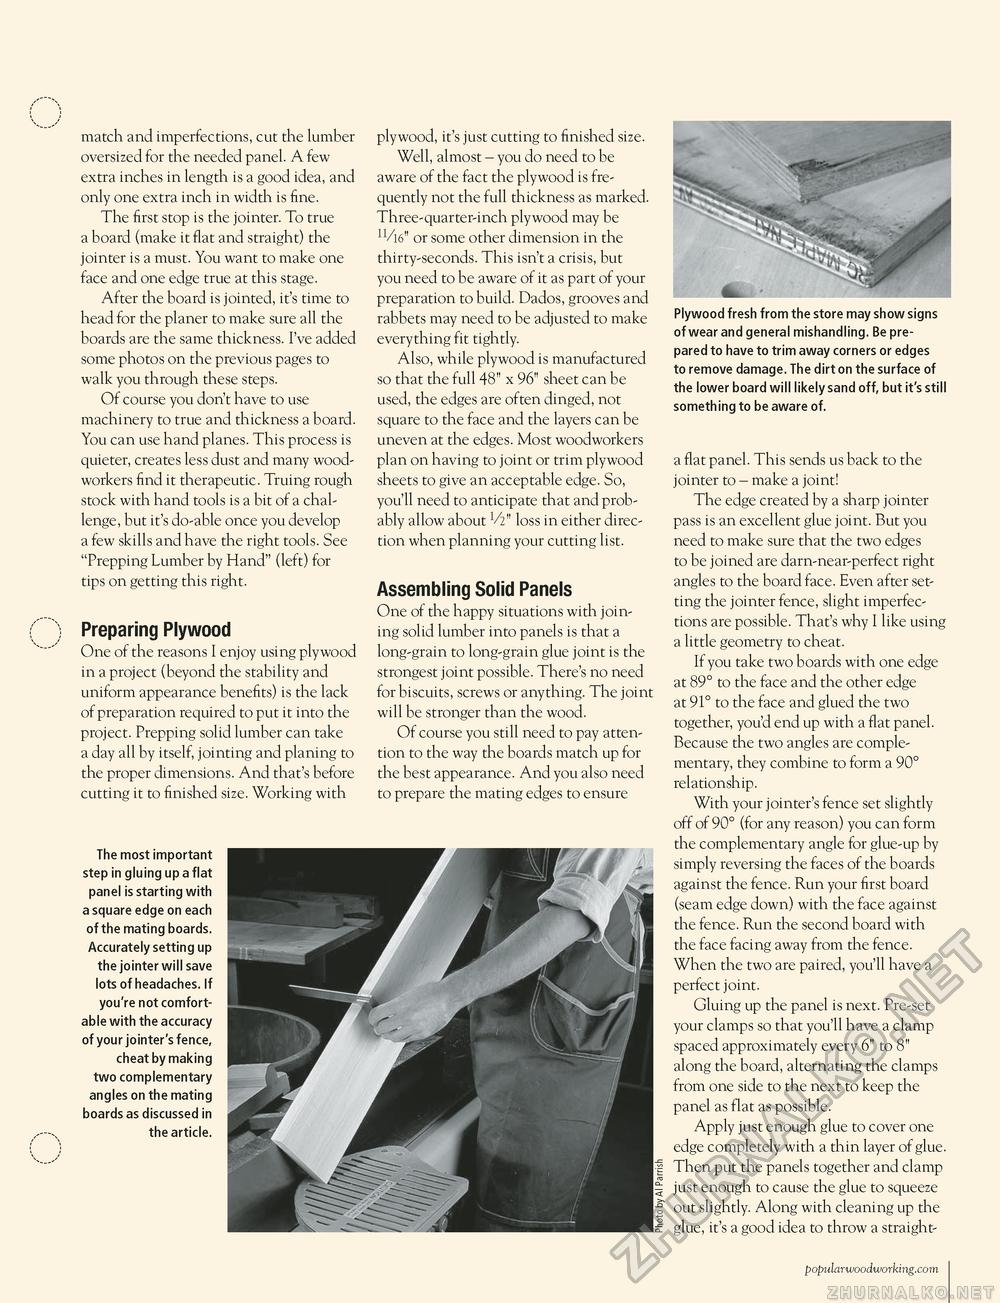
match and imperfections, cut the lumber oversized for the needed panel. A few extra inches in length is a good idea, and only one extra inch in width is fine. The first stop is the jointer. To true a board (make it flat and straight) the jointer is a must. You want to make one face and one edge true at this stage. After the board is jointed, it's time to head for the planer to make sure all the boards are the same thickness. I've added some photos on the previous pages to walk you through these steps. Of course you don't have to use machinery to true and thickness a board. You can use hand planes. This process is quieter, creates less dust and many woodworkers find it therapeutic. Truing rough stock with hand tools is a bit of a challenge, but it's do-able once you develop a few skills and have the right tools. See "Prepping Lumber by Hand" (left) for tips on getting this right. Preparing Plywood One of the reasons I enjoy using plywood in a project (beyond the stability and uniform appearance benefits) is the lack of preparation required to put it into the project. Prepping solid lumber can take a day all by itself, jointing and planing to the proper dimensions. And that's before cutting it to finished size. Working with The most important step in gluing up a flat panel is starting with a square edge on each of the mating boards. Accurately setting up the jointer will save lots of headaches. If you're not comfortable with the accuracy of your jointer's fence, cheat by making two complementary angles on the mating boards as discussed in the article. plywood, it's just cutting to finished size. Well, almost - you do need to be aware of the fact the plywood is frequently not the full thickness as marked. Three-quarter-inch plywood may be 1^//16" or some other dimension in the thirty-seconds. This isn't a crisis, but you need to be aware of it as part of your preparation to build. Dados, grooves and rabbets may need to be adjusted to make everything fit tightly. Also, while plywood is manufactured so that the full 48" x 96" sheet can be used, the edges are often dinged, not square to the face and the layers can be uneven at the edges. Most woodworkers plan on having to joint or trim plywood sheets to give an acceptable edge. So, you'll need to anticipate that and probably allow about V2" loss in either direction when planning your cutting list. Assembling Solid Panels One of the happy situations with joining solid lumber into panels is that a long-grain to long-grain glue joint is the strongest joint possible. There's no need for biscuits, screws or anything. The joint will be stronger than the wood. Of course you still need to pay attention to the way the boards match up for the best appearance. And you also need to prepare the mating edges to ensure Plywood fresh from the store may show signs of wear and general mishandling. Be prepared to have to trim away corners or edges to remove damage. The dirt on the surface of the lower board will likely sand off, but it's still something to be aware of. a flat panel. This sends us back to the jointer to - make a joint! The edge created by a sharp jointer pass is an excellent glue joint. But you need to make sure that the two edges to be joined are darn-near-perfect right angles to the board face. Even after setting the jointer fence, slight imperfections are possible. That's why I like using a little geometry to cheat. If you take two boards with one edge at 89° to the face and the other edge at 91° to the face and glued the two together, you'd end up with a flat panel. Because the two angles are complementary, they combine to form a 90° relationship. With your jointer's fence set slightly off of 90° (for any reason) you can form the complementary angle for glue-up by simply reversing the faces of the boards against the fence. Run your first board (seam edge down) with the face against the fence. Run the second board with the face facing away from the fence. When the two are paired, you'll have a perfect joint. Gluing up the panel is next. Pre-set your clamps so that you'll have a clamp spaced approximately every 6" to 8" along the board, alternating the clamps from one side to the next to keep the panel as flat as possible. Apply just enough glue to cover one edge completely with a thin layer of glue. Then put the panels together and clamp just enough to cause the glue to squeeze out slightly. Along with cleaning up the glue, it's a good idea to throw a straight- popularwoodworking.com 57 |


