Popular Woodworking 2005-11 № 151, страница 54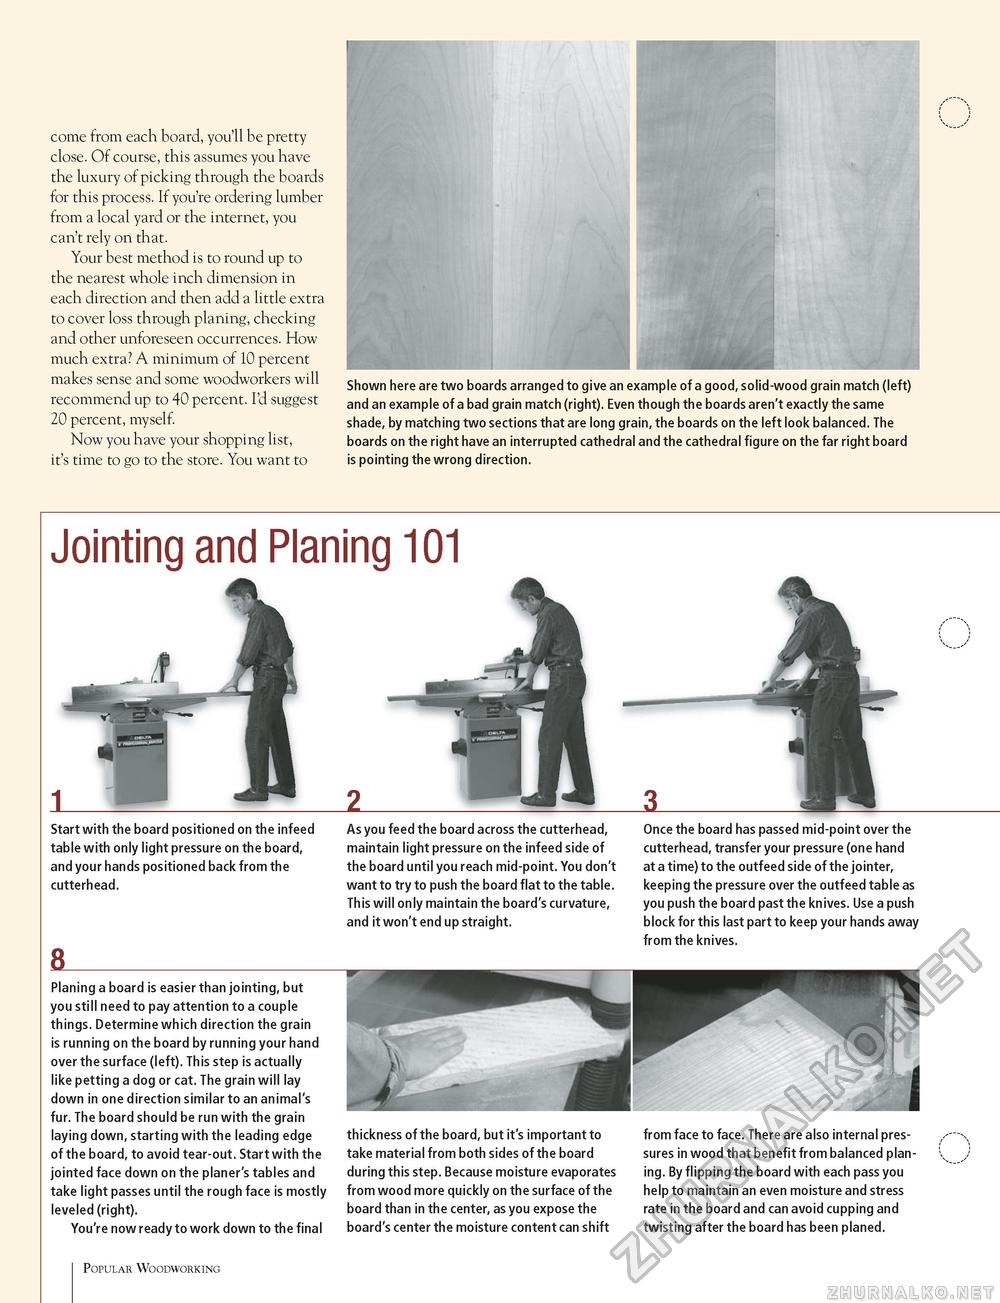
come from each board, you'll be pretty close. Of course, this assumes you have the luxury of picking through the boards for this process. If you're ordering lumber from a local yard or the internet, you can't rely on that. Your best method is to round up to the nearest whole inch dimension in each direction and then add a little extra to cover loss through planing, checking and other unforeseen occurrences. How much extra? A minimum of 10 percent makes sense and some woodworkers will recommend up to 40 percent. I'd suggest 20 percent, myself. Now you have your shopping list, it's time to go to the store. You want to Shown here are two boards arranged to give an example of a good, solid-wood grain match (left) and an example of a bad grain match (right). Even though the boards aren't exactly the same shade, by matching two sections that are long grain, the boards on the left look balanced. The boards on the right have an interrupted cathedral and the cathedral figure on the far right board is pointing the wrong direction. Jointing and Planing 101 Start with the board positioned on the infeed table with only light pressure on the board, and your hands positioned back from the cutterhead. As you feed the board across the cutterhead, maintain light pressure on the infeed side of the board until you reach mid-point. You don't want to try to push the board flat to the table. This will only maintain the board's curvature, and it won't end up straight. 8 Once the board has passed mid-point over the cutterhead, transfer your pressure (one hand at a time) to the outfeed side of the jointer, keeping the pressure over the outfeed table as you push the board past the knives. Use a push block for this last part to keep your hands away from the knives. Planing a board is easier than jointing, but you still need to pay attention to a couple things. Determine which direction the grain is running on the board by running your hand over the surface (left). This step is actually like petting a dog or cat. The grain will lay down in one direction similar to an animal's fur. The board should be run with the grain laying down, starting with the leading edge of the board, to avoid tear-out. Start with the jointed face down on the planer's tables and take light passes until the rough face is mostly leveled (right). You're now ready to work down to the final thickness of the board, but it's important to take material from both sides of the board during this step. Because moisture evaporates from wood more quickly on the surface of the board than in the center, as you expose the board's center the moisture content can shift from face to face. There are also internal pressures in wood that benefit from balanced planing. By flipping the board with each pass you help to maintain an even moisture and stress rate in the board and can avoid cupping and twisting after the board has been planed. popularwoodworking.com 54 |


