Popular Woodworking 2005-11 № 151, страница 82
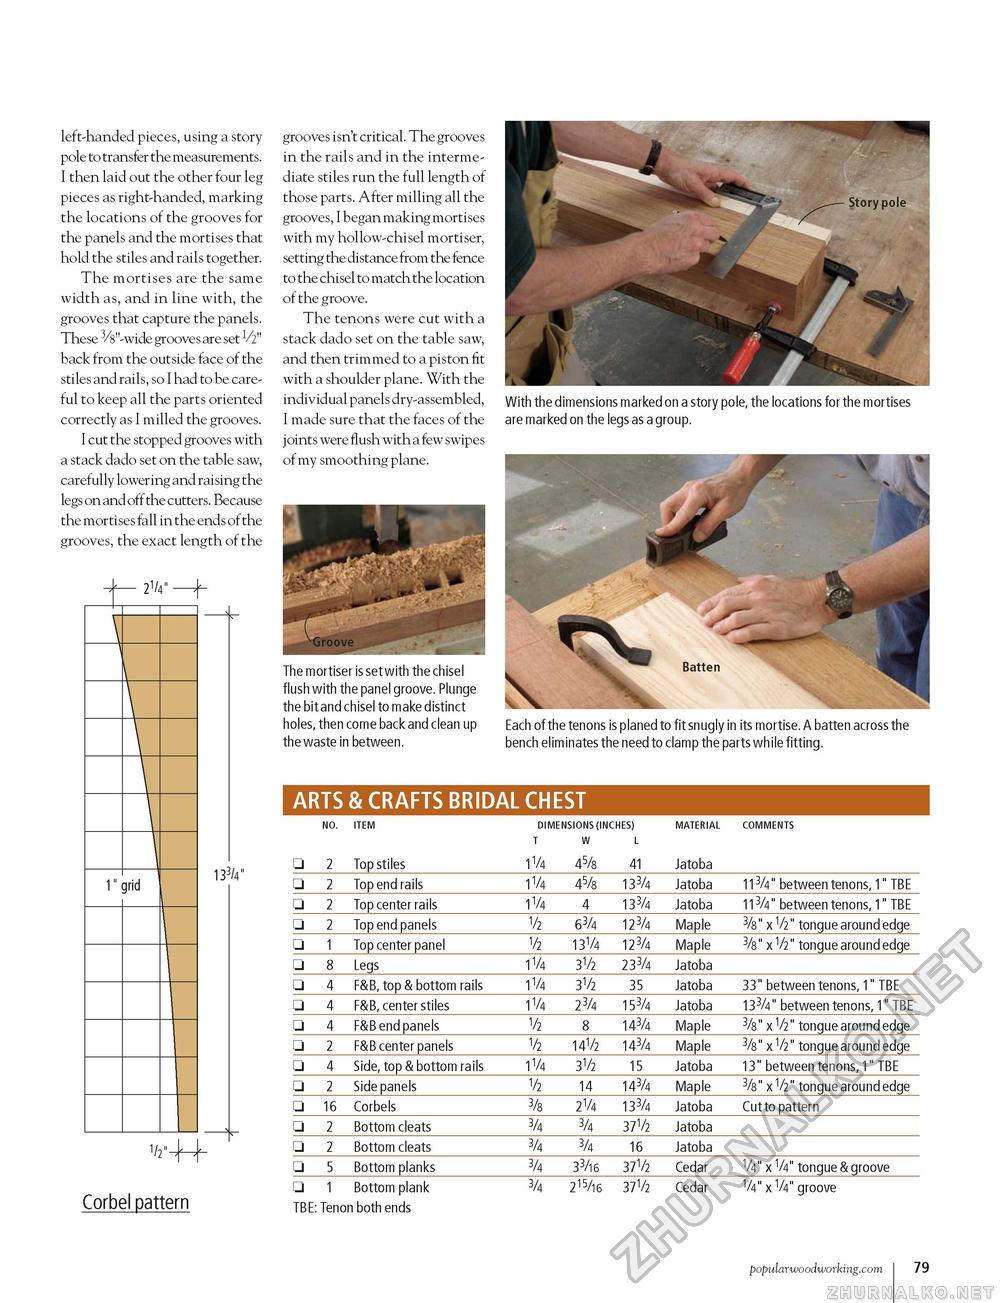
left-handed pieces, using a story pole to transfer the measurements. I then laid out the other four leg pieces as right-handed, marking the locations of the grooves for the panels and the mortises that hold the stiles and rails together. The mortises are the same width as, and in line with, the grooves that capture the panels. These 3/8"-wide grooves are set V2" back from the outside face of the stiles and rails, so I had to be careful to keep all the parts oriented correctly as I milled the grooves. I cut the stopped grooves with a stack dado set on the table saw, carefully lowering and raising the legs on and off the cutters. Because the mortises fall in the ends of the grooves, the exact length of the 21/4" 21/4"
Corbel pattern grooves isn't critical. The grooves in the rails and in the intermediate stiles run the full length of those parts. After milling all the grooves, I began making mortises with my hollow-chisel mortiser, setting the distance from the fence to the chisel to match the location of the groove. The tenons were cut with a stack dado set on the table saw, and then trimmed to a piston fit with a shoulder plane. With the individual panels dry-assembled, I made sure that the faces of the joints were flush with a few swipes of my smoothing plane. With the dimensions marked on a story pole, the locations for the mortises are marked on the legs as a group. The mortiser is set with the chisel flush with the panel groove. Plunge the bit and chisel to make distinct holes, then come back and clean up the waste in between. Each of the tenons is planed to fit snugly in its mortise. A batten across the bench eliminates the need to clamp the parts while fitting. ARTS & CRAFTS BRIDAL CHEST
TBE: Tenon both ends TBE: Tenon both ends popularwoodworking. com 79 |
||||||||||||||||||||||||||||||||||||||||||||||||||||||||||||||||||||||||||||||||||||||||||||||||||||||||||||||||||||||||||||||||||||||||||||||||||||||||||||||||||||||||||||||||||||||||||


