Popular Woodworking 2005-11 № 151, страница 84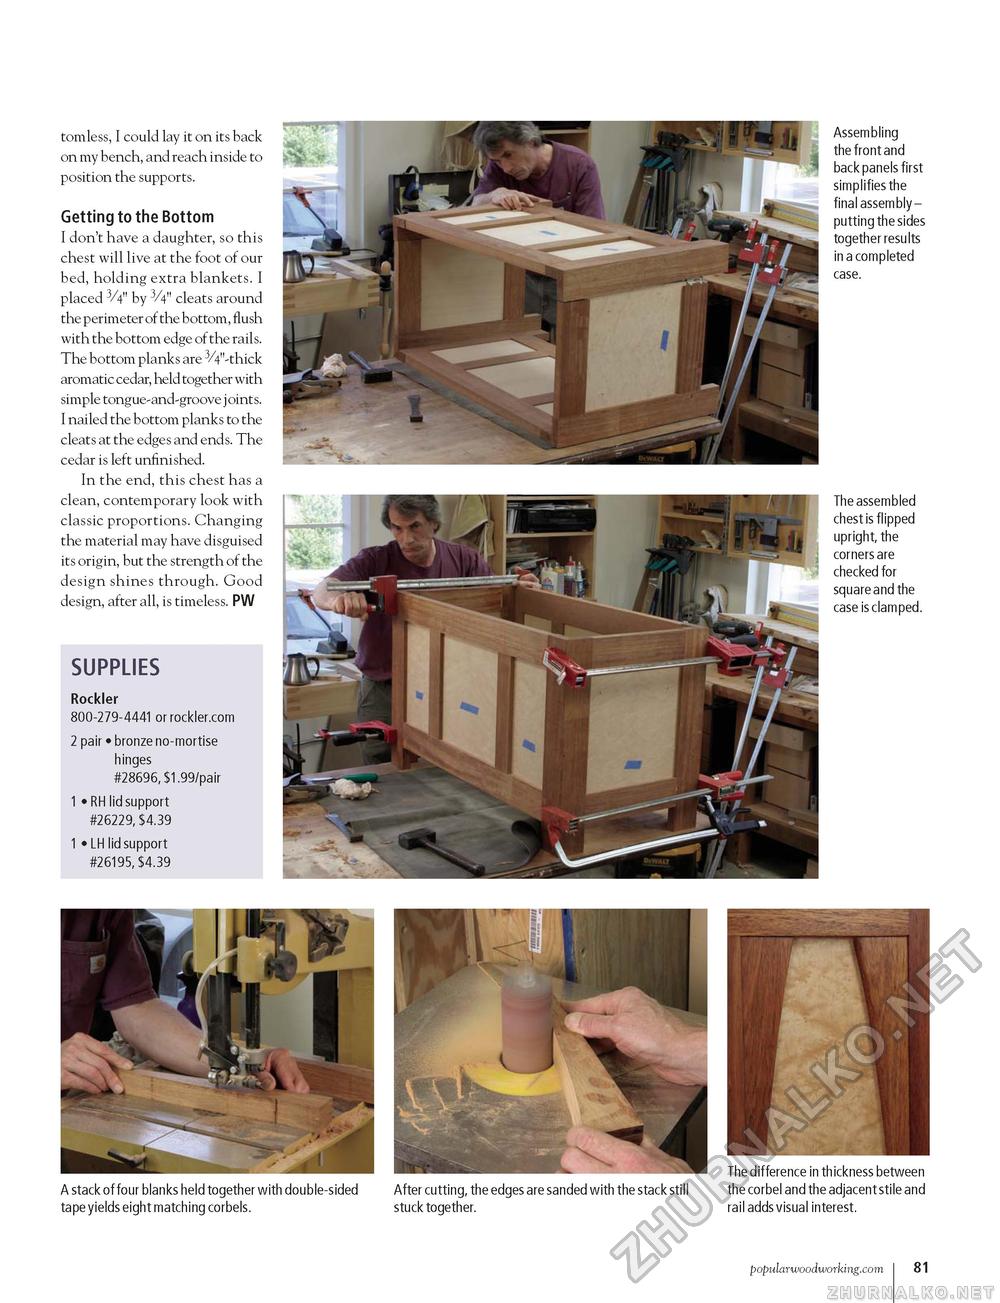
tomless, I could lay it on its back on my bench, and reach inside to position the supports. Getting to the Bottom I don't have a daughter, so this chest will live at the foot of our bed, holding extra blankets. I placed 3/4" by 3/4" cleats around the perimeter of the bottom, flush with the bottom edge of the rails. The bottom planks are 3/4"-thick aromatic cedar, held together with simple tongue-and-groove joints. I nailed the bottom planks to the cleats at the edges and ends. The cedar is left unfinished. In the end, this chest has a clean, contemporary look with classic proportions. Changing the material may have disguised its origin, but the strength of the design shines through. Good design, after all, is timeless. PW SUPPLIES Rockler 800-279-4441 or rockler.com 2 pair • bronze no-mortise hinges #28696, $1.99/pair 1 • RH lid support #26229, $4.39 1 • LH lid support #26195, $4.39 Assembling the front and back panels first simplifies the final assembly -putting the sides together results in a completed The assembled chest is flipped upright, the corners are checked for square and the case is clamped. A stack of four blanks held together with double-sided tape yields eight matching corbels. After cutting, the edges are sanded with the stack still stuck together. The difference in thickness between the corbel and the adjacent stile and rail adds visual interest. popularwoodworking.com i 81 |


