Popular Woodworking 2006-02 № 153, страница 48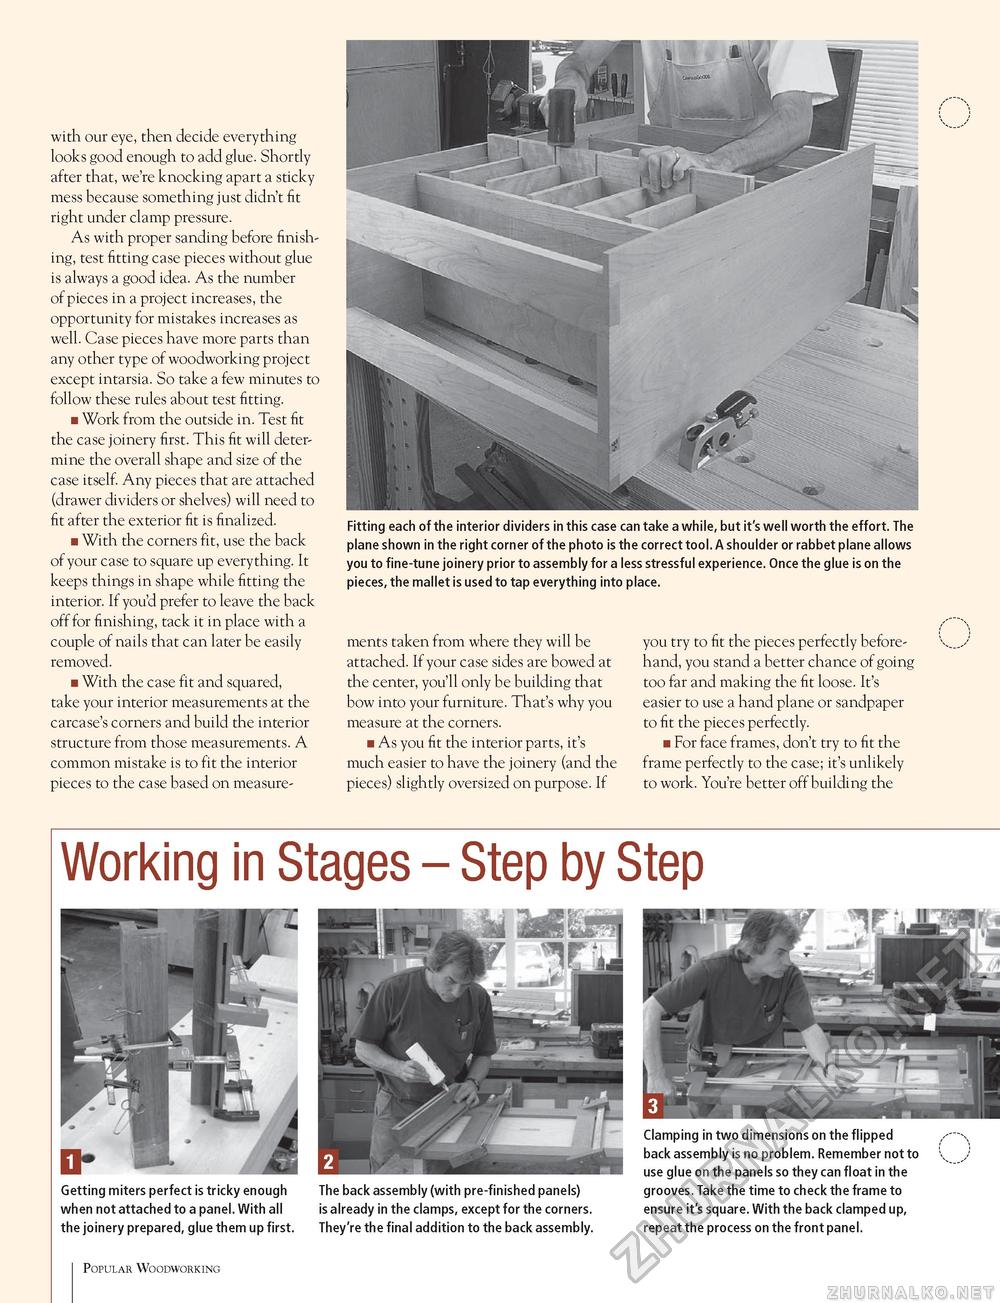
Fitting each of the interior dividers in this case can take a while, but it's well worth the effort. The plane shown in the right corner of the photo is the correct tool. A shoulder or rabbet plane allows you to fine-tune joinery prior to assembly for a less stressful experience. Once the glue is on the pieces, the mallet is used to tap everything into place. with our eye, then decide everything looks good enough to add glue. Shortly after that, we're knocking apart a sticky mess because something just didn't fit right under clamp pressure. As with proper sanding before finishing, test fitting case pieces without glue is always a good idea. As the number of pieces in a project increases, the opportunity for mistakes increases as well. Case pieces have more parts than any other type of woodworking project except intarsia. So take a few minutes to follow these rules about test fitting. ■ Work from the outside in. Test fit the case joinery first. This fit will determine the overall shape and size of the case itself. Any pieces that are attached (drawer dividers or shelves) will need to fit after the exterior fit is finalized. ■ With the corners fit, use the back of your case to square up everything. It keeps things in shape while fitting the interior. If you'd prefer to leave the back off for finishing, tack it in place with a couple of nails that can later be easily removed. ■ With the case fit and squared, take your interior measurements at the carcase's corners and build the interior structure from those measurements. A common mistake is to fit the interior pieces to the case based on measure- ments taken from where they will be attached. If your case sides are bowed at the center, you'll only be building that bow into your furniture. That's why you measure at the corners. ■ As you fit the interior parts, it's much easier to have the joinery (and the pieces) slightly oversized on purpose. If you try to fit the pieces perfectly beforehand, you stand a better chance of going too far and making the fit loose. It's easier to use a hand plane or sandpaper to fit the pieces perfectly. ■ For face frames, don't try to fit the frame perfectly to the case; it's unlikely to work. You're better off building the Working in Stages - Step by Step Getting miters perfect is tricky enough when not attached to a panel. With all the joinery prepared, glue them up first. The back assembly (with pre-finished panels) is already in the clamps, except for the corners. They're the final addition to the back assembly. Clamping in two dimensions on the flipped back assembly is no problem. Remember not to use glue on the panels so they can float in the grooves. Take the time to check the frame to ensure it's square. With the back clamped up, repeat the process on the front panel. Popular Woodworking |


