Popular Woodworking 2006-04 № 154, страница 76
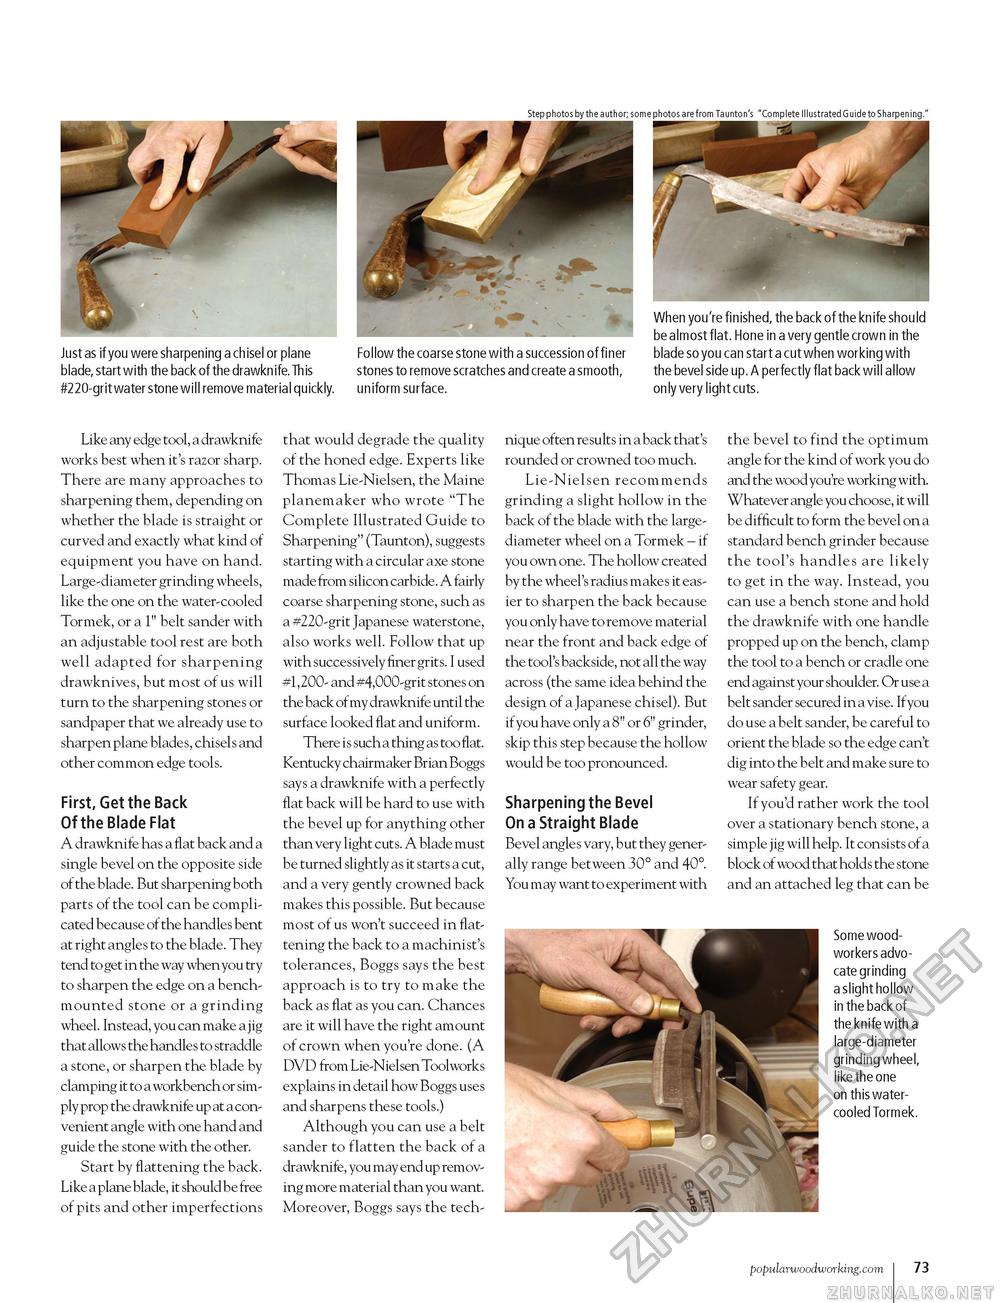
Step photos by the author; some photos are from Taunton's "Complete Illustrated Guide to Sharpening." Just as if you were sharpening a chisel or plane blade, start with the back of the drawknife. Th is #220-grit water stone will remove material quickly. Follow the coarse stone with a succession of finer stones to remove scratches and create a smooth, uniform surface. When you're finished, the back of the knife should be almost flat. Hone in a very gentle crown in the blade so you can start a cut when working with the bevel side up. A perfectly flat back will allow only very light cuts. Like any edge tool, a drawknife works best when it's razor sharp. There are many approaches to sharpening them, depending on whether the blade is straight or curved and exactly what kind of equipment you have on hand. Large-diameter grinding wheels, like the one on the water-cooled Tormek, or a 1" belt sander with an adjustable tool rest are both well adapted for sharpening drawknives, but most of us will turn to the sharpening stones or sandpaper that we already use to sharpen plane blades, chisels and other common edge tools. First, Get the Back Of the Blade Flat A drawknife has a flat back and a single bevel on the opposite side of the blade. But sharpening both parts of the tool can be complicated because of the handles bent at right angles to the blade. They tend to get in the way when you try to sharpen the edge on a bench-mounted stone or a grinding wheel. Instead, you can make a jig that allows the handles to straddle a stone, or sharpen the blade by clamping it to a workbench or simply prop the drawknife up at a convenient angle with one hand and guide the stone with the other. Start by flattening the back. Like a plane blade, it should be free of pits and other imperfections that would degrade the quality of the honed edge. Experts like Thomas Lie-Nielsen, the Maine planemaker who wrote "The Complete Illustrated Guide to Sharpening" (Taunton), suggests starting with a circular axe stone made from silicon carbide. A fairly coarse sharpening stone, such as a #220-grit Japanese waterstone, also works well. Follow that up with successively finer grits. I used #1,200- and #4,000-grit stones on the back of my drawknife until the surface looked flat and uniform. There is such a thing as too flat. Kentucky chairmaker Brian Boggs says a drawknife with a perfectly flat back will be hard to use with the bevel up for anything other than very light cuts. A blade must be turned slightly as it starts a cut, and a very gently crowned back makes this possible. But because most of us won't succeed in flattening the back to a machinist's tolerances, Boggs says the best approach is to try to make the back as flat as you can. Chances are it will have the right amount of crown when you're done. (A DVD from Lie-Nielsen Toolworks explains in detail how Boggs uses and sharpens these tools.) Although you can use a belt sander to flatten the back of a drawknife, you may end up removing more material than you want. Moreover, Boggs says the tech nique often re sults in a back that's rounded or crowned too much. Lie-Nielsen recommends grinding a slight hollow in the back of the blade with the large-diameter wheel on a Tormek - if you own one. The hollow created by the wheel's radius makes it easier to sharpen the back because you only have to remove material near the front and back edge of the tool's backside, not all the way across (the same idea behind the design of a Japanese chisel). But if you have only a 8" or 6" grinder, skip this step because the hollow would be too pronounced. Sharpening the Bevel On a Straight Blade Bevel angles vary, but they generally range between 30° and 40°. You may want to experiment with the bevel to find the optimum angle for the kind of work you do and the wood you're working with. Whatever angle you choose, it will be difficult to form the bevel on a standard bench grinder because the tool's handles are likely to get in the way. Instead, you can use a bench stone and hold the drawknife with one handle propped up on the bench, clamp the tool to a bench or cradle one end against your shoulder. Or use a belt sander secured in a vise. If you do use a belt sander, be careful to orient the blade so the edge can't dig into the belt and make sure to wear safety gear. If you'd rather work the tool over a stationary bench stone, a simple jig will help. It consists of a block of wood that holds the stone and an attached leg that can be Some woodworkers advocate grinding a slight hollow in the back of the knife with a large-diameter grinding wheel, like the one on this water-cooled Tormek. popularwoodworking.com i 73 |


