Popular Woodworking 2006-04 № 154, страница 83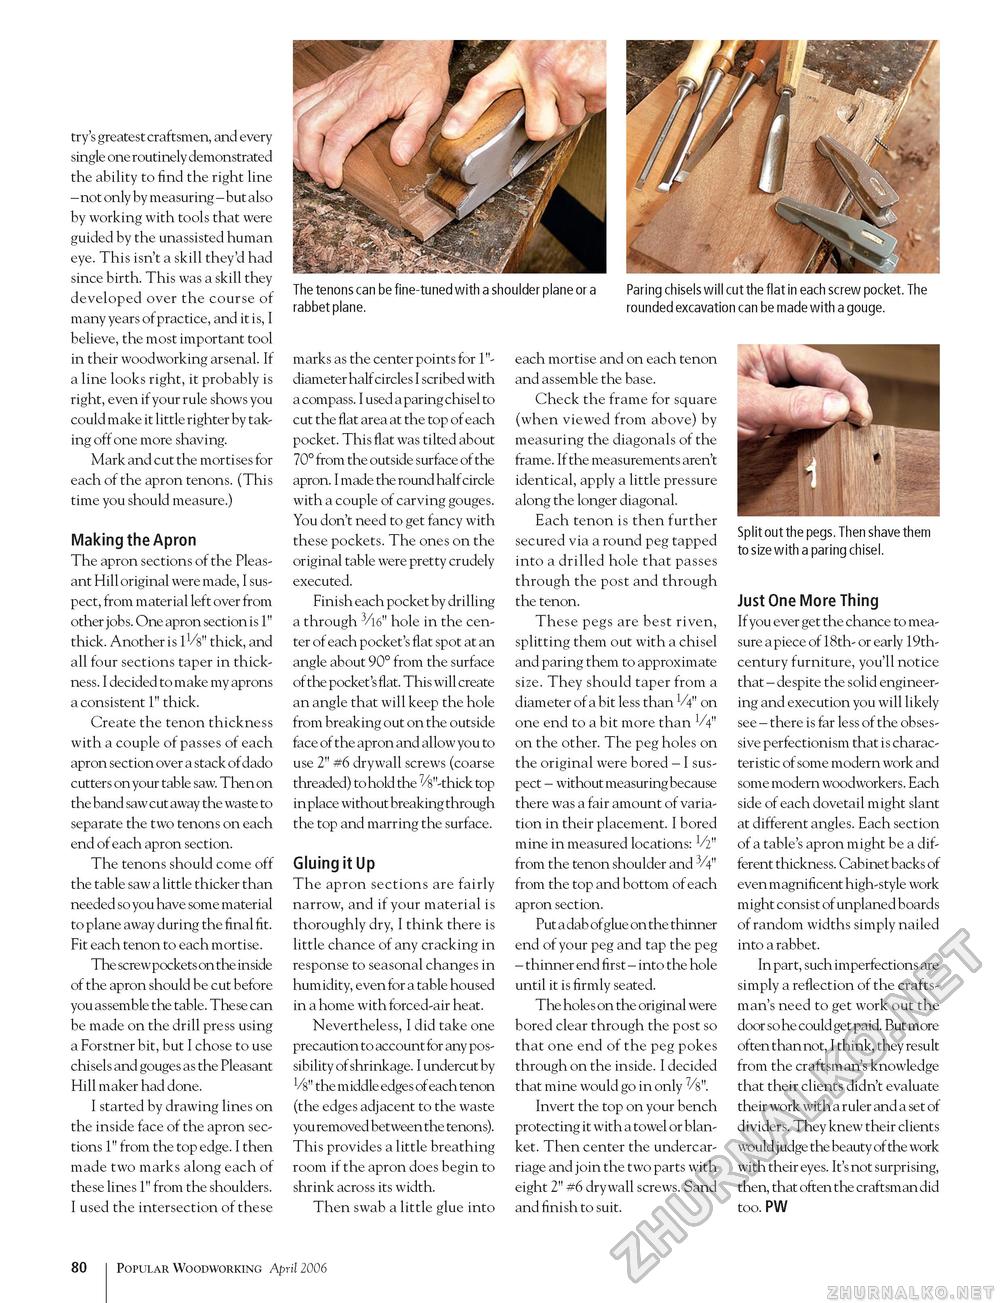
The tenons can be fine-tuned with a shoulder plane or a Paring chisels will cut the flat in each screw pocket. The rabbet plane. rounded excavation can be made with a gouge. try's greatest craftsmen, and every single one routinely demonstrated the ability to find the right line - not only by measuring - but also by working with tools that were guided by the unassisted human eye. This isn't a skill they'd had since birth. This was a skill they developed over the course of many years of practice, and it is, I believe, the most important tool in their woodworking arsenal. If a line looks right, it probably is right, even if your rule shows you could make it little righter by taking off one more shaving. Mark and cut the mortises for each of the apron tenons. (This time you should measure.) Making the Apron The apron sections of the Pleasant Hill original were made, I suspect, from material left over from other jobs. One apron section is 1" thick. Another is 11/s" thick, and all four sections taper in thickness. I decided to make my aprons a consistent 1" thick. Create the tenon thickness with a couple of passes of each apron section over a stack of dado cutters on your table saw. Then on the band saw cut away the waste to separate the two tenons on each end of each apron section. The tenons should come off the table saw a little thicker than needed so you have some material to plane away during the final fit. Fit each tenon to each mortise. The screw pockets on the inside of the apron should be cut before you assemble the table. These can be made on the drill press using a Forstner bit, but I chose to use chisels and gouges as the Pleasant Hill maker had done. I started by drawing lines on the inside face of the apron sections 1" from the top edge. I then made two marks along each of these lines 1" from the shoulders. I used the intersection of these marks as the center points for 1"-diameter half circles I scribed with a compass. I used a paring chisel to cut the flat area at the top of each pocket. This flat was tilted about 70° from the outside surface of the apron. I made the round half circle with a couple of carving gouges. You don't need to get fancy with these pockets. The ones on the original table were pretty crudely executed. Finish each pocket by drilling a through 3/16" hole in the center of each pocket's flat spot at an angle about 90° from the surface of the pocket's flat. This will create an angle that will keep the hole from breaking out on the outside face of the apron and allow you to use 2" #6 drywall screws (coarse threaded) to hold the 7/s"-thick top in place without breaking through the top and marring the surface. Gluing it Up The apron sections are fairly narrow, and if your material is thoroughly dry, I think there is little chance of any cracking in response to seasonal changes in humidity, even for a table housed in a home with forced-air heat. Nevertheless, I did take one precaution to account for any possibility of shrinkage. I undercut by Vs" the middle edges of each tenon (the edges adjacent to the waste you removed between the tenons). This provides a little breathing room if the apron does begin to shrink across its width. Then swab a little glue into each mortise and on each tenon and assemble the base. Check the frame for square (when viewed from above) by measuring the diagonals of the frame. If the measurements aren't identical, apply a little pressure along the longer diagonal. Each tenon is then further secured via a round peg tapped into a drilled hole that passes through the post and through the tenon. These pegs are best riven, splitting them out with a chisel and paring them to approximate size. They should taper from a diameter of a bit less than V4" on one end to a bit more than 1/4" on the other. The peg holes on the original were bored - I suspect - without measuring because there was a fair amount of variation in their placement. I bored mine in measured locations: V2" from the tenon shoulder and 3/4" from the top and bottom of each apron section. Put a dab of glue on the thinner end of your peg and tap the peg - thinner end first - into the hole until it is firmly seated. The hole s on the original were bored clear through the post so that one end of the peg pokes through on the inside. I decided that mine would go in only 7/s". Invert the top on your bench protecting it with a towel or blanket. Then center the undercarriage and join the two parts with eight 2" #6 drywall screws. Sand and finish to suit. Split out the pegs. Then shave them to size with a paring chisel. Just One More Thing If you ever get the chance to measure a piece of 18th- or early 19th-century furniture, you'll notice that - despite the solid engineering and execution you will likely see - there is far less of the obsessive perfectionism that is characteristic of some modern work and some modern woodworkers. Each side of each dovetail might slant at different angles. Each section of a table's apron might be a different thickness. Cabinet backs of even magnificent high-style work might consist of unplaned boards of random widths simply nailed into a rabbet. In part, such imperfections are simply a reflection of the craftsman's need to get work out the door so he could get paid. But more often than not, I think, they result from the craftsman's knowledge that their clients didn't evaluate their work with a ruler and a set of dividers. They knew their clients would judge the beauty of the work with their eyes. It's not surprising, then, that often the craftsman did too. PW 80 Popular Woodworking April 2006 |


