Popular Woodworking 2006-04 № 154, страница 80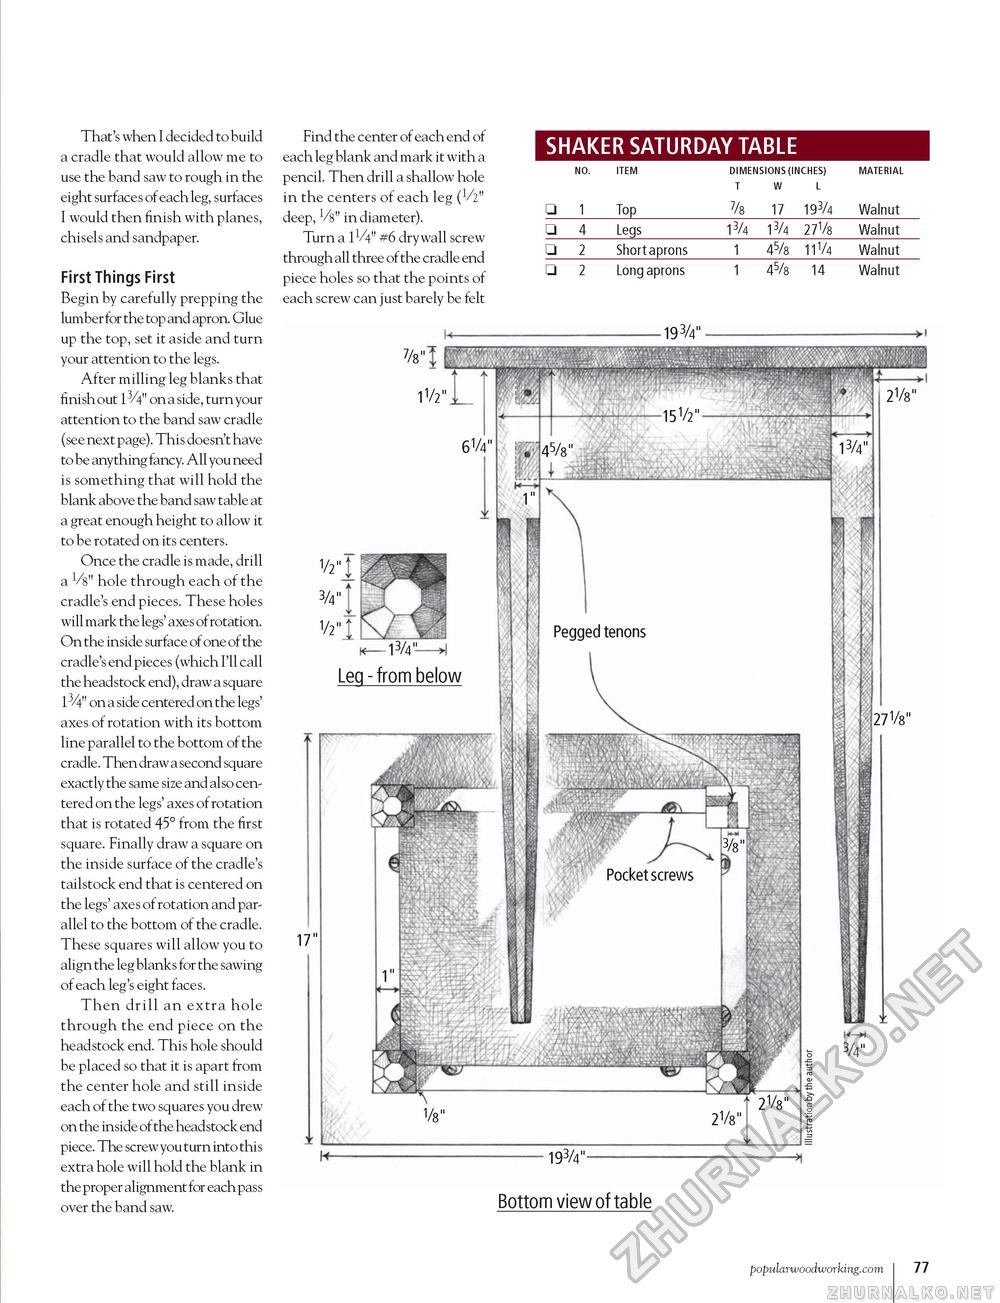
That's when I decided to build a cradle that would allow me to use the band saw to rough in the eight surfaces of each leg, surfaces I would then finish with planes, chisels and sandpaper. First Things First Begin by carefully prepping the lumber for the top and apron. Glue up the top, set it aside and turn your attention to the legs. After milling leg blanks that finish out 13/4" on a side, turn your attention to the band saw cradle (see next page). This doesn't have to be anything fancy. All you need is something that will hold the blank above the band saw table at a great enough height to allow it to be rotated on its centers. Once the cradle is made, drill a Vs" hole through each of the cradle's end pieces. These holes will mark the legs' axes of rotation. On the inside surface of one of the cradle's end pieces (which I'll call the headstock end), draw a square 134" on a side centered on the legs' axes of rotation with its bottom line parallel to the bottom of the cradle. Then draw a second square exactly the same size and also centered on the legs' axes of rotation that is rotated 45° from the first square. Finally draw a square on the inside surface of the cradle's tailstock end that is centered on the legs' axes of rotation and parallel to the bottom of the cradle. These squares will allow you to align the leg blanks for the sawing of each leg's eight faces. Then drill an extra hole through the end piece on the headstock end. This hole should be placed so that it is apart from the center hole and still inside each of the two squares you drew on the inside of the headstock end piece. The screw you turn into this extra hole will hold the blank in the proper alignment for each pass over the band saw. Find the center of each end of each leg blank and mark it with a pencil. Then drill a shallow hole in the centers of each leg (V2" deep, Vs" in diameter). Turn a IV4" #6 drywall screw through all three of the cradle end piece holes so that the points of each screw can just barely be felt 7/8"I 1V2" , SHAKER SATURDAY TABLE
Walnut 1/2" 3/4" 12" 17" Bottomview oftable popularwoodworking.com i 77 |


