Popular Woodworking 2006-06 № 155, страница 41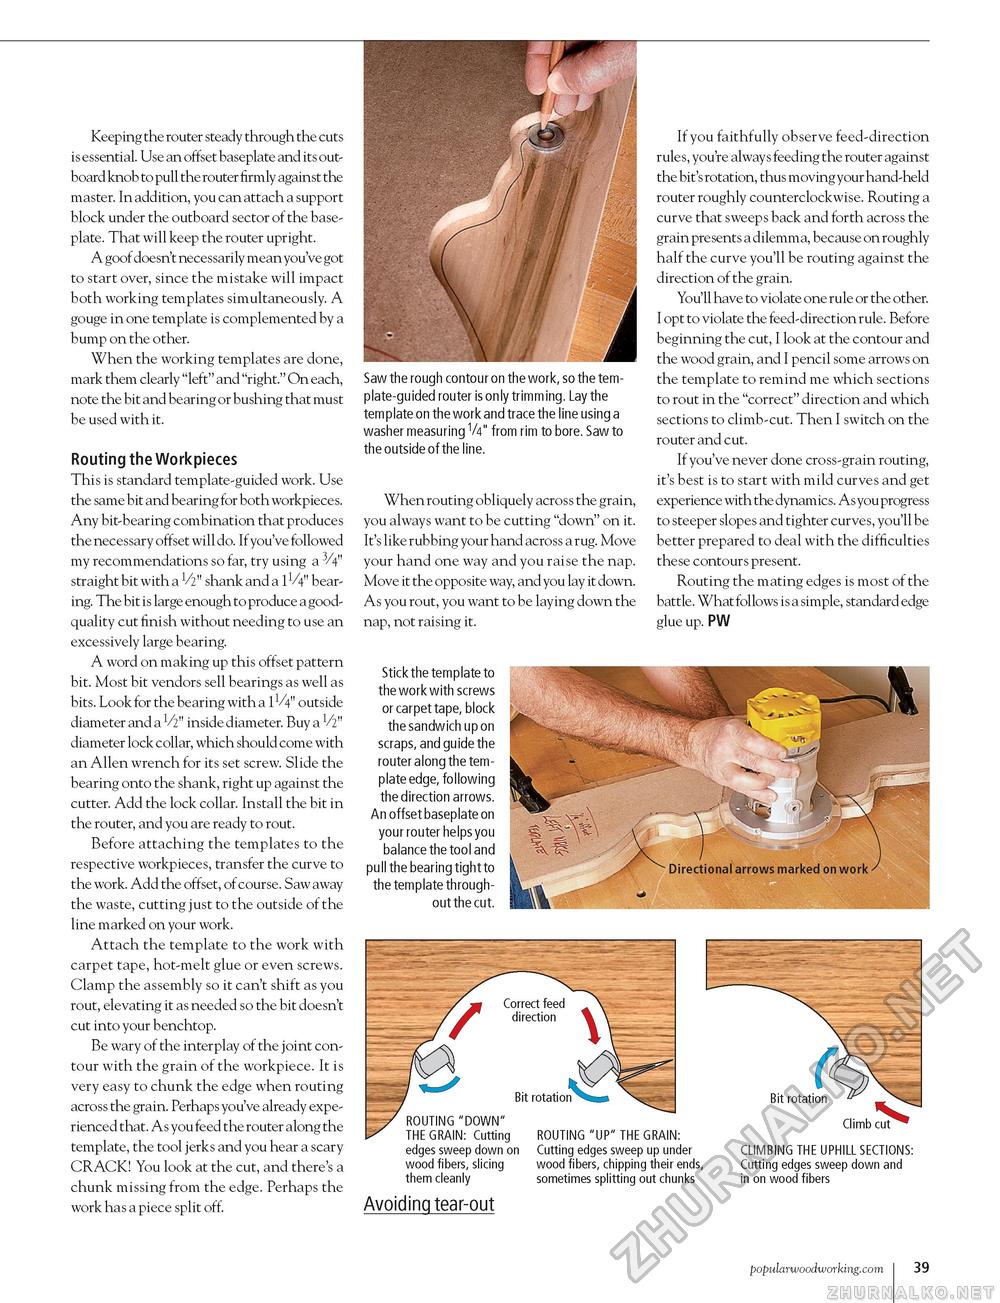
Keeping the router steady through the cuts is essential. Use an offset baseplate and its outboard knob to pull the router firmly against the master. In addition, you can attach a support block under the outboard sector of the baseplate. That will keep the router upright. A goof doesn't necessarily mean you've got to start over, since the mistake will impact both working templates simultaneously. A gouge in one template is complemented by a bump on the other. When the working templates are done, mark them clearly "left" and "right." On each, note the bit and bearing or bushing that must be used with it. Routing the Workpieces This is standard template-guided work. Use the same bit and bearing for both workpieces. Any bit-bearing combination that produces the necessary offset will do. If you've followed my recommendations so far, try using a 3/4" straight bit with a V2" shank and a 1V4" bearing. The bit is large enough to produce a good-quality cut finish without needing to use an excessively large bearing. A word on making up this offset pattern bit. Most bit vendors sell bearings as well as bits. Look for the bearing with a 1V4" outside diameter and a 1/2" inside diameter. Buy a V2" diameter lock collar, which should come with an Allen wrench for its set screw. Slide the bearing onto the shank, right up against the cutter. Add the lock collar. Install the bit in the router, and you are ready to rout. Before attaching the templates to the respective workpieces, transfer the curve to the work. Add the offset, of course. Saw away the waste, cutting just to the outside of the line marked on your work. Attach the template to the work with carpet tape, hot-melt glue or even screws. Clamp the assembly so it can't shift as you rout, elevating it as needed so the bit doesn't cut into your benchtop. Be wary of the interplay of the joint contour with the grain of the workpiece. It is very easy to chunk the edge when routing across the grain. Perhaps you've already experienced that. As you feed the router along the template, the tool jerks and you hear a scary CRACK! You look at the cut, and there's a chunk missing from the edge. Perhaps the work has a piece split off. Saw the rough contour on the work, so the template-guided router is only trimming. Lay the template on the work and trace the line using a washer measuring V4" from rim to bore. Saw to the outside of the line. When routing obliquely across the grain, you always want to be cutting "down" on it. It's like rubbing your hand across a rug. Move your hand one way and you raise the nap. Move it the opposite way, and you lay it down. As you rout, you want to be laying down the nap, not raising it. If you faithfully observe feed-direction rules, you're always feeding the router against the bit's rotation, thus moving your hand-held router roughly counterclockwise. Routing a curve that sweeps back and forth across the grain presents a dilemma, because on roughly half the curve you'll be routing against the direction of the grain. You'll have to violate one rule or the other. I opt to violate the feed-direction rule. Before beginning the cut, I look at the contour and the wood grain, and I pencil some arrows on the template to remind me which sections to rout in the "correct" direction and which sections to climb-cut. Then I switch on the router and cut. If you've never done cross-grain routing, it's best is to start with mild curves and get experience with the dynamics. As you progress to steeper slopes and tighter curves, you'll be better prepared to deal with the difficulties these contours present. Routing the mating edges is most of the battle. What follows is a simple, standard edge glue up. PW Stick the template to the work with screws or carpet tape, block the sandwich up on scraps, and guide the router along the template edge, following the direction arrows. An offset baseplate on your router helps you balance the tool and pull the bearing tight to the template throughout the cut. ROUTING "DOWN" THEGRAIN: Cutting edges sweep down on wood fibers, slicing them cleanly ROUTING "UP" THEGRAIN: Cutting edges sweep up under wood fibers, chipping their ends, sometimes splitting out chunks Climb cut CLIMBING THE UPHILL SECTIONS: Cutting edges sweep down and in on wood fibers Avoiding tear-out popularwoodworking.com I 39 |


