Popular Woodworking 2006-12 № 159, страница 19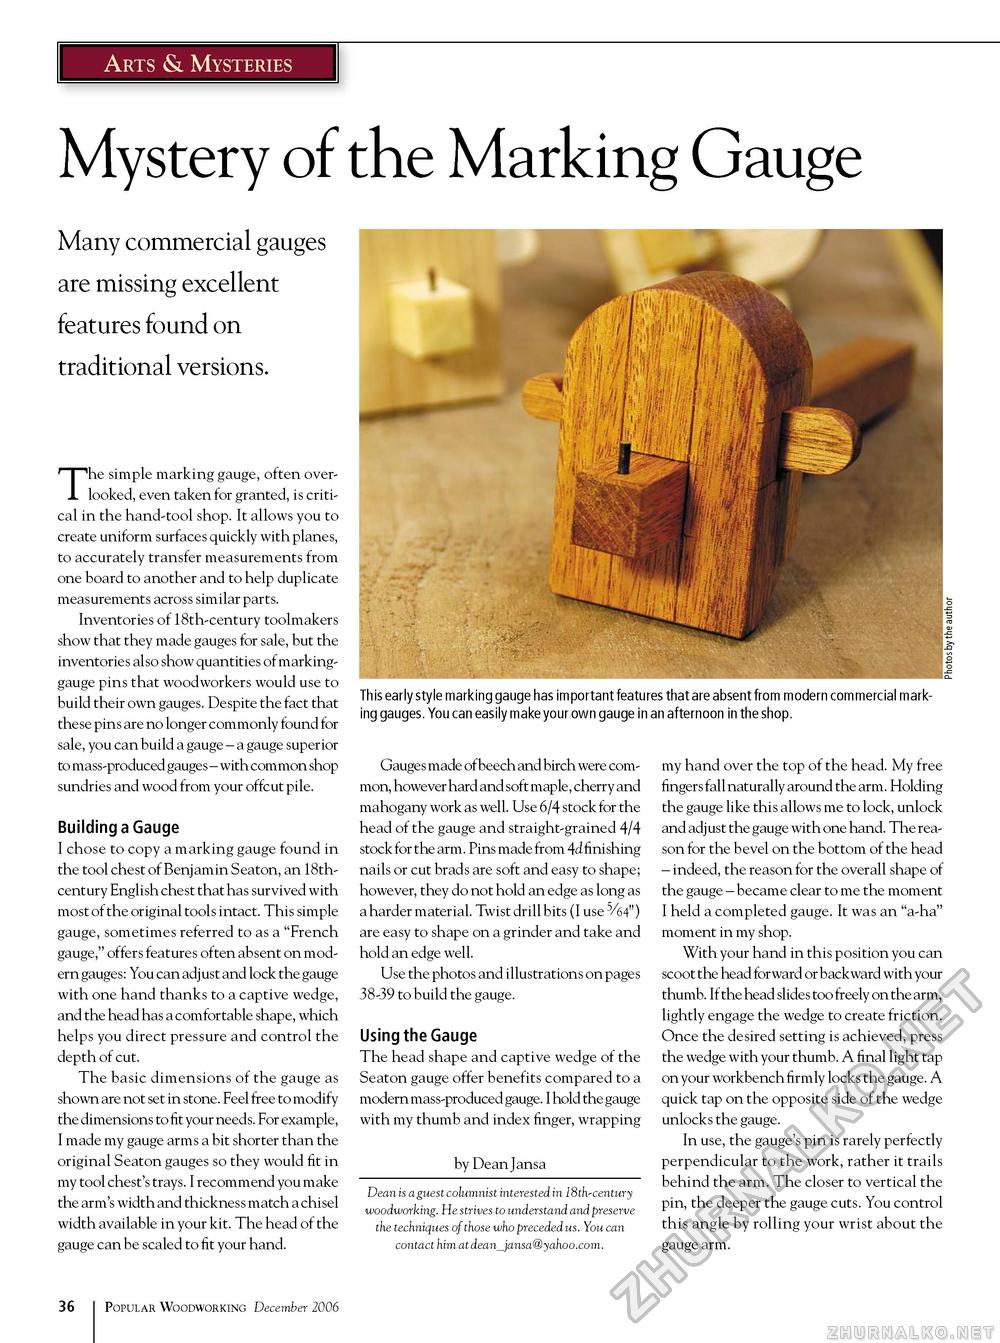
Arts & Mysteries Mystery of the Marking Gauge Many commercial gauges are missing excellent features found on traditional versions. The simple marking gauge, often overlooked, even taken for granted, is critical in the hand-tool shop. It allows you to create uniform surfaces quickly with planes, to accurately transfer measurements from one board to another and to help duplicate measurements across similar parts. Inventories of 18th-century toolmakers show that they made gauges for sale, but the inventories also show quantities of marking-gauge pins that woodworkers would use to build their own gauges. Despite the fact that these pins are no longer commonly found for sale, you can build a gauge - a gauge superior to mass-produced gauges - with common shop sundries and wood from your offcut pile. Building a Gauge I chose to copy a marking gauge found in the tool chest of Benjamin Seaton, an 18th-century English chest that has survived with most of the original tools intact. This simple gauge, sometimes referred to as a "French gauge," offers features often absent on modern gauges: You can adjust and lock the gauge with one hand thanks to a captive wedge, and the head has a comfortable shape, which helps you direct pressure and control the depth of cut. The basic dimensions of the gauge as shown are not set in stone. Feel free to modify the dimensions to fit your needs. For example, I made my gauge arms a bit shorter than the original Seaton gauges so they would fit in my tool chest's trays. I recommend you make the arm's width and thickness match a chisel width available in your kit. The head of the gauge can be scaled to fit your hand. This early style marking gauge has important features that are absent from modern commercial marking gauges. You can easily make your own gauge in an afternoon in the shop. Gauges made of beech and birch were common, however hard and soft maple, cherry and mahogany work as well. Use 6/4 stock for the head of the gauge and straight-grained 4/4 stock for the arm. Pins made from 4d finishing nails or cut brads are soft and easy to shape; however, they do not hold an edge as long as a harder material. Twist drill bits (I use 5/64") are easy to shape on a grinder and take and hold an edge well. Use the photos and illustrations on pages 38-39 to build the gauge. Using the Gauge The head shape and captive wedge of the Seaton gauge offer benefits compared to a modern mass-produced gauge. I hold the gauge with my thumb and index finger, wrapping by Dean Jansa Dean is a guest columnist interested in 18th-century woodworking. He strives to understand and preserve the techniques of those who preceded us. You can contact him atdean_jansa@yahoo.com. my hand over the top of the head. My free fingers fall naturally around the arm. Holding the gauge like this allows me to lock, unlock and adjust the gauge with one hand. The reason for the bevel on the bottom of the head - indeed, the reason for the overall shape of the gauge - became clear to me the moment I held a completed gauge. It was an "a-ha" moment in my shop. With your hand in this position you can scoot the head forward or backward with your thumb. If the head slides too freely on the arm, lightly engage the wedge to create friction. Once the desired setting is achieved, press the wedge with your thumb. A final light tap on your workbench firmly locks the gauge. A quick tap on the opposite side of the wedge unlocks the gauge. In use, the gauge's pin is rarely perfectly perpendicular to the work, rather it trails behind the arm. The closer to vertical the pin, the deeper the gauge cuts. You control this angle by rolling your wrist about the gauge arm. 36 Popular Woodworking December 2006 |


