Popular Woodworking 2006-12 № 159, страница 20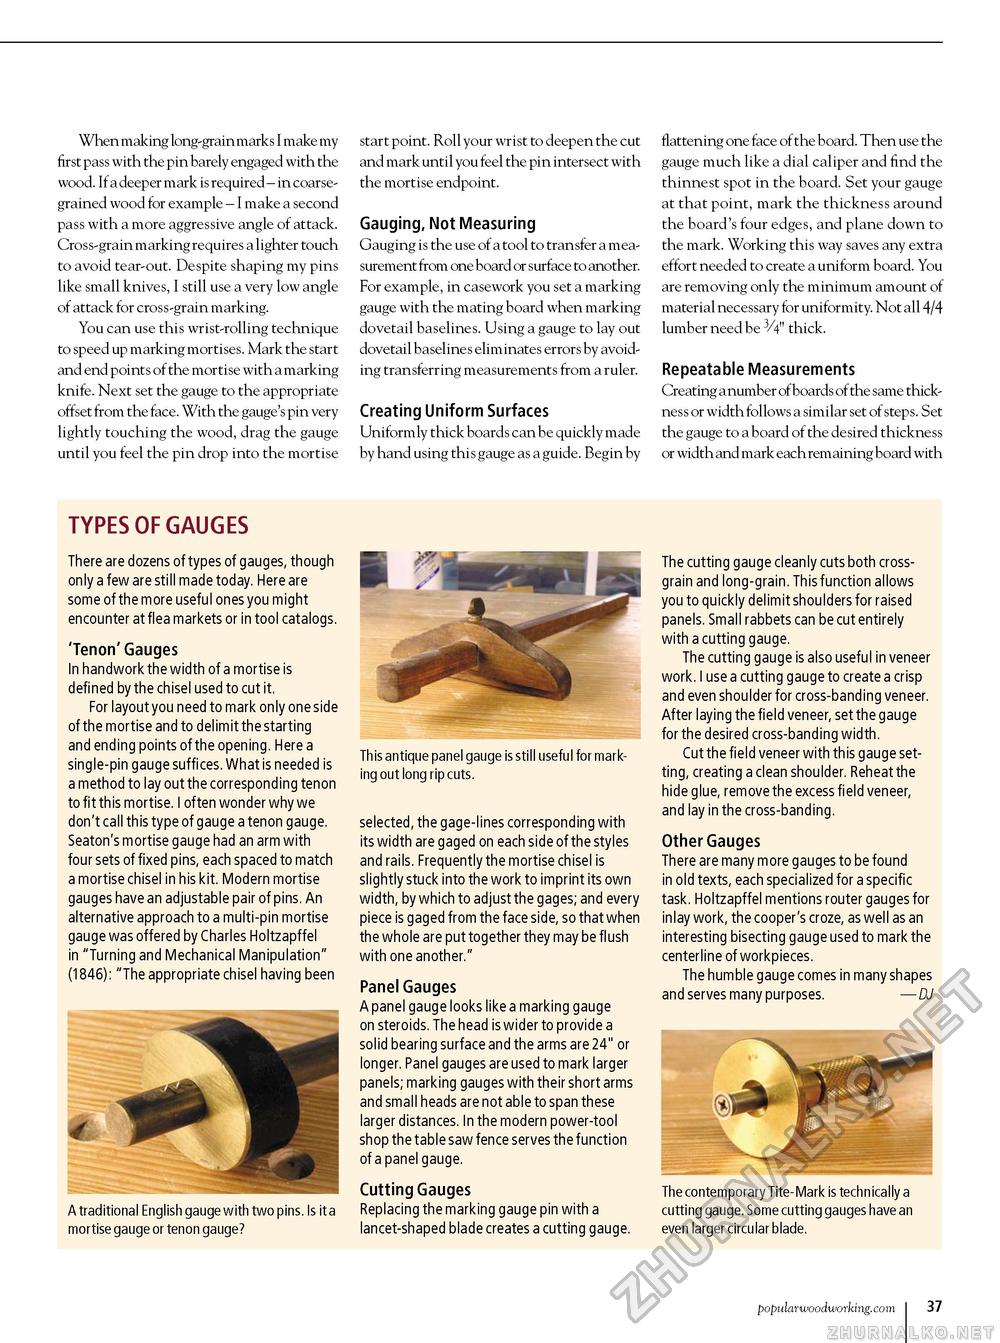
When making long-grain marks I make my first pass with the pin barely engaged with the wood. If a deeper mark is required - in coarsegrained wood for example - I make a second pass with a more aggressive angle of attack. Cross-grain marking requires a lighter touch to avoid tear-out. Despite shaping my pins like small knives, I still use a very low angle of attack for cross-grain marking. You can use this wrist-rolling technique to speed up marking mortises. Mark the start and end points of the mortise with a marking knife. Next set the gauge to the appropriate offset from the face. With the gauge's pin very lightly touching the wood, drag the gauge until you feel the pin drop into the mortise start point. Roll your wrist to deepen the cut and mark until you feel the pin intersect with the mortise endpoint. Gauging, Not Measuring Gauging is the use of a tool to transfer a measurement from one board or surface to another. For example, in casework you set a marking gauge with the mating board when marking dovetail baselines. Using a gauge to lay out dovetail baselines eliminates errors by avoiding transferring measurements from a ruler. Creating Uniform Surfaces Uniformly thick boards can be quickly made by hand using this gauge as a guide. Begin by flattening one face of the board. Then use the gauge much like a dial caliper and find the thinnest spot in the board. Set your gauge at that point, mark the thickness around the board's four edges, and plane down to the mark. Working this way saves any extra effort needed to create a uniform board. You are removing only the minimum amount of material necessary for uniformity. Not all 4/4 lumber need be 3/4" thick. Repeatable Measurements Creating a number of boards of the same thickness or width follows a similar set of steps. Set the gauge to a board of the desired thickness or width and mark each remaining board with TYPES OF GAUGES There are dozens of types of gauges, though only a few are still made today. Here are some of the more useful ones you might encounter at flea markets or in tool catalogs. 'Tenon' Gauges In handwork the width of a mortise is defined by the chisel used to cut it. For layout you need to mark only one side of the mortise and to delimit the starting and ending points of the opening. Here a single-pin gauge suffices. What is needed is a method to lay out the corresponding tenon to fit this mortise. I often wonder why we don't call this type of gauge a tenon gauge. Seaton's mortise gauge had an arm with four sets of fixed pins, each spaced to match a mortise chisel in his kit. Modern mortise gauges have an adjustable pair of pins. An alternative approach to a multi-pin mortise gauge was offered by Charles Holtzapffel in "Turning and Mechanical Manipulation" (1846): "The appropriate chisel having been A traditional English gauge with two pins. Is it a mortise gauge or tenon gauge? This antique panel gauge is still useful for marking out long rip cuts. selected, the gage-lines corresponding with its width are gaged on each side of the styles and rails. Frequently the mortise chisel is slightly stuck into the work to imprint its own width, by which to adjust the gages; and every piece is gaged from the face side, so that when the whole are put together they may be flush with one another." Panel Gauges A panel gauge looks like a marking gauge on steroids. The head is wider to provide a solid bearing surface and the arms are 24" or longer. Panel gauges are used to mark larger panels; marking gauges with their short arms and small heads are not able to span these larger distances. In the modern power-tool shop the table saw fence serves the function of a panel gauge. Cutting Gauges Replacing the marking gauge pin with a lancet-shaped blade creates a cutting gauge. The cutting gauge cleanly cuts both cross-grain and long-grain. This function allows you to quickly delimit shoulders for raised panels. Small rabbets can be cut entirely with a cutting gauge. The cutting gauge is also useful in veneer work. I use a cutting gauge to create a crisp and even shoulder for cross-banding veneer. After laying the field veneer, set the gauge for the desired cross-banding width. Cut the field veneer with this gauge setting, creating a clean shoulder. Reheat the hide glue, remove the excess field veneer, and lay in the cross-banding. Other Gauges There are many more gauges to be found in old texts, each specialized for a specific task. Holtzapffel mentions router gauges for inlay work, the cooper's croze, as well as an interesting bisecting gauge used to mark the centerline of workpieces. The humble gauge comes in many shapes and serves many purposes. — DJ The contemporary Tite-Mark is technically a cutting gauge. Some cutting gauges have an even larger circular blade. popularwoodworking.com i 37 |


