Popular Woodworking 2006-12 № 159, страница 21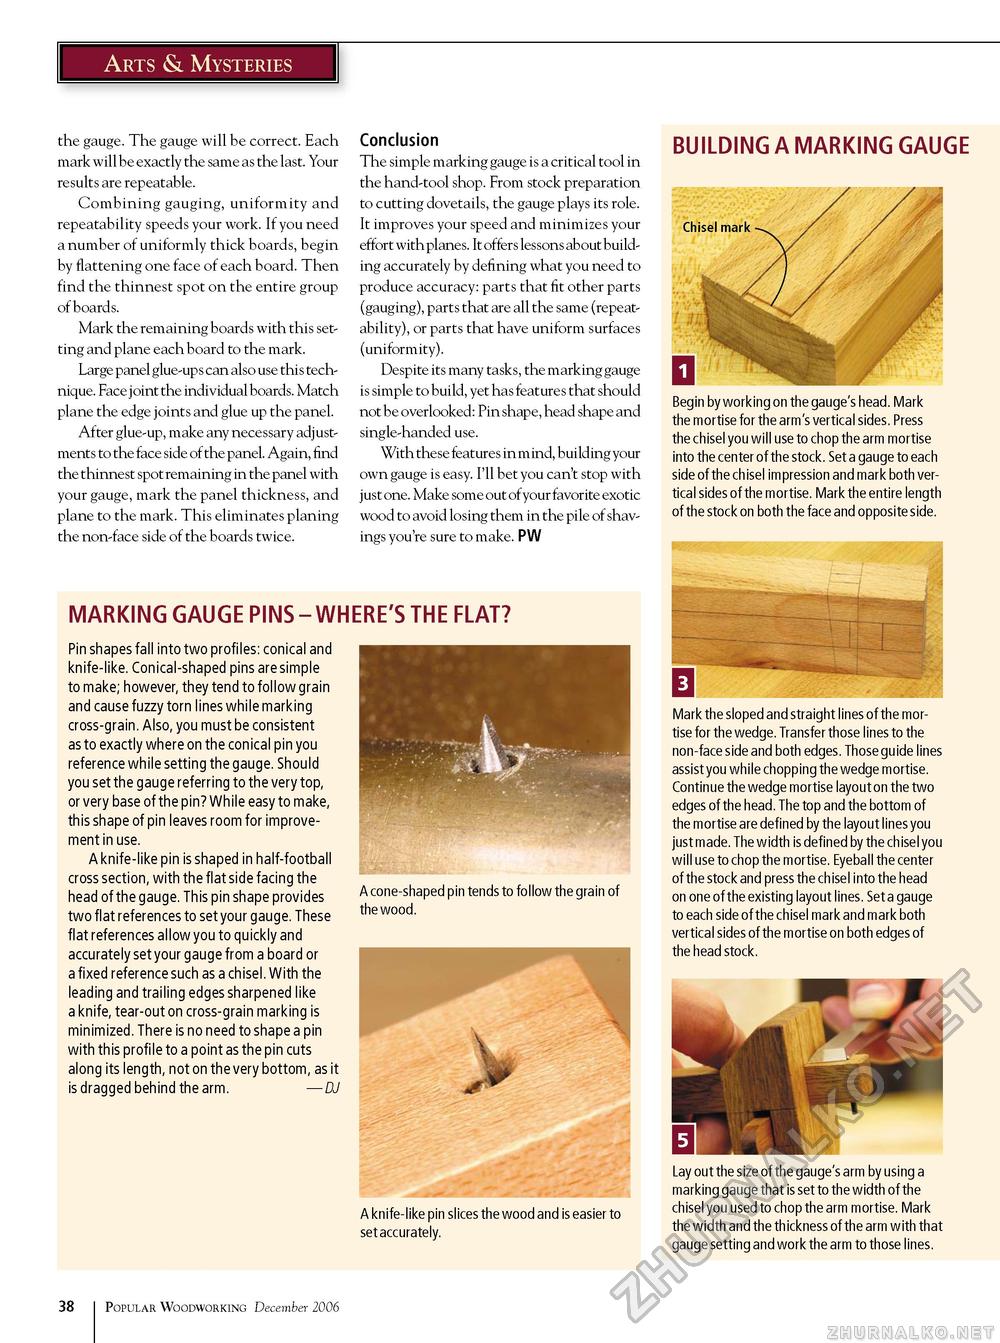
Arts & Mysteries the gauge. The gauge will be correct. Each mark will be exactly the same as the last. Your results are repeatable. Combining gauging, uniformity and repeatability speeds your work. If you need a number of uniformly thick boards, begin by flattening one face of each board. Then find the thinnest spot on the entire group of boards. Mark the remaining boards with this setting and plane each board to the mark. Large panel glue-ups can also use this technique. Face joint the individual boards. Match plane the edge joints and glue up the panel. After glue-up, make any necessary adjustments to the face side of the panel. Again, find the thinnest spot remaining in the panel with your gauge, mark the panel thickness, and plane to the mark. This eliminates planing the non-face side of the boards twice. Conclusion The simple marking gauge is a critical tool in the hand-tool shop. From stock preparation to cutting dovetails, the gauge plays its role. It improves your speed and minimizes your effort with planes. It offers lessons about building accurately by defining what you need to produce accuracy: parts that fit other parts (gauging), parts that are all the same (repeatability), or parts that have uniform surfaces (uniformity). Despite its many tasks, the marking gauge is simple to build, yet has features that should not be overlooked: Pin shape, head shape and single-handed use. With these features in mind, building your own gauge is easy. I'll bet you can't stop with just one. Make some out of your favorite exotic wood to avoid losing them in the pile of shavings you're sure to make. PW BUILDING A MARKING GAUGE MARKING GAUGE PINS - WHERE'S THE FLAT? Pin shapes fall into two profiles: conical and knife-like. Conical-shaped pins are simple to make; however, they tend to follow grain and cause fuzzy torn lines while marking cross-grain. Also, you must be consistent as to exactly where on the conical pin you reference while setting the gauge. Should you set the gauge referring to the very top, or very base of the pin? While easy to make, this shape of pin leaves room for improvement in use. A knife-like pin is shaped in half-football cross section, with the flat side facing the head of the gauge. This pin shape provides two flat references to set your gauge. These flat references allow you to quickly and accurately set your gauge from a board or a fixed reference such as a chisel. With the leading and trailing edges sharpened like a knife, tear-out on cross-grain marking is minimized. There is no need to shape a pin with this profile to a point as the pin cuts along its length, not on the very bottom, as it is dragged behind the arm. — DJ A cone-shaped pin tends to follow the grain of the wood. Chisel mark Begin by working on the gauge's head. Mark the mortise for the arm's vertical sides. Press the chisel you will use to chop the arm mortise into the center of the stock. Set a gauge to each side of the chisel impression and mark both vertical sides of the mortise. Mark the entire length of the stock on both the face and opposite side. Mark the sloped and straight lines of the mortise for the wedge. Transfer those lines to the non-face side and both edges. Those guide lines assist you while chopping the wedge mortise. Continue the wedge mortise layout on the two edges of the head. The top and the bottom of the mortise are defined by the layout lines you just made. The width is defined by the chisel you will use to chop the mortise. Eyeball the center of the stock and press the chisel into the head on one of the existing layout lines. Set a gauge to each side of the chisel mark and mark both vertical sides of the mortise on both edges of the head stock. A knife-like pin slices the wood and is easier to set accurately. Lay out the size of the gauge's arm by using a marking gauge that is set to the width of the chisel you used to chop the arm mortise. Mark the width and the thickness of the arm with that gauge setting and work the arm to those lines. 38 Popular Woodworking December 2006 |


