Popular Woodworking 2006-12 № 159, страница 24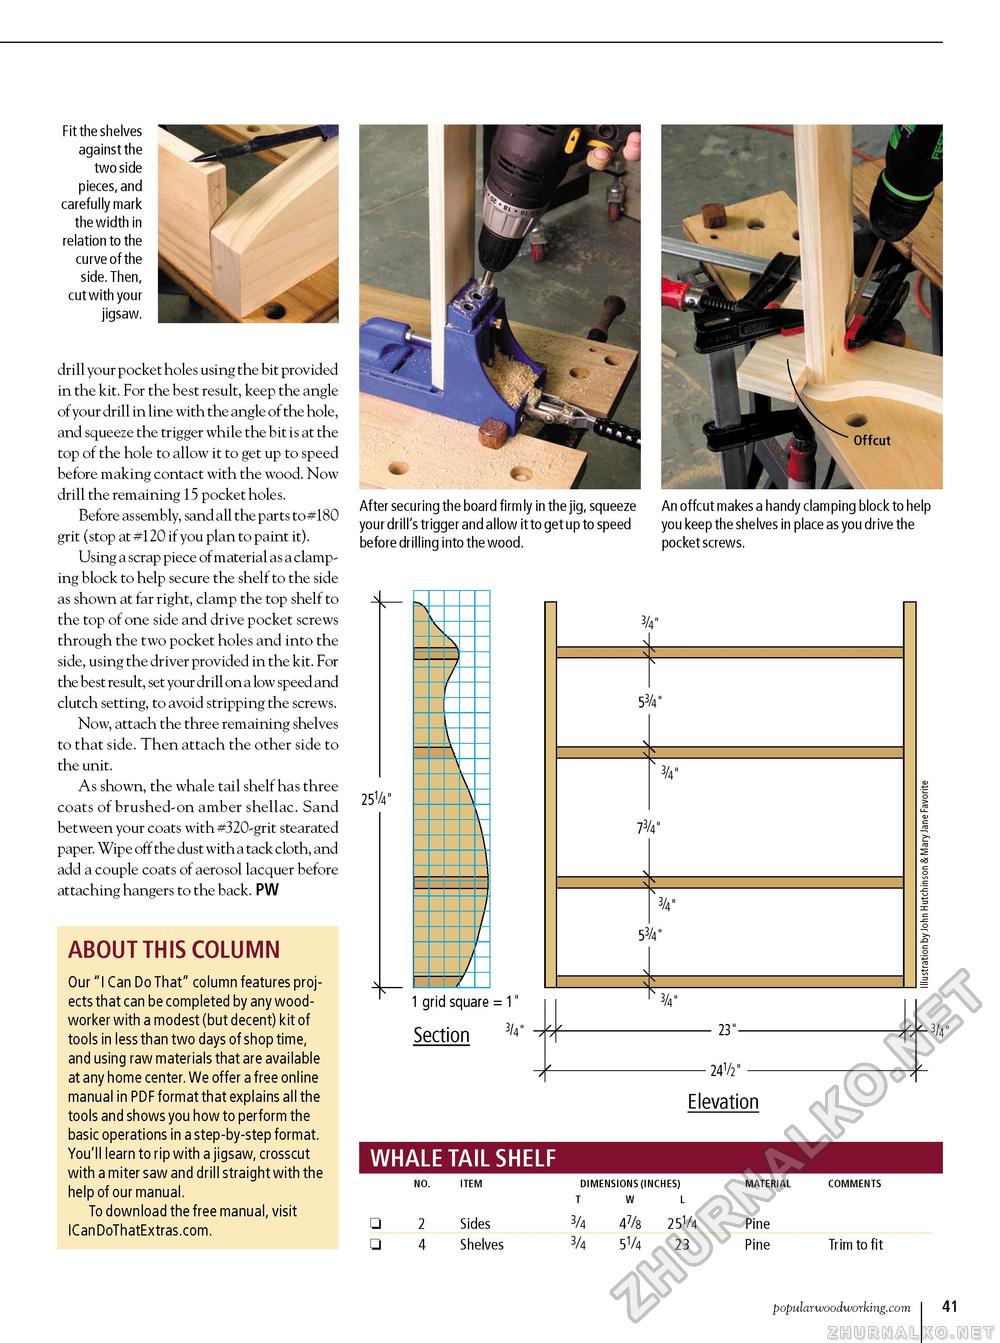
Fit the shelves against the two side pieces, and carefully mark the width in relation to the curve of the side. Then, cut with your jigsaw. drill your pocket holes using the bit provided in the kit. For the best result, keep the angle of your drill in line with the angle of the hole, and squeeze the trigger while the bit is at the top of the hole to allow it to get up to speed before making contact with the wood. Now drill the remaining 15 pocket holes. Before assembly, sand all the parts to #180 grit (stop at #120 if you plan to paint it). Using a scrap piece of material as a clamping block to help secure the shelf to the side as shown at far right, clamp the top shelf to the top of one side and drive pocket screws through the two pocket holes and into the side, using the driver provided in the kit. For the best result, set your drill on a low speed and clutch setting, to avoid stripping the screws. Now, attach the three remaining shelves to that side. Then attach the other side to the unit. As shown, the whale tail shelf has three coats of brushed-on amber shellac. Sand between your coats with #320-grit stearated paper. Wipe off the dust with a tack cloth, and add a couple coats of aerosol lacquer before attaching hangers to the back. PW ABOUT THIS COLUMN Our "I Can Do That" column features projects that can be completed by any woodworker with a modest (but decent) kit of tools in less than two days of shop time, and using raw materials that are available at any home center. We offer a free online manual in PDF format that explains all the tools and shows you how to perform the basic operations in a step-by-step format. You'll learn to rip with a jigsaw, crosscut with a miter saw and drill straight with the help of our manual. To download the free manual, visit ICanDoThatExtras.com. After securing the board firm ly in the jig, squeeze An offcut makes a handy clamping block to help your drill's trigger and allow it to get up to speed you keep the shelves in place as you drive the before drilling into the wood. pocket screws. 251/4"
34" 53/4" 3/4" 73/4" 34" 53/4" 1 grid square = 1" Section 3/4" 3/4" 23"- — 24V2" — Elevation -3/4" WHALE TAIL SHELF □ □ NO. ITEM 2 Sides 4 Shelves DIMENSIONS (INCHES) T W L 3/4 3/4 4% 5V4 25V4 23 Pine Pine Trim to fit popularwoodworking.com i 41 |


