Popular Woodworking 2006-12 № 159, страница 26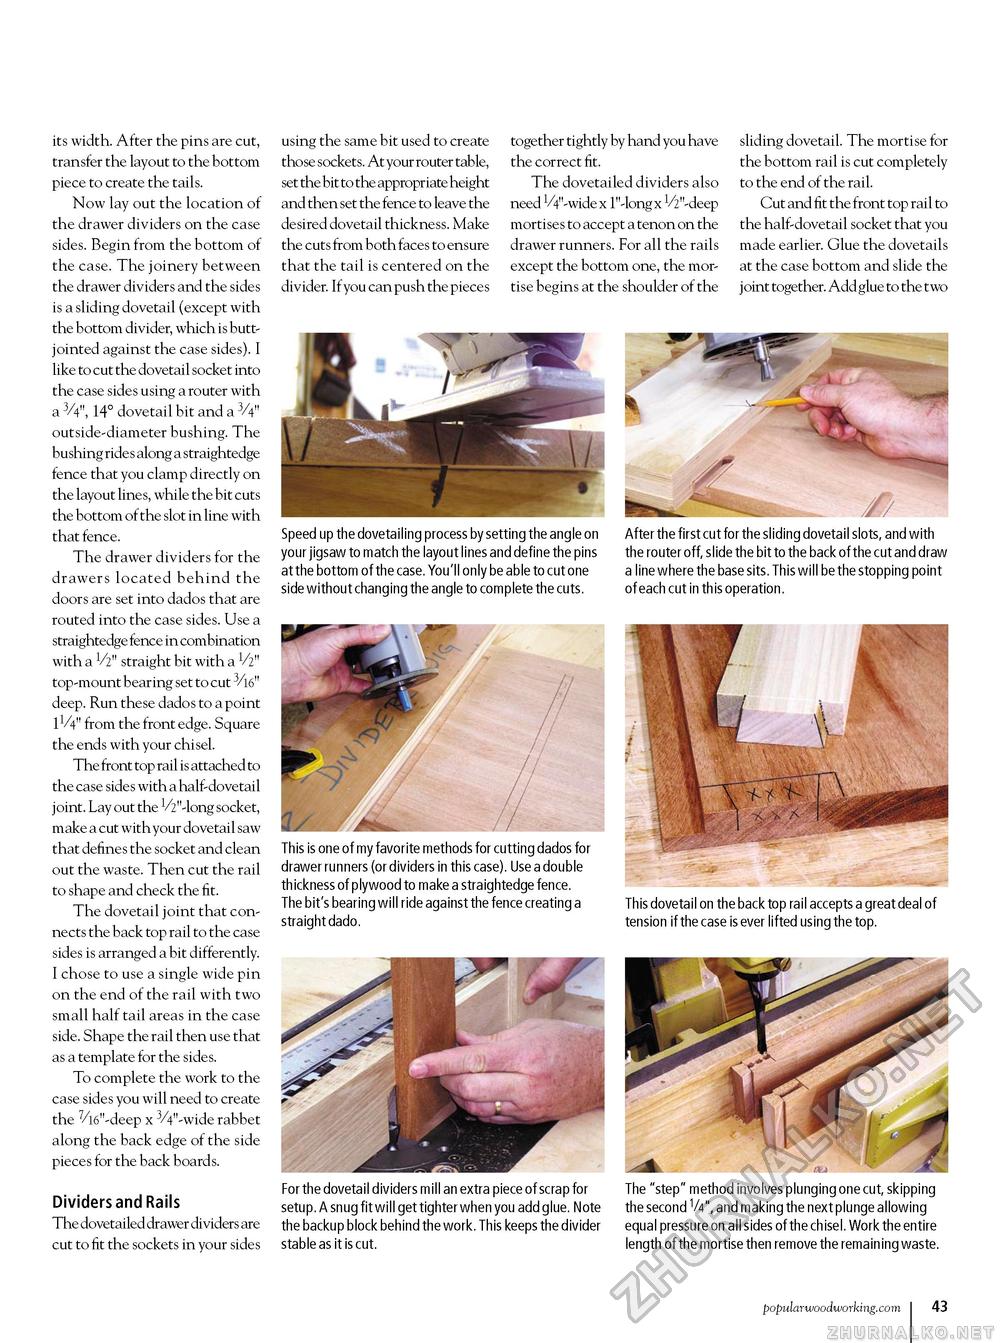
its width. After the pins are cut, transfer the layout to the bottom piece to create the tails. Now lay out the location of the drawer dividers on the case sides. Begin from the bottom of the case. The joinery between the drawer dividers and the sides is a sliding dovetail (except with the bottom divider, which is butt-jointed against the case sides). I like to cut the dovetail socket into the case sides using a router with a 3/4", 14° dovetail bit and a 3/4" outside-diameter bushing. The bushing rides along a straightedge fence that you clamp directly on the layout lines, while the bit cuts the bottom of the slot in line with that fence. The drawer dividers for the drawers located behind the doors are set into dados that are routed into the case sides. Use a straightedge fence in combination with a V2" straight bit with a 1/2" top-mount bearing set to cut 3/16" deep. Run these dados to a point 1/4" from the front edge. Square the ends with your chisel. The front top rail is attached to the case sides with a half-dovetail joint. Lay out the V"""-long socket, make a cut with your dovetail saw that defines the socket and clean out the waste. Then cut the rail to shape and check the fit. The dovetail joint that connects the back top rail to the case sides is arranged a bit differently. I chose to use a single wide pin on the end of the rail with two small half tail areas in the case side. Shape the rail then use that as a template for the sides. To complete the work to the case sides you will need to create the 7/16"-deep x 3/4"-wide rabbet along the back edge of the side pieces for the back boards. Dividers and Rails The dovetailed drawer dividers are cut to fit the sockets in your sides using the same bit used to create those sockets. At your router table, set the bit to the appropriate height and then set the fence to leave the desired dovetail thickness. Make the cuts from both faces to ensure that the tail is centered on the divider. Ifyou can push the pieces together tightly by hand you have the correct fit. The dovetailed dividers also need V4"-wide x 1"-long x V2"-deep mortises to accept a tenon on the drawer runners. For all the rails except the bottom one, the mortise begins at the shoulder of the sliding dovetail. The mortise for the bottom rail is cut completely to the end of the rail. Cut and fit the front top rail to the half-dovetail socket that you made earlier. Glue the dovetails at the case bottom and slide the j oint together. Add glue to the two Speed up the dovetailing process by setting the angle on your jigsaw to match the layout lines and define the pins at the bottom of the case. You'll only be able to cut one side without changing the angle to complete the cuts. This is one of my favorite methods for cutting dados for drawer runners (or dividers in this case). Use a double thickness of plywood to make a straightedge fence. The bit's bearing will ride against the fence creating a straight dado. For the dovetail dividers mill an extra piece of scrap for setup. A snug fit will get tighter when you add glue. Note the backup block behind the work. This keeps the divider stable as it is cut. After the first cut for the sliding dovetail slots, and with the router off, slide the bit to the back of the cut and draw a line where the base sits. This will be the stopping point of each cut in this operation. This dovetail on the back top rail accepts a great deal of tension if the case is ever lifted using the top. The "step" method involves plunging one cut, skipping the second V4", and making the next plunge allowing equal pressure on all sides of the chisel. Work the entire length of the mortise then remove the remaining waste. popularwoodworking.com i 43 |


