Popular Woodworking 2006-12 № 159, страница 29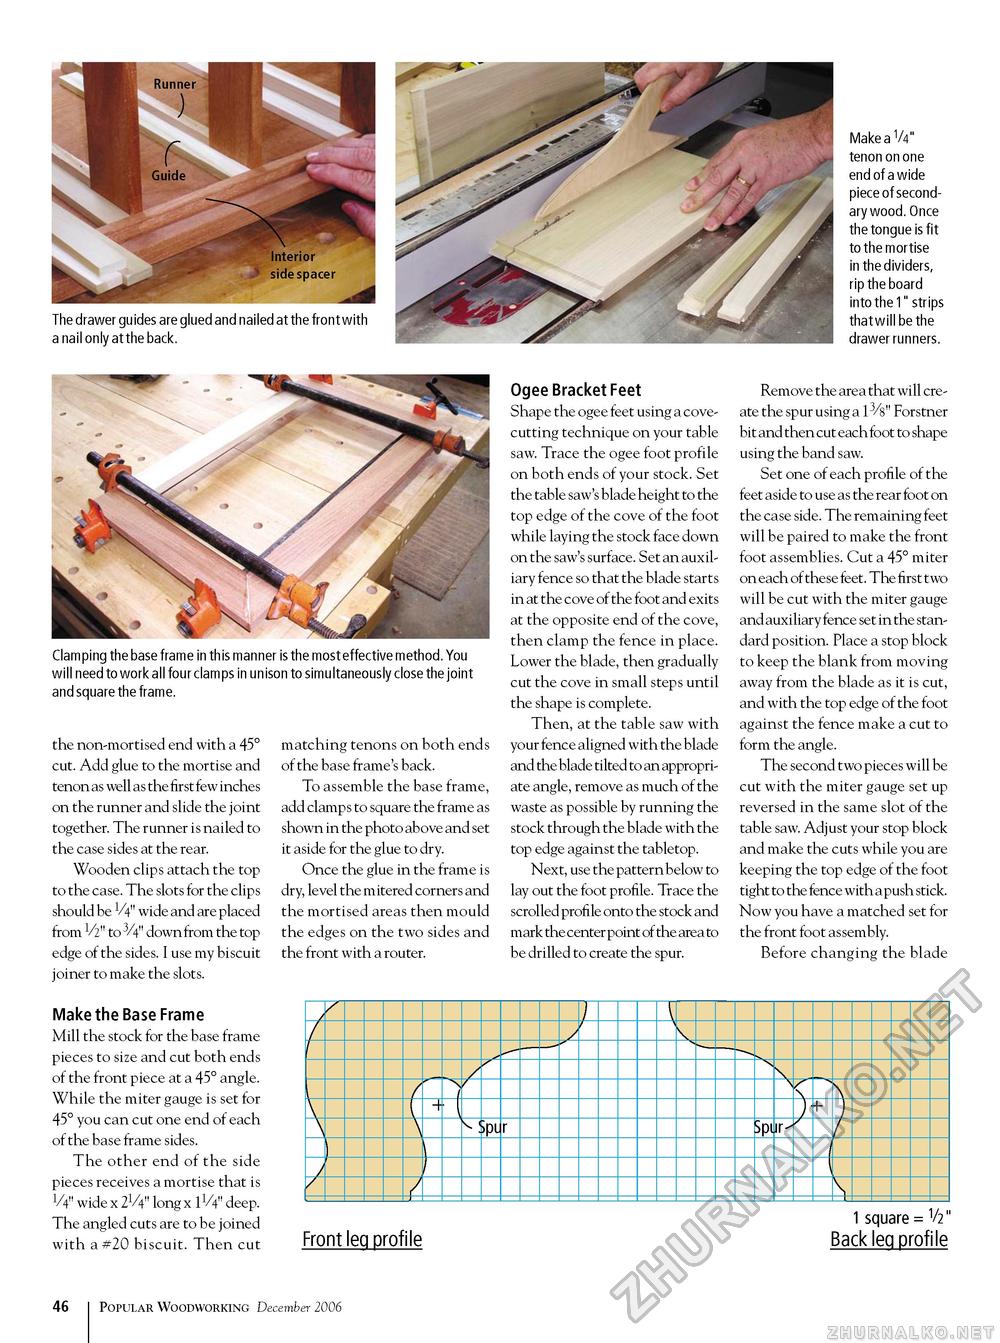
The drawer guides are glued and nailed at the front with a nail only at the back. Make a V4" tenon on one end of a wide piece of secondary wood. Once the tongue is fit to the mortise in the dividers, rip the board into the 1" strips that will be the drawer runners. Clamping the base frame in this manner is the most effective method. You will need to work all four clamps in unison to simultaneously close the joint and square the frame. the non-mortised end with a 45° cut. Add glue to the mortise and tenon as well as the first few inches on the runner and slide the joint together. The runner is nailed to the case sides at the rear. Wooden clips attach the top to the case. The slots for the clips should be 1/4" wide and are placed from V2" to 3/4" down from the top edge of the sides. I use my biscuit joiner to make the slots. Make the Base Frame Mill the stock for the base frame pieces to size and cut both ends of the front piece at a 45° angle. While the miter gauge is set for 45° you can cut one end of each of the base frame sides. The other end of the side pieces receives a mortise that is V4" wide x 2V4" long x IV4" deep. The angled cuts are to be joined with a #20 biscuit. Then cut matching tenons on both ends of the base frame's back. To assemble the base frame, add clamps to square the frame as shown in the photo above and set it aside for the glue to dry. Once the glue in the frame is dry, level the mitered corners and the mortised areas then mould the edges on the two sides and the front with a router. Ogee Bracket Feet Shape the ogee feet using a cove-cutting technique on your table saw. Trace the ogee foot profile on both ends of your stock. Set the table saw's blade height to the top edge of the cove of the foot while laying the stock face down on the saw's surface. Set an auxiliary fence so that the blade starts in at the cove of the foot and exits at the opposite end of the cove, then clamp the fence in place. Lower the blade, then gradually cut the cove in small steps until the shape is complete. Then, at the table saw with your fence aligned with the blade and the blade tilted to an appropriate angle, remove as much of the waste as possible by running the stock through the blade with the top edge against the tabletop. Next, use the pattern below to lay out the foot profile. Trace the scrolled profile onto the stock and mark the center point of the area to be drilled to create the spur. Remove the area that will create the spur using a l3/s" Forstner bit and then cut each foot to shape using the band saw. Set one of each profile of the feet aside to use as the rear foot on the case side. The remaining feet will be paired to make the front foot assemblies. Cut a 45° miter on each of these feet. The first two will be cut with the miter gauge and auxiliary fence set in the standard position. Place a stop block to keep the blank from moving away from the blade as it is cut, and with the top edge of the foot against the fence make a cut to form the angle. The second two pieces will be cut with the miter gauge set up reversed in the same slot of the table saw. Adjust your stop block and make the cuts while you are keeping the top edge of the foot tight to the fence with a push stick. Now you have a matched set for the front foot assembly. Before changing the blade
Front leg profile 1 square = V2" Back leg profile 46 Popular Woodworking December 2006 |


