Popular Woodworking 2007-02 № 160, страница 24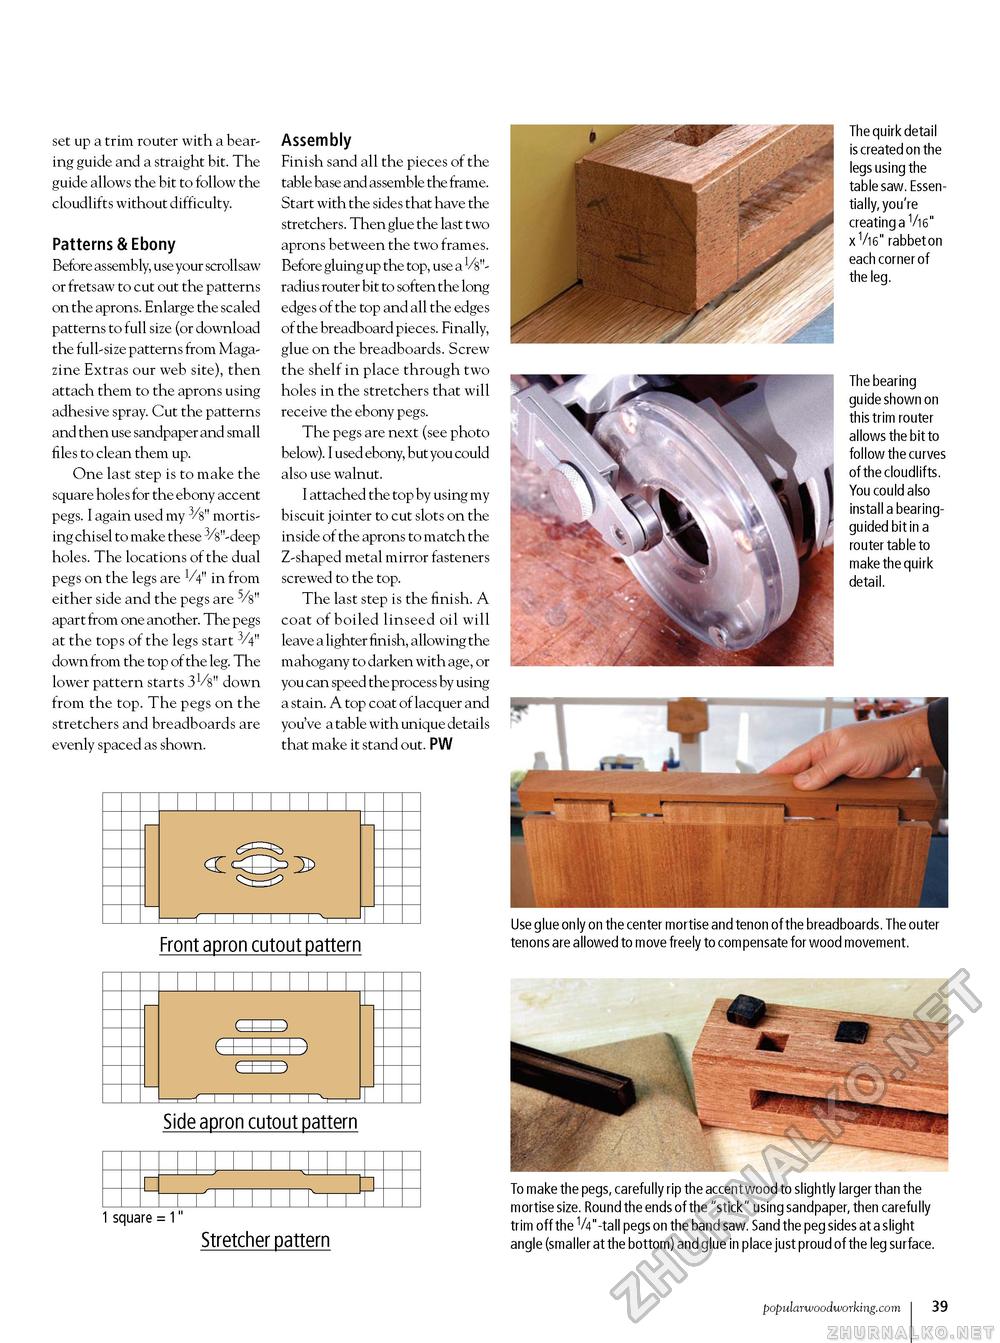
set up a trim router with a bearing guide and a straight bit. The guide allows the bit to follow the cloudlifts without difficulty. Patterns & Ebony Before assembly, use your scrollsaw or fretsaw to cut out the patterns on the aprons. Enlarge the scaled patterns to full size (or download the full-size patterns from Magazine Extras our web site), then attach them to the aprons using adhesive spray. Cut the patterns and then use sandpaper and small files to clean them up. One last step is to make the square holes for the ebony accent pegs. I again used my 3/8" mortising chisel to make these 3/s"-deep holes. The locations of the dual pegs on the legs are V4" in from either side and the pegs are apart from one another. The pegs at the tops of the legs start 3/4" down from the top of the leg. The lower pattern starts 31/8" down from the top. The pegs on the stretchers and breadboards are evenly spaced as shown. Assembly Finish sand all the pieces of the table base and assemble the frame. Start with the sides that have the stretchers. Then glue the last two aprons between the two frames. Before gluing up the top, use a V8"-radius router bit to soften the long edges of the top and all the edges of the breadboard pieces. Finally, glue on the breadboards. Screw the shelf in place through two holes in the stretchers that will receive the ebony pegs. The pegs are next (see photo below). I used ebony, but you could also use walnut. I attached the top by using my biscuit jointer to cut slots on the inside of the aprons to match the Z-shaped metal mirror fasteners screwed to the top. The last step is the finish. A coat of boiled linseed oil will leave a lighter finish, allowing the mahogany to darken with age, or you can speed the process by using a stain. A top coat of lacquer and you've a table with unique details that make it stand out. PW The quirk detail is created on the legs using the table saw. Essentially, you're creating a Vi6" x Vi6" rabbet on each corner of the leg. The bearing guide shown on this trim router allows the bit to follow the curves of the cloudlifts. You could also install a bearing-guided bit in a router table to make the quirk detail. Front apron cutout pattern Use glue only on the center mortise and tenon of the breadboards. The outer tenons are allowed to move freely to compensate for wood movement.
Side apron cutout pattern 1 square = 1" Stretcher pattern To make the pegs, carefully rip the accent wood to slightly larger than the mortise size. Round the ends of the "stick" using sandpaper, then carefully trim off the V4"-tall pegs on the band saw. Sand the peg sides at a slight angle (smaller at the bottom) and glue in place just proud of the leg surface. popularwoodworking.com 31 |


