Popular Woodworking 2007-02 № 160, страница 22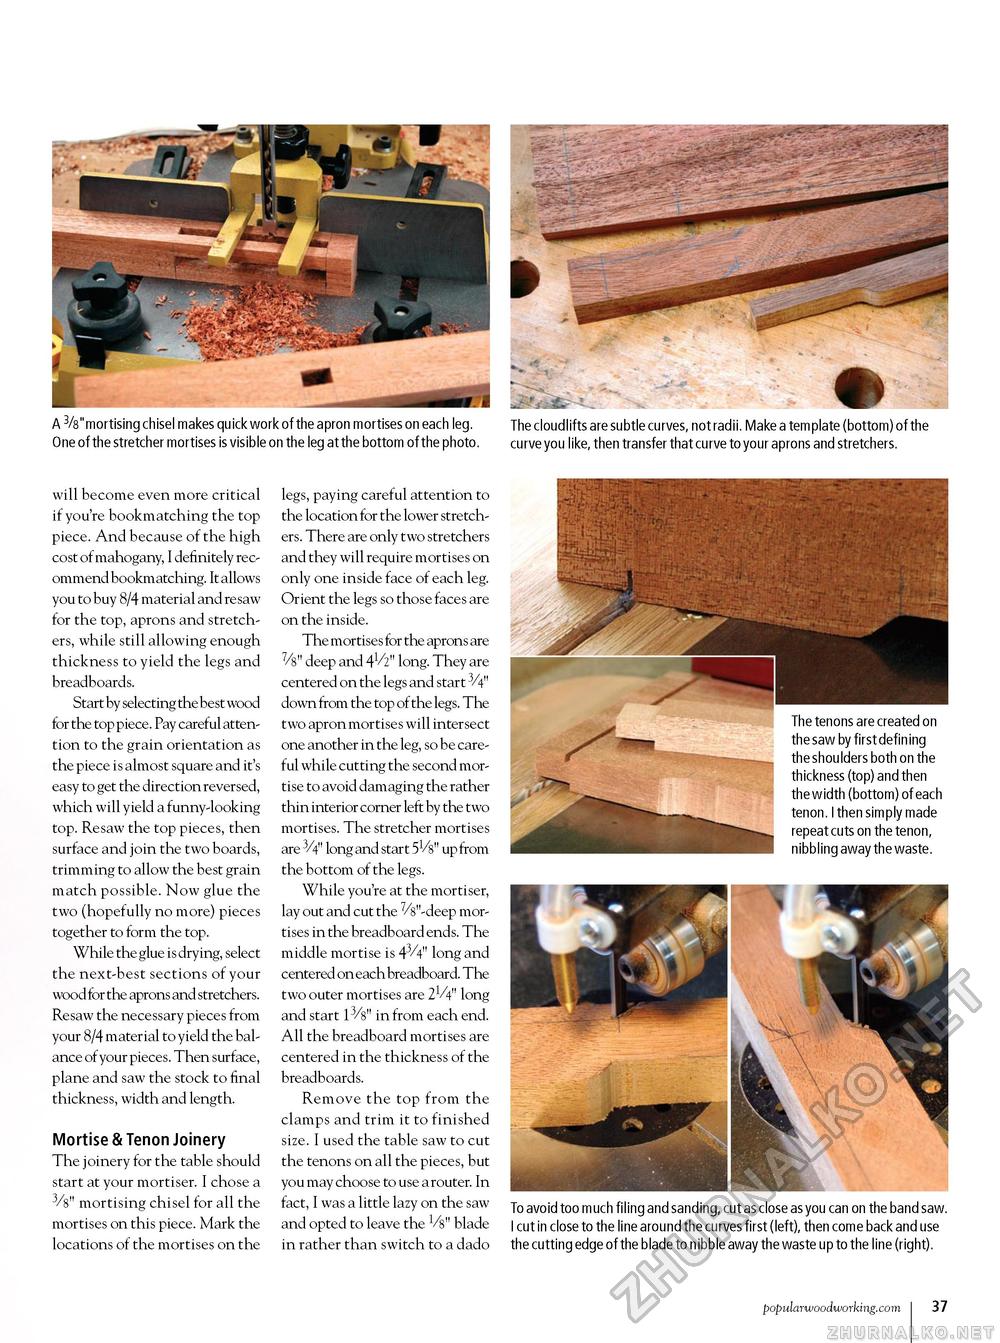
A 3/8"mortising chisel makes quick work of the apron mortises on each leg. The cloudlifts are subtle curves, not radii. Make a template (bottom) of the One of the stretcher mortises is visible on the leg at the bottom of the photo. curve you like, then transfer that curve to your aprons and stretchers. will become even more critical if you're bookmatching the top piece. And because of the high cost of mahogany, I definitely recommend bookmatching. It allows you to buy 8/4 material and resaw for the top, aprons and stretchers, while still allowing enough thickness to yield the legs and breadboards. Start by selecting the best wood for the top piece. Pay careful attention to the grain orientation as the piece is almost square and it's easy to get the direction reversed, which will yield a funny-looking top. Resaw the top pieces, then surface and join the two boards, trimming to allow the best grain match possible. Now glue the two (hopefully no more) pieces together to form the top. While the glue is drying, select the next-best sections of your wood for the aprons and stretchers. Resaw the necessary pieces from your 8/4 material to yield the balance of your pieces. Then surface, plane and saw the stock to final thickness, width and length. Mortise & Tenon Joinery The joinery for the table should start at your mortiser. I chose a mortising chisel for all the mortises on this piece. Mark the locations of the mortises on the legs, paying careful attention to the location for the lower stretchers. There are only two stretchers and they will require mortises on only one inside face of each leg. Orient the legs so those faces are on the inside. The mortises for the aprons are %" deep and 41/2" long. They are centered on the legs and start 3/4" down from the top of the legs. The two apron mortises will intersect one another in the leg, so be careful while cutting the second mortise to avoid damaging the rather thin interior corner left by the two mortises. The stretcher mortises are 3/4" long and start 5V8" up from the bottom of the legs. While you're at the mortiser, lay out and cut the 7/8"-deep mortises in the breadboard ends. The middle mortise is 43/4" long and centered on each breadboard. The two outer mortises are 21/4" long and start 13/8" in from each end. All the breadboard mortises are centered in the thickness of the breadboards. Remove the top from the clamps and trim it to finished size. I used the table saw to cut the tenons on all the pieces, but you may choose to use a router. In fact, I was a little lazy on the saw and opted to leave the 1/8" blade in rather than switch to a dado To avoid too much filing and sanding, cut as close as you can on the band saw. I cut in close to the line around the curves first (left), then come back and use the cutting edge of the blade to nibble away the waste up to the line (right). popularwoodworking.com 31 |


