Popular Woodworking 2007-02 № 160, страница 40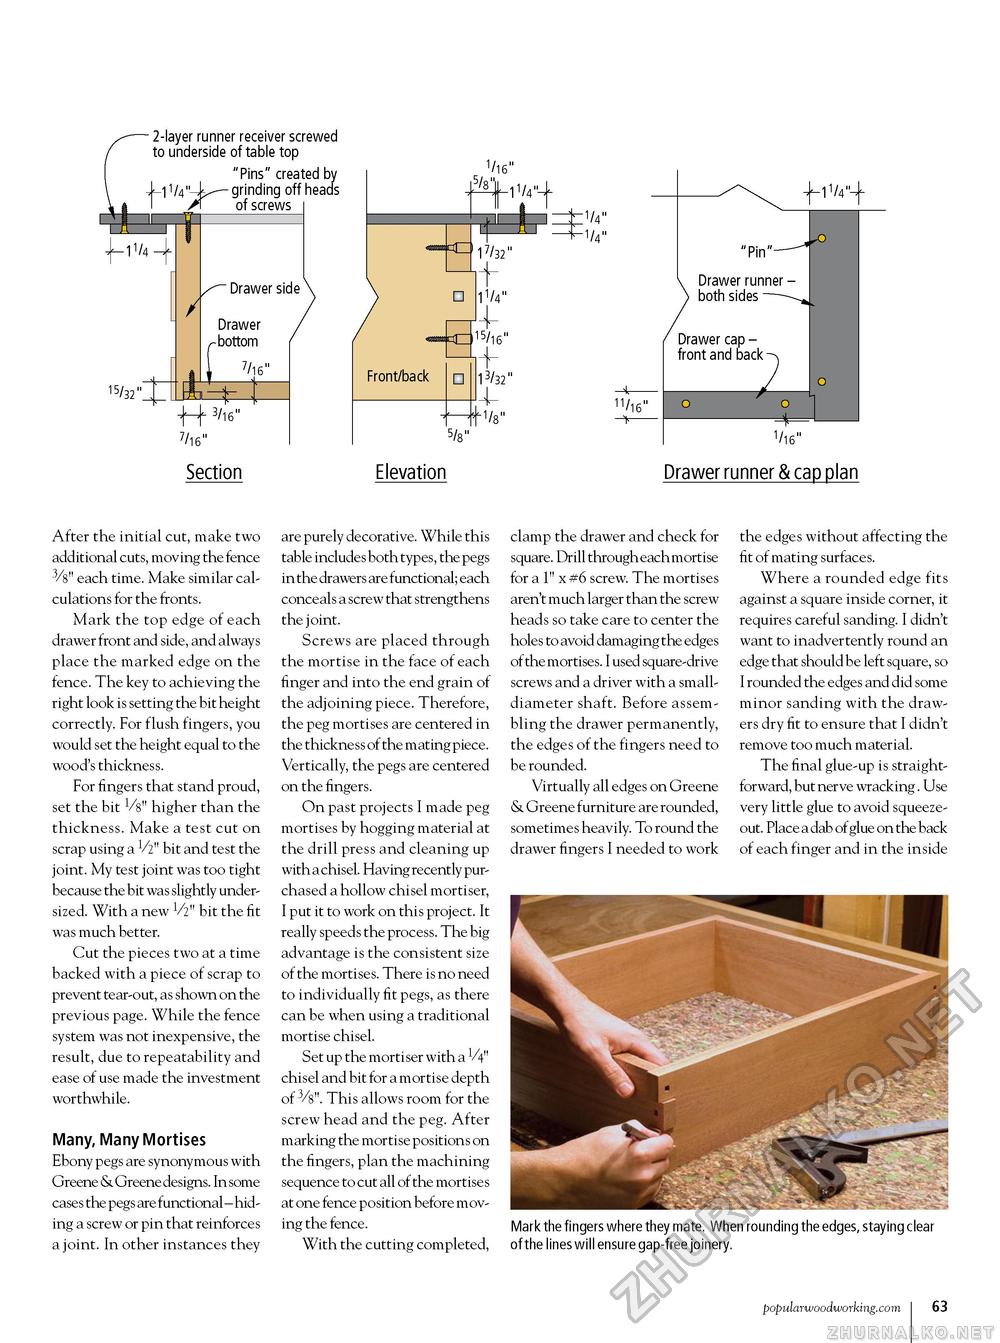
■ 2-layer runner receiver screwed to underside of table top "Pins" created by — grinding offheads of screws 15/32" / - Drawer side Drawer bottom 7/l6" 3/16" ?/l6" Section 1/16" 5/8"[ 11/4 □ ^rosasa cj i^/lfi" Front/back □ lV4" 5/8" 13/32" ■1/8" Elevation 11/4" -1/4" 11/16" - "Pin"---- Drawer runner -both sides —\ Drawer cap front and back -1V4" Vie" Drawer runner & cap plan After the initial cut, make two additional cuts, moving the fence 3/8" each time. Make similar calculations for the fronts. Mark the top edge of each drawer front and side, and always place the marked edge on the fence. The key to achieving the right look is setting the bit height correctly. For flush fingers, you would set the height equal to the wood's thickness. For fingers that stand proud, set the bit V8" higher than the thickness. Make a test cut on scrap using a V2" bit and test the joint. My test joint was too tight because the bit was slightly undersized. With a new V2" bit the fit was much better. Cut the pieces two at a time backed with a piece of scrap to prevent tear-out, as shown on the previous page. While the fence system was not inexpensive, the result, due to repeatability and ease of use made the investment worthwhile. Many, Many Mortises Ebony pegs are synonymous with Greene & Greene designs. In some cases the pegs are functional - hiding a screw or pin that reinforces a joint. In other instances they are purely decorative. While this table includes both types, the pegs in the drawers are functional; each conceals a screw that strengthens the joint. Screws are placed through the mortise in the face of each finger and into the end grain of the adjoining piece. Therefore, the peg mortises are centered in the thickness of the mating piece. Vertically, the pegs are centered on the fingers. On past projects I made peg mortises by hogging material at the drill press and cleaning up with a chisel. Having recently purchased a hollow chisel mortiser, I put it to work on this project. It really speeds the process. The big advantage is the consistent size of the mortises. There is no need to individually fit pegs, as there can be when using a traditional mortise chisel. Set up the mortiser with a V4" chisel and bit for a mortise depth of 3/8". This allows room for the screw head and the peg. After marking the mortise positions on the fingers, plan the machining sequence to cut all of the mortises at one fence position before moving the fence. With the cutting completed, clamp the drawer and check for square. Drill through each mortise for a 1" x #6 screw. The mortises aren't much larger than the screw heads so take care to center the holes to avoid damaging the edges of the mortises. I used square-drive screws and a driver with a small-diameter shaft. Before assembling the drawer permanently, the edges of the fingers need to be rounded. Virtually all edges on Greene & Greene furniture are rounded, sometimes heavily. To round the drawer fingers I needed to work the edges without affecting the fit of mating surfaces. Where a rounded edge fits against a square inside corner, it requires careful sanding. I didn't want to inadvertently round an edge that should be left square, so I rounded the edges and did some minor sanding with the drawers dry fit to ensure that I didn't remove too much material. The final glue-up is straightforward, but nerve wracking . Use very little glue to avoid squeeze-out. Place a dab of glue on the back of each finger and in the inside Mark the fingers where they mate. When rounding the edges, staying clear of the lines will ensure gap-free joinery. popularwoodworking.com 31 |


