Popular Woodworking 2007-02 № 160, страница 41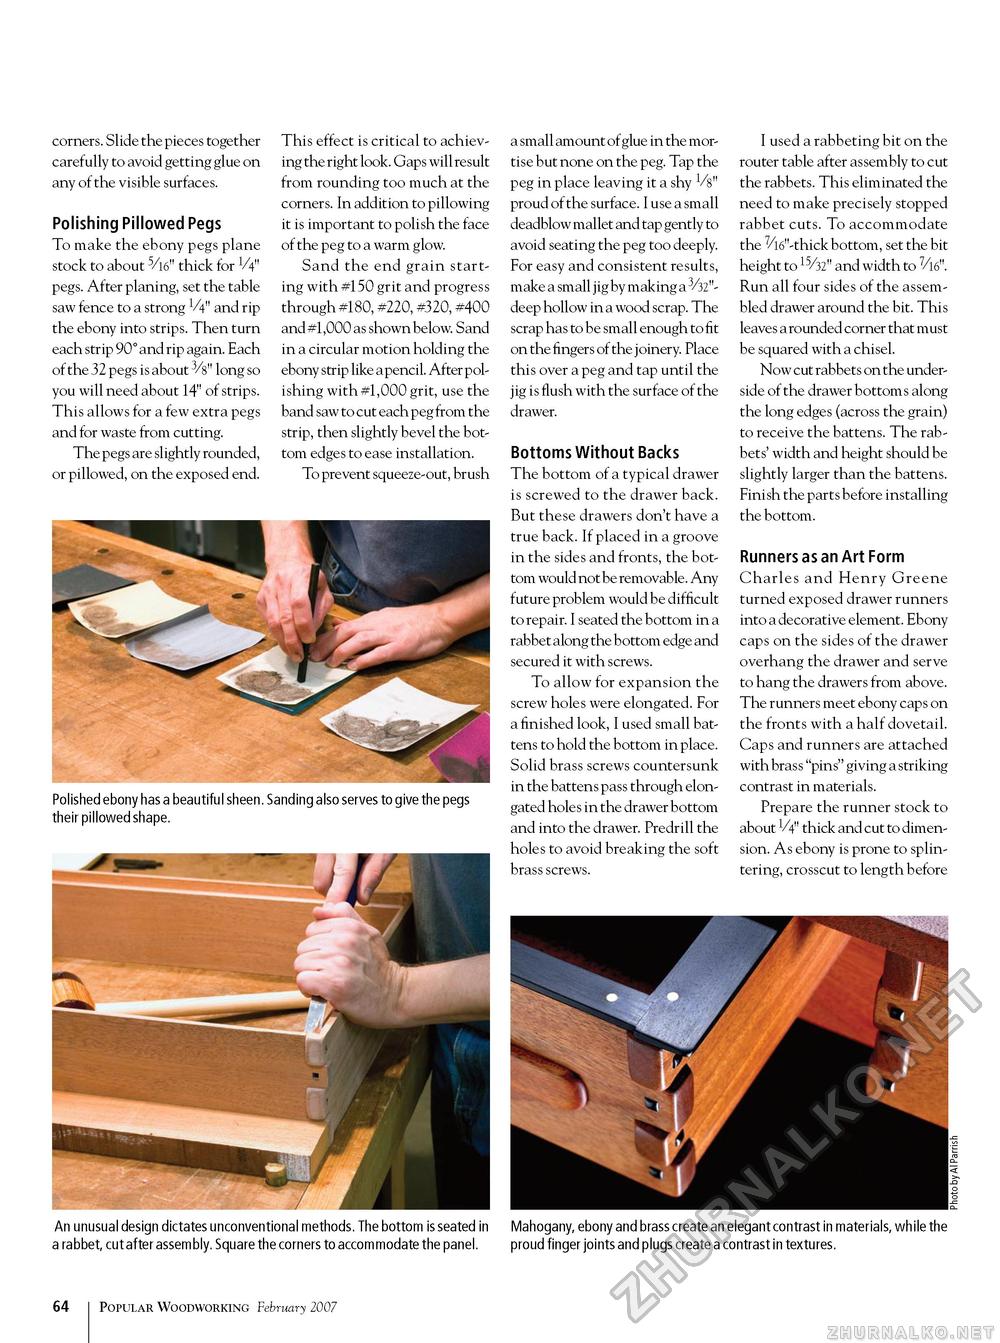
corners. Slide the pieces together carefully to avoid getting glue on any of the visible surfaces. Polishing Pillowed Pegs To make the ebony pegs plane stock to about 5/l6" thick for V4" pegs. After planing, set the table saw fence to a strong V4" and rip the ebony into strips. Then turn each strip 90° and rip again. Each of the 32 pegs is about 3/s" long so you will need about 14" of strips. This allows for a few extra pegs and for waste from cutting. The pegs are slightly rounded, or pillowed, on the exposed end. This effect is critical to achieving the right look. Gaps will result from rounding too much at the corners. In addition to pillowing it is important to polish the face of the peg to a warm glow. Sand the end grain starting with #150 grit and progress through #180, #220, #320, #400 and #1,000 as shown below. Sand in a circular motion holding the ebony strip like a pencil. After polishing with #1,000 grit, use the band saw to cut each peg from the strip, then slightly bevel the bottom edges to ease installation. To prevent squeeze-out, brush Polished ebony has a beautiful sheen. Sanding also serves to give the pegs their pillowed shape. a small amount of glue in the mortise but none on the peg. Tap the peg in place leaving it a shy 1/8" proud of the surface. I use a small deadblow mallet and tap gently to avoid seating the peg too deeply. For easy and consistent results, make a small jig by making a 3/32"-deep hollow in a wood scrap. The scrap has to be small enough to fit on the fingers of the joinery. Place this over a peg and tap until the jig is flush with the surface of the drawer. Bottoms Without Backs The bottom of a typical drawer is screwed to the drawer back. But these drawers don't have a true back. If placed in a groove in the sides and fronts, the bottom would not be removable. Any future problem would be difficult to repair. I seated the bottom in a rabbet along the bottom edge and secured it with screws. To allow for expansion the screw holes were elongated. For a finished look, I used small battens to hold the bottom in place. Solid brass screws countersunk in the battens pass through elongated holes in the drawer bottom and into the drawer. Predrill the holes to avoid breaking the soft brass screws. I used a rabbeting bit on the router table after assembly to cut the rabbets. This eliminated the need to make precisely stopped rabbet cuts. To accommodate the 7/16"-thick bottom, set the bit height to 15/32" and width to 7/16". Run all four sides of the assembled drawer around the bit. This leaves a rounded corner that must be squared with a chisel. Now cut rabbets on the underside of the drawer bottoms along the long edges (across the grain) to receive the battens. The rabbets' width and height should be slightly larger than the battens. Finish the parts before installing the bottom. Runners as an Art Form Charles and Henry Greene turned exposed drawer runners into a decorative element. Ebony caps on the sides of the drawer overhang the drawer and serve to hang the drawers from above. The runners meet ebony caps on the fronts with a half dovetail. Caps and runners are attached with brass ""pins" giving a striking contrast in materials. Prepare the runner stock to about 1/4" thick and cut to dimension. As ebony is prone to splintering, crosscut to length before An unusual design dictates unconventional methods. The bottom is seated in a rabbet, cut after assembly. Square the corners to accommodate the panel. Mahogany, ebony and brass create an elegant contrast in materials, while the proud finger joints and plugs create a contrast in textures. 10 Popular Woodworking February 2007 |


