Popular Woodworking 2007-02 № 160, страница 46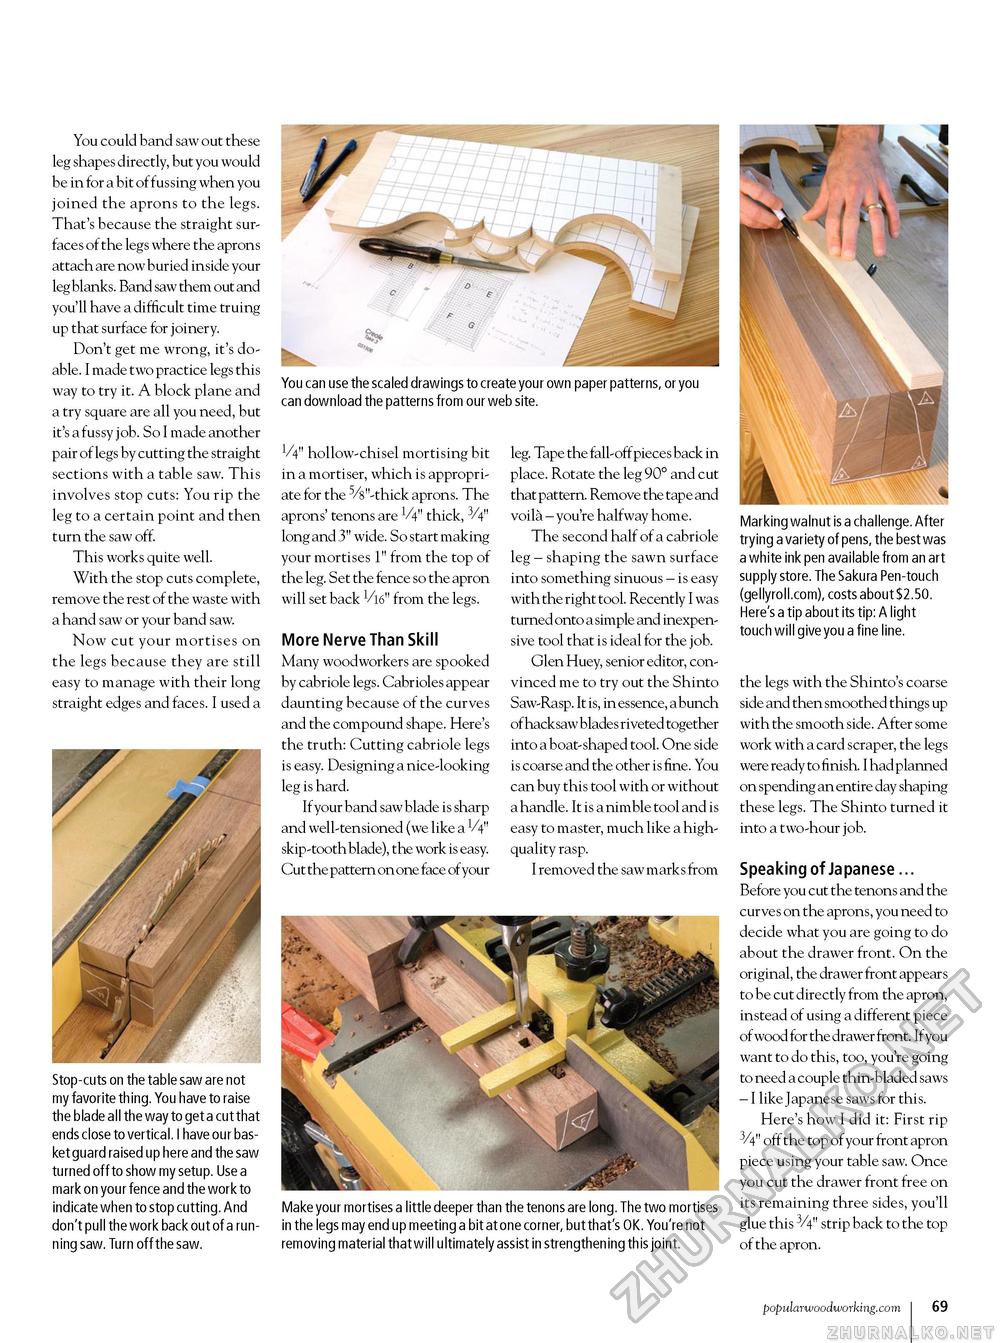
You could band saw out these leg shapes directly, but you would be in for a bit of fussing when you joined the aprons to the legs. That's because the straight surfaces of the legs where the aprons attach are now buried inside your leg blanks. Band saw them out and you'll have a difficult time truing up that surface for joinery. Don't get me wrong, it's doable. I made two practice legs this way to try it. A block plane and a try square are all you need, but it's a fussy job. So I made another pair of legs by cutting the straight sections with a table saw. This involves stop cuts: You rip the leg to a certain point and then turn the saw off. This works quite well. With the stop cuts complete, remove the rest of the waste with a hand saw or your band saw. Now cut your mortises on the legs because they are still easy to manage with their long straight edges and faces. I used a You can use the scaled drawings to create your own paper patterns, or you can download the patterns from our web site. VV hollow-chisel mortising bit in a mortiser, which is appropriate for the 5/8"-thick aprons. The aprons' tenons are V4" thick, 3/4" long and 3" wide. So start making your mortises 1" from the top of the leg. Set the fence so the apron will set back Vi6" from the legs. More Nerve Than Skill Many woodworkers are spooked by cabriole legs. Cabrioles appear daunting because of the curves and the compound shape. Here's the truth: Cutting cabriole legs is easy. Designing a nice-looking leg is hard. If your band saw blade is sharp and well-tensioned (we like a skip-tooth blade), the work is easy. Cut the pattern on one face of your leg. Tape the fall-off pieces back in place. Rotate the leg 90° and cut that pattern. Remove the tape and voila - you're halfway home. The second half of a cabriole leg - shaping the sawn surface into something sinuous - is easy with the right tool. Recently I was turned onto a simple and inexpensive tool that is ideal for the job. Glen Huey, senior editor, convinced me to try out the Shinto Saw-Rasp. It is, in essence, a bunch of hacksaw blades riveted together into a boat-shaped tool. One side is coarse and the other is fine. You can buy this tool with or without a handle. It is a nimble tool and is easy to master, much like a high-quality rasp. I removed the saw marks from Stop-cuts on the table saw are not my favorite thing. You have to raise the blade all the way to get a cut that ends close to vertical. I have our basket guard raised up here and the saw turned off to show my setup. Use a mark on your fence and the work to indicate when to stop cutting. And don't pull the work back out of a running saw. Turn off the saw. Make your mortises a little deeper than the tenons are long. The two mortises in the legs may end up meeting a bit at one corner, but that's OK. You're not removing material that will ultimately assist in strengthening this joint. Marking walnut is a challenge. After trying a variety of pens, the best was a white ink pen available from an art supply store. The Sakura Pen-touch (gellyroll.com), costs about $2.50. Here's a tip about its tip: A light touch will give you a fine line. the legs with the Shinto's coarse side and then smoothed things up with the smooth side. After some work with a card scraper, the legs were ready to finish. I had planned on spending an entire day shaping these legs. The Shinto turned it into a two-hour job. Speaking of Japanese ... Before you cut the tenons and the curves on the aprons, you need to decide what you are going to do about the drawer front. On the original, the drawer front appears to be cut directly from the apron, instead of using a different piece of wood for the drawer front. If you want to do this, too, you're going to need a couple thin-bladed saws - I like Japanese saws for this. Here's how I did it: First rip 3/4" off the top of your front apron piece using your table saw. Once you cut the drawer front free on its remaining three sides, you'll glue this 3/4" strip back to the top of the apron. popularwoodworking.com 31 |


