Popular Woodworking 2007-02 № 160, страница 47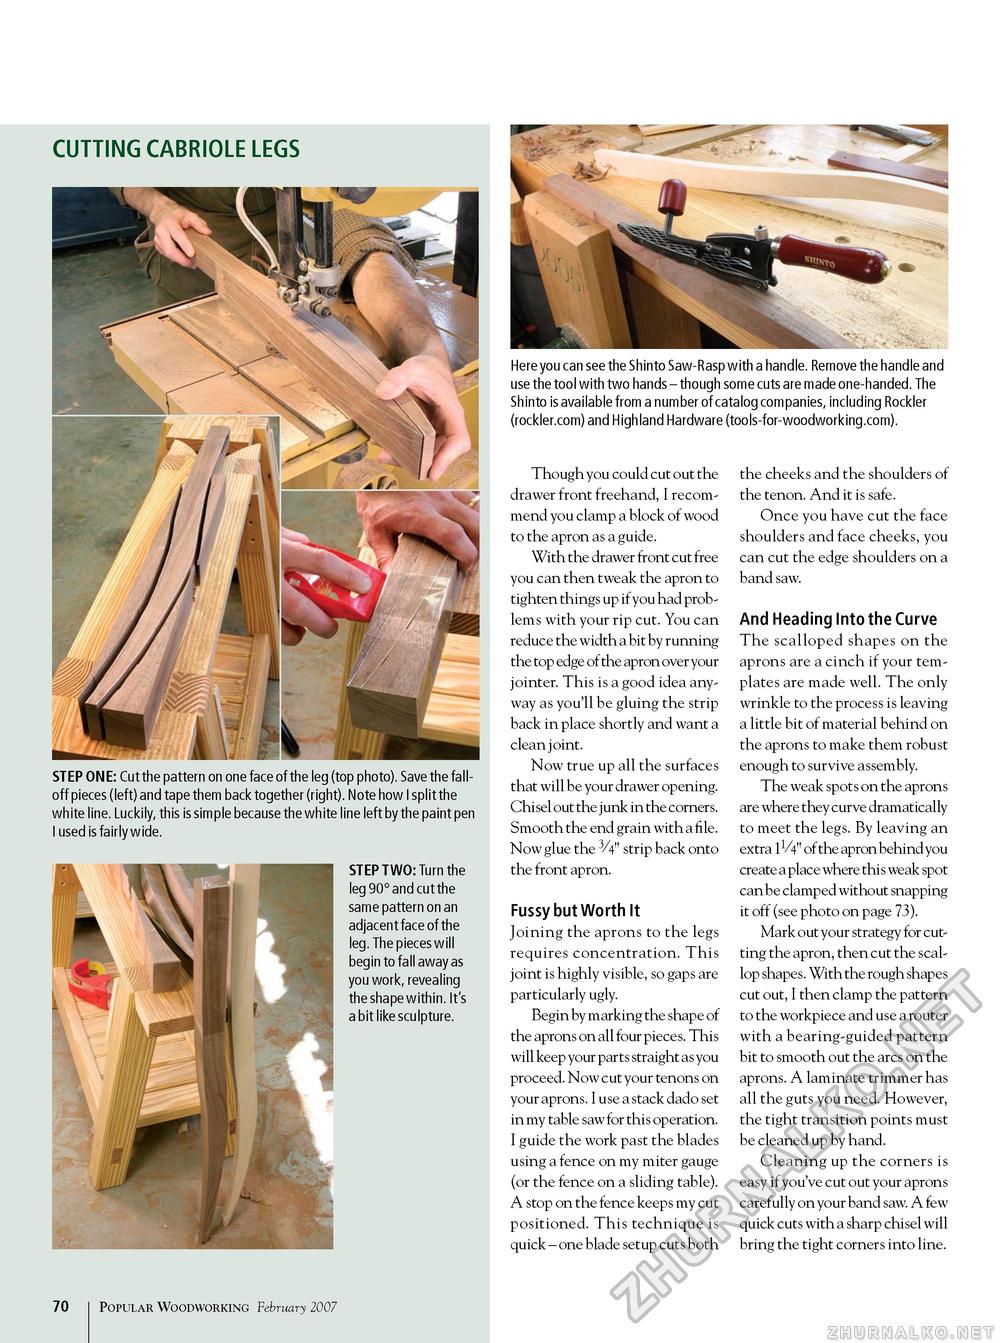
CUTTING CABRIOLE LEGS STEP ONE: Cut the pattern on one face of the leg (top photo). Save the fall-off pieces (left) and tape them back together (right). Note how I split the white line. Luckily, this is simple because the white line left by the paint pen I used is fairly wide. STEP TWO: Turn the leg 90° and cut the same pattern on an adjacent face of the leg. The pieces will begin to fall away as you work, revealing the shape within. It's a bit like sculpture. Here you can see the Shinto Saw-Rasp with a handle. Remove the handle and use the tool with two hands - though some cuts are made one-handed. The Shinto is available from a number of catalog companies, including Rockler (rockler.com) and Highland Hardware (tools-for-woodworking.com). Though you could cut out the drawer front freehand, I recommend you clamp a block of wood to the apron as a guide. With the drawer front cut free you can then tweak the apron to tighten things up if you had prob -lems with your rip cut. You can reduce the width a bit by running the top edge of the apron over your jointer. This is a good idea anyway as you'll be gluing the strip back in place shortly and want a clean joint. Now true up all the surfaces that will be your drawer opening. Chisel out the junk in the corners. Smooth the end grain with a file. Now glue the 3/4" strip back onto the front apron. Fussy but Worth It Joining the aprons to the legs requires concentration. This joint is highly visible, so gaps are particularly ugly. Begin by marking the shape of the aprons on all four pieces. This will keep your parts straight as you proceed. Now cut your tenons on your aprons. I use a stack dado set in my table saw for this operation. I guide the work past the blades using a fence on my miter gauge (or the fence on a sliding table). A stop on the fence keeps my cut positioned. This technique is quick - one blade setup cuts both the cheeks and the shoulders of the tenon. And it is safe. Once you have cut the face shoulders and face cheeks, you can cut the edge shoulders on a band saw. And Heading into the Curve The scalloped shapes on the aprons are a cinch if your templates are made well. The only wrinkle to the process is leaving a little bit of material behind on the aprons to make them robust enough to survive assembly. The weak spots on the aprons are where they curve dramatically to meet the legs. By leaving an extra IV4" of the apron behind you create a place where this weak spot can be clamped without snapping it off (see photo on page 73). Mark out your strategy for cutting the apron, then cut the scallop shapes. With the rough shapes cut out, I then clamp the pattern to the workpiece and use a router with a bearing-guided pattern bit to smooth out the arcs on the aprons. A laminate trimmer has all the guts you need. However, the tight transition points must be cleaned up by hand. Cleaning up the corners is easy if you've cut out your aprons carefully on your band saw. A few quick cuts with a sharp chisel will bring the tight corners into line. 10 Popular Woodworking February 2007 |


