Popular Woodworking 2007-04 № 161, страница 43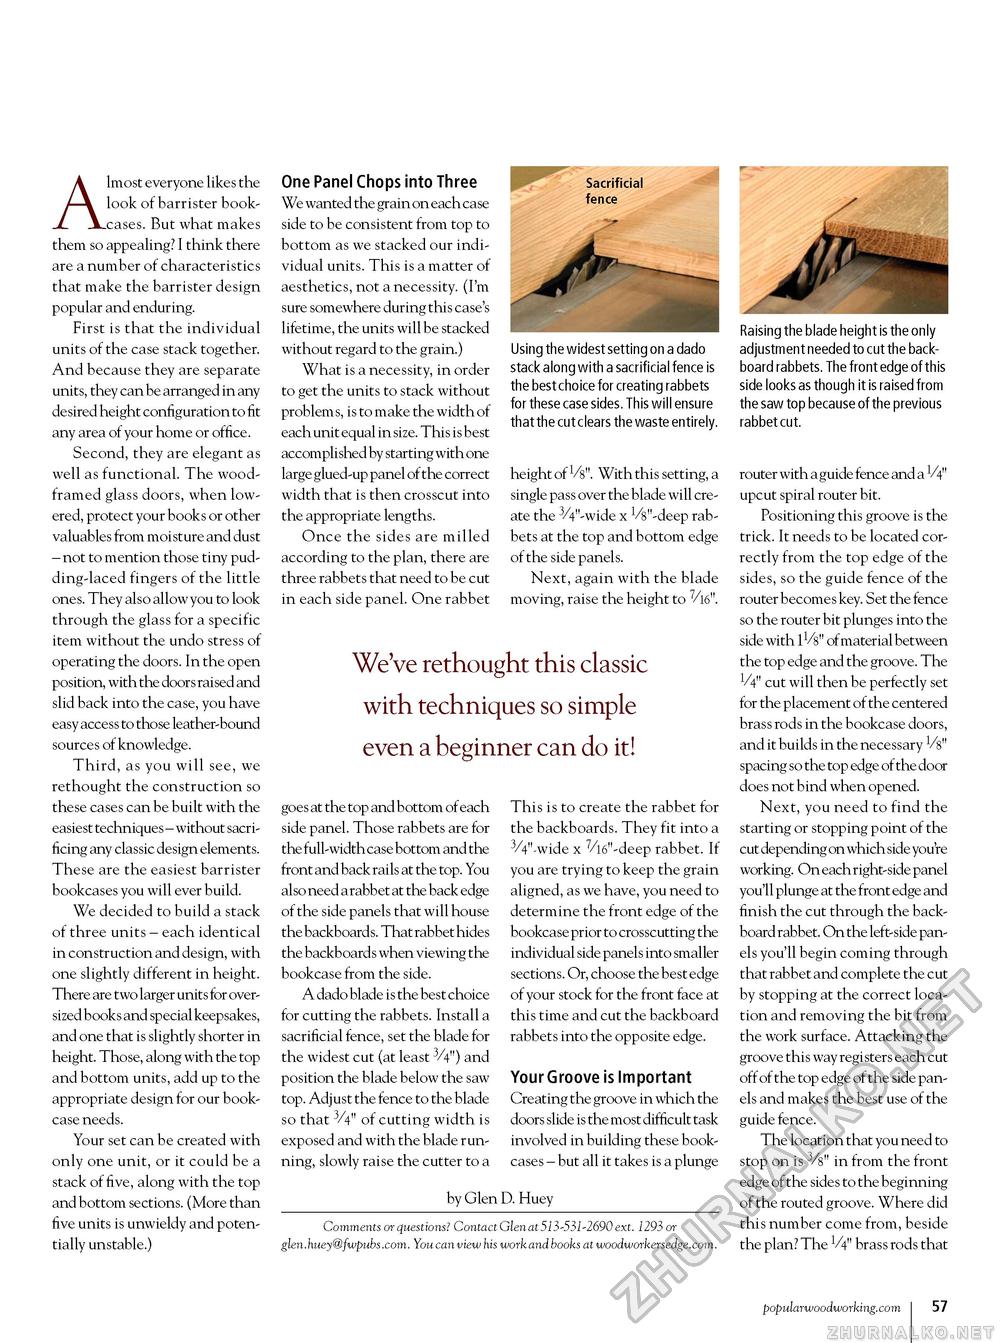
Almost everyone likes the look of barrister bookcases. But what makes them so appealing? I think there are a number of characteristics that make the barrister design popular and enduring. First is that the individual units of the case stack together. And because they are separate units, they can be arranged in any de sired height configuration to fit any area of your home or office. Second, they are elegant as well as functional. The wood-framed glass doors, when lowered, protect your books or other valuables from moisture and dust - not to mention those tiny pudding-laced fingers of the little ones. They also allow you to look through the glass for a specific item without the undo stress of operating the doors. In the open position, with the doors raised and slid back into the case, you have easy access to those leather-bound sources of knowledge. Third, as you will see, we rethought the construction so these cases can be built with the easiest techniques - without sacrificing any classic design elements. These are the easiest barrister bookcases you will ever build. We decided to build a stack of three units - each identical in construction and design, with one slightly different in height. There are two larger units for oversized books and special keepsakes, and one that is slightly shorter in height. Those, along with the top and bottom units, add up to the appropriate design for our bookcase needs. Your set can be created with only one unit, or it could be a stack of five, along with the top and bottom sections. (More than five units is unwieldy and potentially unstable.) one Panel Chops into Three We wanted the grain on each case side to be consistent from top to bottom as we stacked our individual units. This is a matter of aesthetics, not a necessity. (I'm sure somewhere during this case's lifetime, the units will be stacked without regard to the grain.) What is a necessity, in order to get the units to stack without problem s, is to make the width of each unit equal in size. This is best accomplished by starting with one large glued-up panel of the correct width that is then crosscut into the appropriate lengths. Once the sides are milled according to the plan, there are three rabbets that need to be cut in each side panel. One rabbet Using the widest setting on a dado stack along with a sacrificial fence is the best choice for creating rabbets for these case sides. This will ensure that the cut clears the waste entirely. height of V8". With this setting, a single pass over the blade will create the 3/4"-wide x VV'-deep rabbets at the top and bottom edge of the side panels. Next, again with the blade moving, raise the height to 7/16". We've rethought this classic with techniques so simple even a beginner can do it! goes at the top and bottom of each side panel. Those rabbets are for the full-width case bottom and the front and back rails at the top. You also need a rabbet at the back edge of the side panels that will house the backboards. That rabbet hides the backboards when viewing the bookcase from the side. A dado blade is the best choice for cutting the rabbets. Install a sacrificial fence, set the blade for the widest cut (at least 3/4") and position the blade below the saw top. Adjust the fence to the blade so that 3/4" of cutting width is exposed and with the blade running, slowly raise the cutter to a This is to create the rabbet for the backboards. They fit into a 3/4"-wide x 7/16"-deep rabbet. If you are trying to keep the grain aligned, as we have, you need to determine the front edge of the bookcase prior to crosscutting the individual side panels into smaller sections. Or, choose the best edge of your stock for the front face at this time and cut the backboard rabbets into the opposite edge. Your Groove is Important Creating the groove in which the doors slide is the most difficult task involved in building these bookcases - but all it takes is a plunge by Glen D. Huey Comments or questions? Contact Glen at 513-531-2690 ext. 1293 or glen.huey@fwpubs.com. You can view his work and books at woodworkersedge.com. Raising the blade height is the only adjustment needed to cut the backboard rabbets. The front edge of this side looks as though it is raised from the saw top because of the previous rabbet cut. router with a guide fence and a V4" upcut spiral router bit. Positioning this groove is the trick. It needs to be located correctly from the top edge of the sides, so the guide fence of the router becomes key. Set the fence so the router bit plunges into the side with 11/8" of material between the top edge and the groove. The V4" cut will then be perfectly set for the placement of the centered brass rods in the bookcase doors, and it builds in the necessary 18" spacing so the top edge of the door does not bind when opened. Next, you need to find the starting or stopping point of the cut depending on which side you're working. On each right-side panel you'll plunge at the front edge and finish the cut through the backboard rabbet. On the left-side panels you'll begin coming through that rabbet and complete the cut by stopping at the correct location and removing the bit from the work surface. Attacking the groove this way registers each cut off of the top edge of the side panels and makes the best use of the guide fence. The location that you need to stop on is 3/8" in from the front edge of the sides to the beginning of the routed groove. Where did this number come from, beside the plan? The V4" brass rods that popularwoodworking.com I 57 |


