Popular Woodworking 2007-04 № 161, страница 46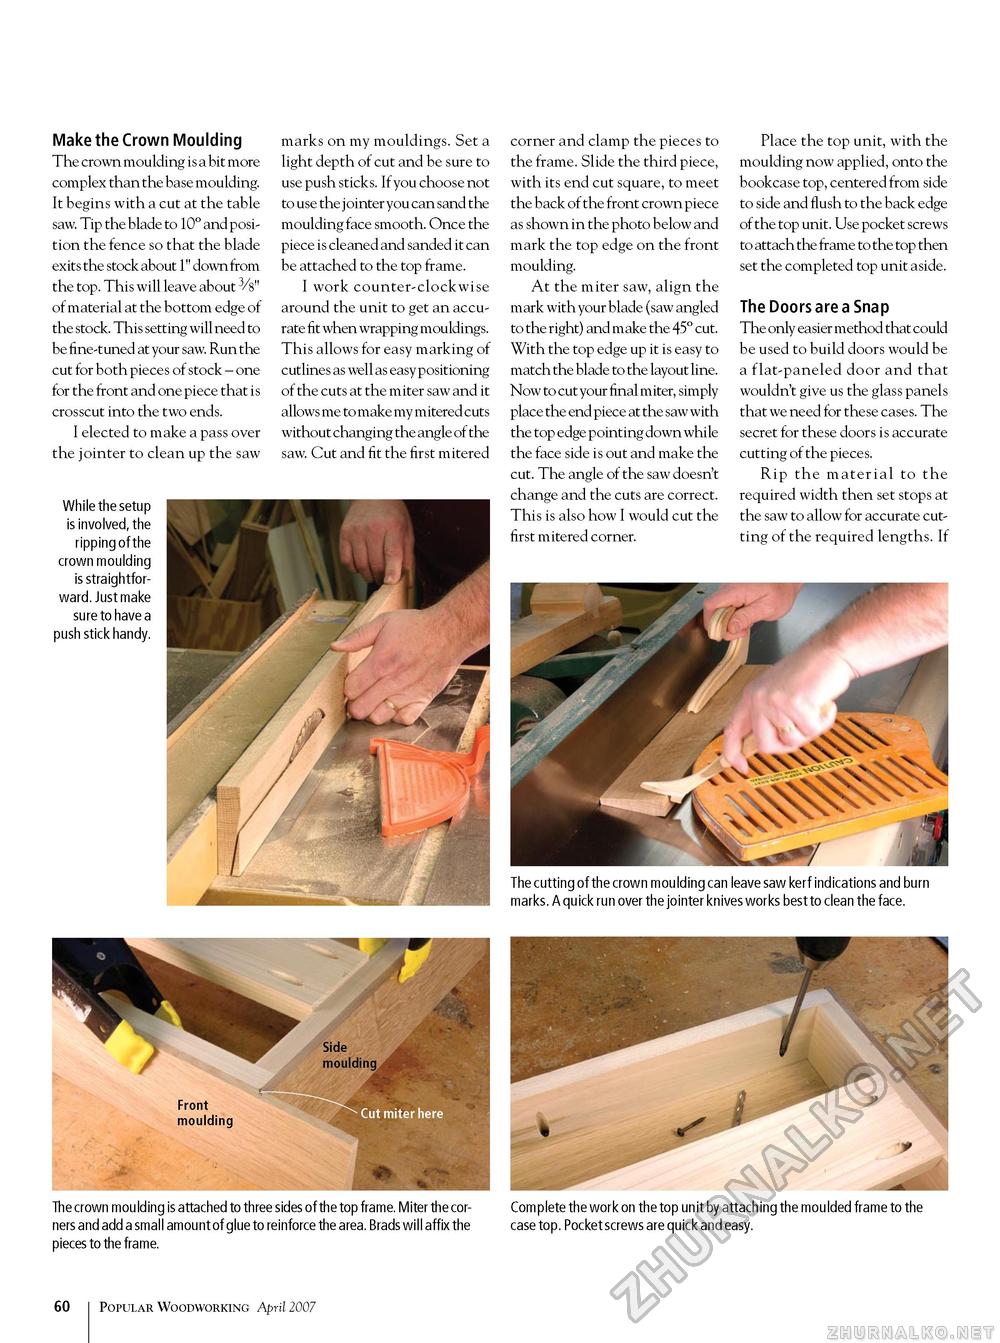
Make the Crown Moulding The crown moulding is a bit more complex than the base moulding. It begins with a cut at the table saw. Tip the blade to 10° and position the fence so that the blade exits the stock about 1" down from the top. This will leave about 3/8" of material at the bottom edge of the stock. This setting will need to be fine-tuned at your saw. Run the cut for both pieces of stock - one for the front and one piece that is crosscut into the two ends. I elected to make a pass over the jointer to clean up the saw While the setup is involved, the ripping of the crown moulding is straightforward. Just make sure to have a push stick handy. marks on my mouldings. Set a light depth of cut and be sure to use push sticks. If you choose not to use the j ointer you can sand the moulding face smooth. Once the piece is cleaned and sanded it can be attached to the top frame. I work counter-clockwise around the unit to get an accurate fit when wrapping mouldings. This allows for easy marking of cutlines as well as easy positioning of the cuts at the miter saw and it allows me to make my mitered cuts without changing the angle of the saw. Cut and fit the first mitered corner and clamp the pieces to the frame. Slide the third piece, with its end cut square, to meet the back of the front crown piece as shown in the photo below and mark the top edge on the front moulding. At the miter saw, align the mark with your blade (saw angled to the right) and make the 45° cut. With the top edge up it is easy to match the blade to the layout line. Now to cut your final miter, simply place the end piece at the saw with the top edge pointing down while the face side is out and make the cut. The angle of the saw doesn't change and the cuts are correct. This is also how I would cut the first mitered corner. Place the top unit, with the moulding now applied, onto the bookcase top, centered from side to side and flush to the back edge of the top unit. Use pocket screws to attach the frame to the top then set the completed top unit aside. The Doors are a Snap The only easier method that could be used to build doors would be a flat-paneled door and that wouldn't give us the glass panels that we need for these cases. The secret for these doors is accurate cutting of the pieces. Rip the material to the required width then set stops at the saw to allow for accurate cutting of the required lengths. If The cutting of the crown moulding can leave saw kerf indications and burn marks. A quick run over the jointer knives works best to clean the face. The crown mou lding is attached to three sides of the top frame. Miter the corners and add a small amount of glue to reinforce the area. Brads will affix the pieces to the frame. Complete the work on the top unit by attaching the moulded frame to the case top. Pocket screws are quick and easy. 60 Popular Woodworking April 2007 |


